Kitchen Chemistry for Kids: Get Hands-On, Then Get Your Snack On

Learning has never been sweeter with this kitchen chemistry for kids of all ages!

Everything we interact within our day-to-day lives is made out of molecules. There are countless different kinds of molecules, each made out of atoms of different elements.

This kitchen chemistry for kids will help build an understanding of atoms and molecules as we create our own atomic marshmallow models!

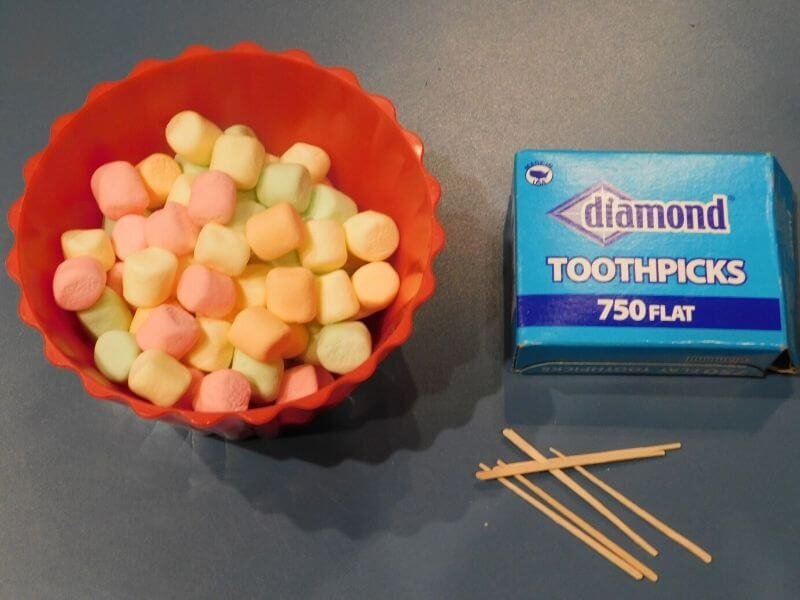
Materials you will need:

  • Colored marshmallows
    *If you don’t have marshmallows, you can use clay, playdough, etc...
  • Toothpicks 
Materials for Kitchen Chemistry for Kids

Molecules:

Hydrogen (H2):

  • Some molecules are homonuclear, which means they are made up of just two atoms of the same element. Let’s make a homonuclear hydrogen molecule.
  • To make a hydrogen molecule, grab 2 marshmallows of the same color. Then connect them with toothpicks, as shown in the picture.
Kitchen Chemistry for Kids- hydrogen molecule

Water (H2O – Dihydrogen Monoxide):

  • The most important molecule for life on Earth is H2O, or water. It is made of 2 hydrogen atoms and 1 oxygen atom.
  • To make a water molecule, grab 2 marshmallows of one color and 1 of another. Then connect them with toothpicks, as shown in the picture. They should make a V shape.
Kitchen Chemistry for Kids- water molecule

Salt (NaCl – Sodium Chloride):

  • Salt molecules form cube-shaped crystals.
  • To make a salt molecule, you will need 8 marshmallows total, 4 of one color, and 4 of another. Connect them together in a cube, as shown in the picture
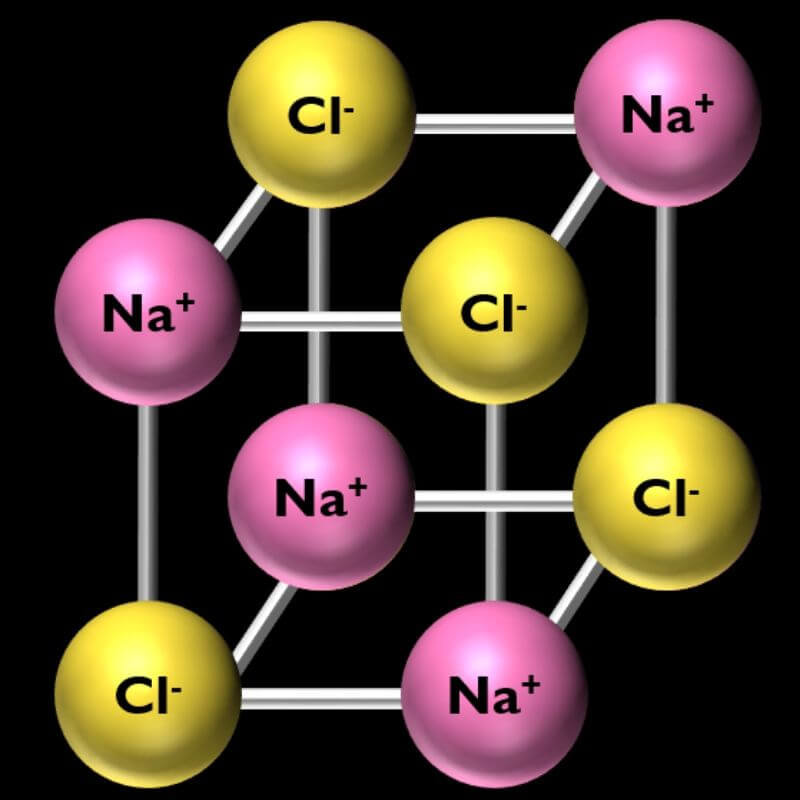
Kitchen Chemistry for Kids- salt molecule

Expand on this activity!

What other molecules can you make? Can you make methane? What about hydrogen peroxide? What’s the biggest molecule you can make? Check out MolView to see the digital models of all kinds of substances that you can base your marshmallow models off of!

Did you make your own marshmallow atomic models? We’d love to see how they turned out! Snap a photo of your models and submit it to our Science Showcase or tag Orlando Science Center and use #OSCatHome on social media! You might be featured on our channels.

The Science:

  • Real molecules aren’t held together by toothpicks. Instead, the atoms are bound together by positive and negative charges.
  • Water molecules are held together by covalent bonds, meaning they share negatively-charged particles called electrons.
  • Salt is a different kind of molecule, one that is made of ions. This happens when an atom gains or loses an electron. Sodium (Na) loves to get rid of electrons, so it is usually positive. Chloride (Cl) loves to steal electrons, so it is usually negative.
  • Molecules like this do not share electrons like water molecules do with covalent bonds. Instead, one atom gives an electron to the other, resulting in two charged atoms (ions). Just like with magnets, opposites attract. So, the positive sodium atoms and the negative chloride atoms will group together in the pattern that you’ve made. We call this an ionic bond.

OSC At Home Emails

Get a round up of our latest activities and ideas delivered straight to your inbox so you don't miss a thing!

Find out when we release new resources by following us on social media!


Follow us on social media for even more science fun including fun facts, games, behind-the-scenes photos, and more!


Facebook Logo Instagram Logo YouTube Logo Twitter Logo

Support OSC At Home

In these ever-changing times, it is our pleasure to adapt quality Orlando Science Center experiences to engage with everyone while they are safe at home. Please consider supporting our operating fund to ensure we can continue developing resources today and well into the future. Thank you for your generosity and support!

How to Talk to Kids About COVID-19: An Interview with Family Therapist Tonya Ramsburg

Family Therapist, Tonya Ramsburg shares tips on how to talk to kids about COVID-19

We spoke with licensed Family Therapist, Tonya Ramsburg, MA, LMFT, in a virtual conversation about the concerns of families during this time. Tonya Ramsburg has 15 years of experience providing therapy to children and families all over the world, and is a mother to a five-year-old and a two-year-old.


In our conversation, we explore how to talk to kids about COVID-19 and balance the needs of everyone in your family and how to address some of the challenging situations that come from the COVID-19 pandemic.

Have more questions?

We’re dedicated to providing our community with expert-approved answers. If you have questions that were not covered in our conversation, please email sciencelive@osc.org

Looking for more?

The resources listed below provide valuable information, tips, and materials to help your family navigate our ever-changing world during this pandemic.

Everyday Help and Information for Caregivers During COVID-19 and Beyond:

  • Vroom

    “This period of change with COVID-19 may bring new challenges, but you already have what it takes! We’ve collected some simple and fun ways to boost brain building at home together with your child. Even a few minutes count.”

    Vroom provides convenient tips for caregivers to bring learning into your everyday routines. These tips are science and research-based and center around a child’s developing brain, with easy-to-understand explanations included for adults.

  • Zero to Three

    “The following resources offer tips for families including age-appropriate responses to common questions, a guide to self-care, and activities for young children experiencing social distancing.”

    Zero to Three provides research-based information for our youngest children. They have created and compiled many informative, empathetic resources for parenting babies and toddlers

  • Conscious Discipline

    “For 20+ years, “We’re all in this together,” has been a core tenet of Conscious Discipline. It seems ironic that a virus that requires social distancing to slow its spread has drawn our attention to how intimately connected we truly are as friends, neighbors, communities and nations. Safety, connection and problem-solving are the most valuable contribution we can offer to those around us as we navigate these unprecedented times (and beyond). Breathe with me. We can handle this … together.”

    Conscious Discipline focuses on evidence-based social emotional learning and is often used in schools to help children feel safe, welcome, and ready to learn. They have put together many great resources for appropriate and wise guidance for your family during the pandemic. Be sure to scroll through the whole page for webinars, printables, and podcasts.

  • Child Mind Institute

    “We know parents are struggling to balance work, child care and self-care while keeping worries — both your children’s and your own — under control. You don’t have to do it alone.”

    Child Mind Institute is a national non-profit organization dedicated to helping children who have mental and learning differences. Their COVID-19 resource page includes helpful information for families with children who have specific needs such as autism, anxiety, and PTSD. They provide parental guidance on a wide range of subjects and for a wide range of ages. 

  • National Geographic: Talking to Kids About Xenophobia

    “In time, coronavirus infections will likely start to slow—and perhaps the related hate incidents against people of Asian descent will slow with it. But xenophobia is something that’s always with us, which is why it’s important for parents to teach their kids to fight it.”

    This article from National Geographic talks about ways to recognize, understand, prevent, and address xenophobia with our children. (Please be aware that National Geographic only allows access to a limited number of digital articles each month. If you have already hit your limit of free articles, you will need to purchase a subscription to read this article right away or wait until the next month.)

  • Unicef: 5 Ways to Fight Racism and Xenophobia

    “Celebrating other cultures emphasizes the fact that we are all people and sends the message that racism and xenophobia will not be tolerated in a civil society. It is our job, as people, as parents, as citizens of the world, to combat racism and xenophobia wherever we can.”

    This article provides guidance for individuals and parents in responding to racism as a result of COVID-19. 

  • Teaching Tolerance: Speaking Up Against Racism Around the New Coronavirus

    “Even if your students do not represent the identities likely to be harmed by racist comments around the coronavirus, or you believe they’re not spreading misinformation and repeating racist tropes, exploring anti-AAPI rhetoric around the virus is still worthy of critical conversations in the classroom.”

    While this article is geared towards educators, it also includes helpful context and information for parents around bias and rhetoric our children are exposed to beyond what we may be aware of.

  • Coronavirus Books for Children

    “Several medical organizations and countless child educators and health teachers have been involved in the creation of storybooks for children. While many coronavirus books for children are likely to be soon published, here’s a closer look at a few outstanding and widely different examples…”


    This listing includes a variety of books and comics available for free and provided by experts from varying fields and backgrounds.

These stories provide you with a tool to talk to your children about COVID-19 and help answer some of their questions with age-appropriate language and images.


  • A Curious Guide for Courageous Kids

    “To prevent the virus from having too much fun jumping from one person to the next, day and night, scientists and doctors are studying how to defeat it. They say that we shouldn’t be too afraid, we should be cautious. But there is something you can do to keep it from spreading. It’s called prevention.

  • Tara Tuchel: Seeing Other People Wearing Masks

    “Some people wear glasses, some people wear hats, and some people wear masks. Seeing people wearing masks is different But, it’s okay!”

Tools to Help Children with Anxiety and Other Big Emotions

  • Save the Children: Relaxation Activities

    “School closings, sick friends and family members, isolation at home – these and other factors can cause anxiety and stress for children during this coronavirus (COVID-19) pandemic. As the world’s leading expert on childhood, we’re sharing these drama-based relaxation exercises that are part of our global Healing and Education through the Arts (HEART) program for children living in stressful situations.”


    In this list, you will find specific breathing and relaxation techniques that use visualizations and dramatic play to help children de-stress.


  • PBS: How You and Your Kids Can De-Stress During Coronavirus

    “Research shows that just being in the presence of a compassionate, safe adult con help kids calm down. As families, we can be “that person” for each other.”


    PBS shares various techniques for relaxing and combating anxiety using familiar characters from their children’s shows.

  • Messenger Kids


    “Messenger Kids is a free video calling and messaging app for smartphones and tablets*. Parents manage the contact list, and kids control the fun. Keep in touch with close friends and family with fun-filled features like filters and stickers.”

Kids News

These websites can help you share current world news with your children in simpler, more age-appropriate language. Please take some time to review these websites before sharing since all of the content may not be appropriate for your child. Check in with your children as you review the news and start conversations about how they are feeling and what concerns they might have about what you are learning together. 


  • News for Kids

    “We believe the name says it all. NewsForKids.net was created by a teacher to make the news accessible to kids. We carefully choose high interest stories appropriate to the audience, and present them in a way that is easy to understand. News is necessarily complicated and messy. There’s a lot to know. We strive to make each article as self-contained as possible, giving the necessary background and not assuming that the reader already has certain knowledge.”

  • DOGO 

    “DOGO Media is the leading online network empowering kids to engage with digital media in a fun, safe and social environment. Used by millions of students and teachers from around the world, our websites have quickly grown into a community of kids and educators engaging positively with current events, books, and movies. DOGO [doh-GOH] means young or small in Swahili. While our young fans may be small, they act BIG as they engage with our websites and express their opinions on the content that interests and inspires them.”

  • Time for Kids

    “Since 1995, TIME for Kids has published a weekly magazine for elementary school students. With exclusive access to TIME’s award-winning content, TIME for Kids is uniquely positioned to teach kids to recognize and value authentic and trustworthy journalism.”

  • Scholastic: Kids Press

    “Scholastic Kids Press is a group of talented Kid Reporters, ages 10–14, from across the country and around the world. Since 2000, our award-winning young journalists have reported "news for kids, by kids," covering politics, entertainment, the environment, sports, and more in their hometowns and on the national stage.”

Animal Chart Activity: Who Are Your Tree-Dwelling Neighbors?

Find out who's home with this early childhood animal chart activity! 

Age recommendation: 3 – 7 years 


Who’s home? The trees all around us are a habitat or home to many different animals. Learn about how a tree can provide shelter, food, and a place to play!  

You can complete this animal chart activity by simply following the steps below, but if you'd like to add to the activity, we recommend you make it a story time with the book The Busy Tree by Jennifer Ward, illustrated by Lisa Falkenstern and published by Two Lions, an Amazon Publishing imprint. Get the book on Amazon.com here, or consider getting an e-book or checking it out from your local library if it's available! 

If you want to keep an eye out for the animals you see in The Busy Treeyou can print out this pre-made chart by clicking here. You can also use this chart as a start instead of making your own but keep in mind you may not see all of these animals during your observations. We’ve left one column blank so if you see an animal neighbor who lives near you that isn’t in the book, you can still include them in your data!

Who are your tree-dwelling neighbors? 

Lots of the animals who live in The Busy Tree are animals that we see here in Florida. Take some time to observe the outdoors through a window, in a backyard, or on a nature walk. 

As you’re observing, collect data on what you see! As scientists, when we collect data we are gathering information about something so that we can better understand it. As you collect data on the animals that live in the trees near your home, you are learning more about your environment and the critters who share a space with you. 

Materials For Your Animal Chart Activity:

  • Paper 
  • Clipboard or something to lean and write against 
  • Marker, crayon, or pencil 
  • Straightedge like a ruler, the side of a book, or anything you have on hand
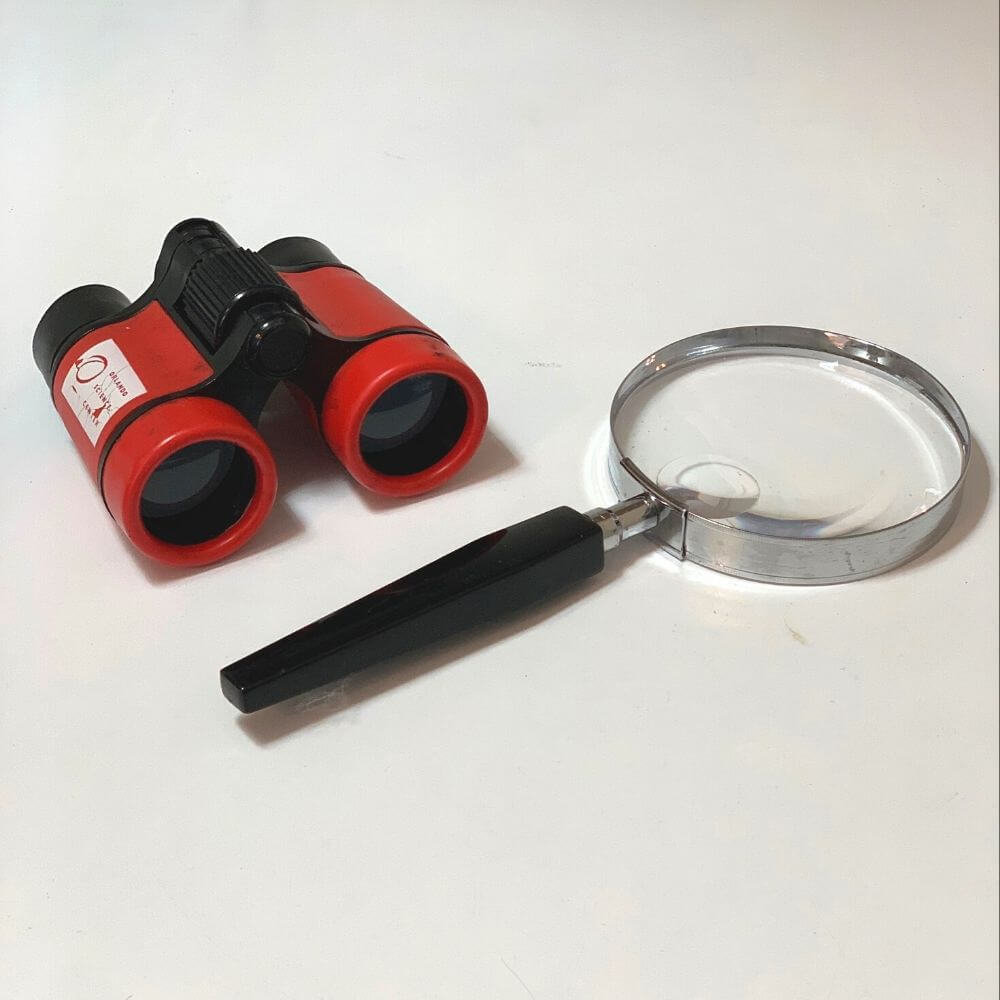
  • Binoculars (optional) 
  • Magnifying glass (optional) 
How to create Orlando Science Center's animal chart activity

Directions:

STEP 1
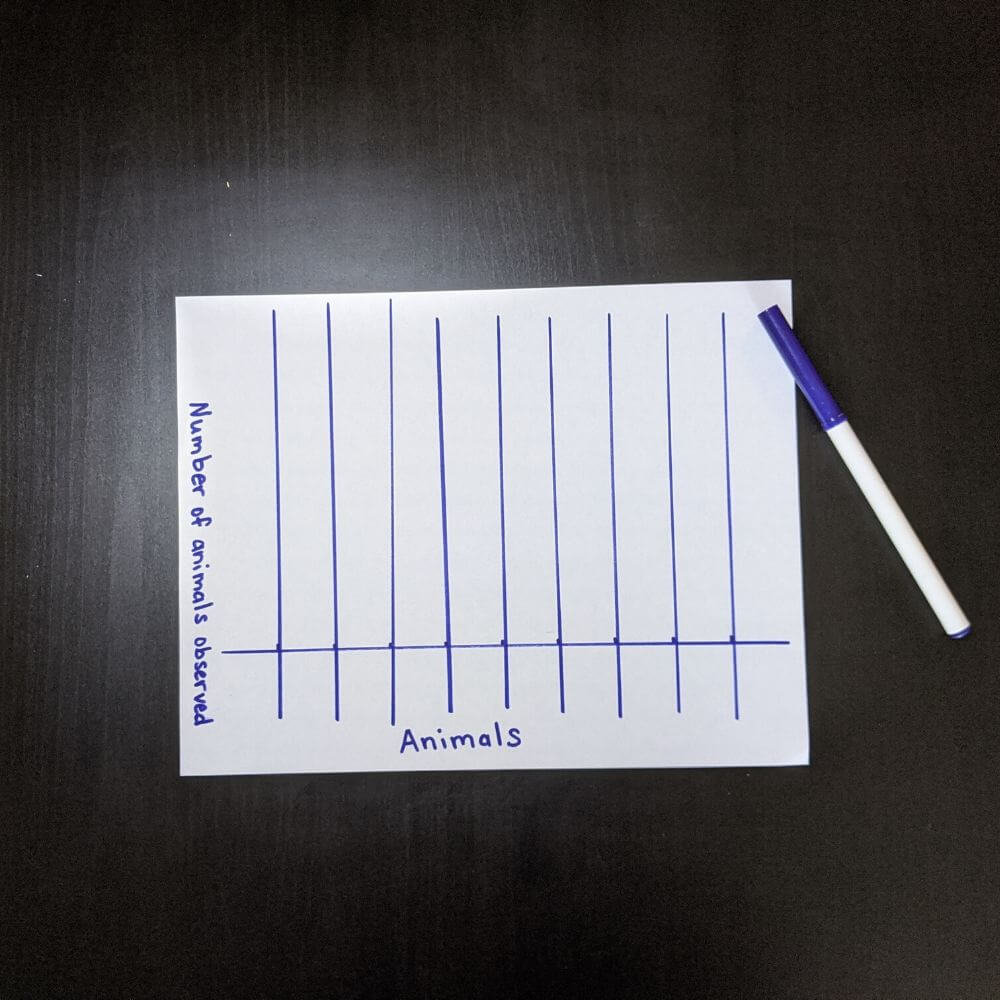
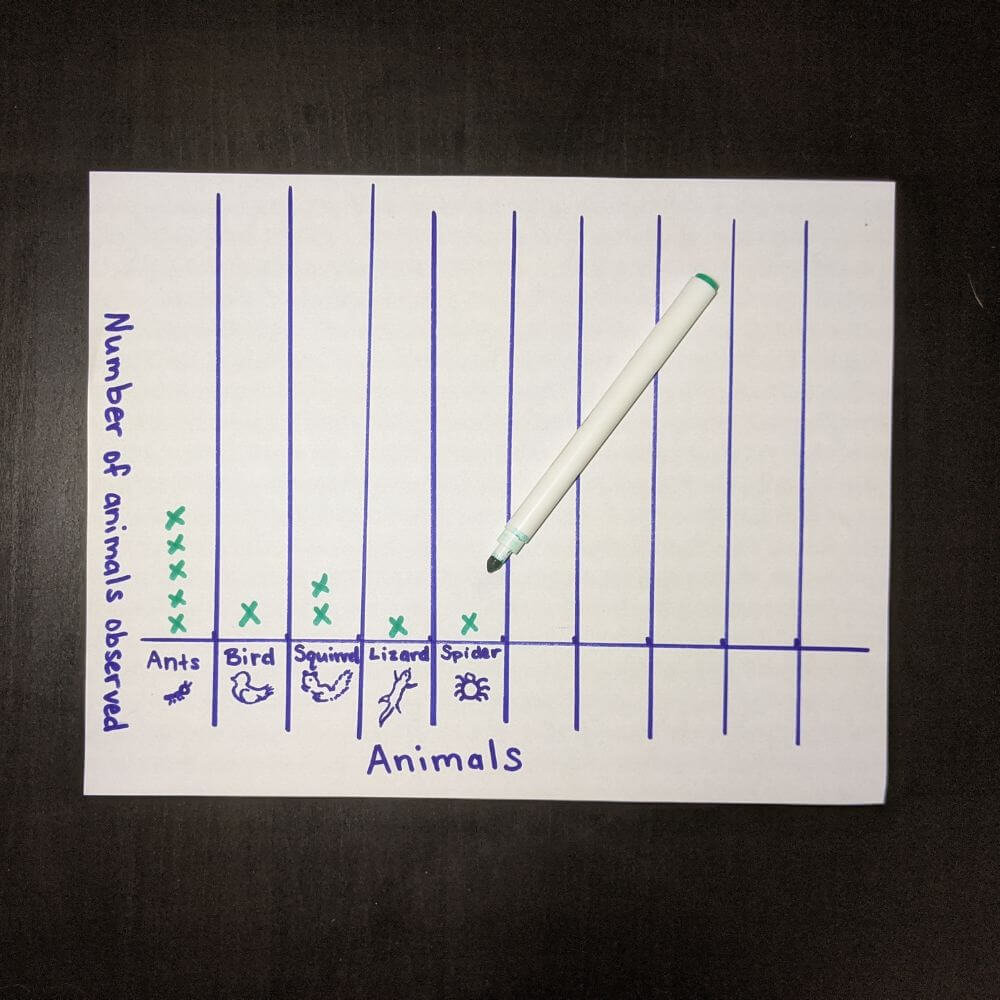
  • Using your paper and writing utensil, create a simple chart. You can use your straightedge to help you make straight lines.

    A
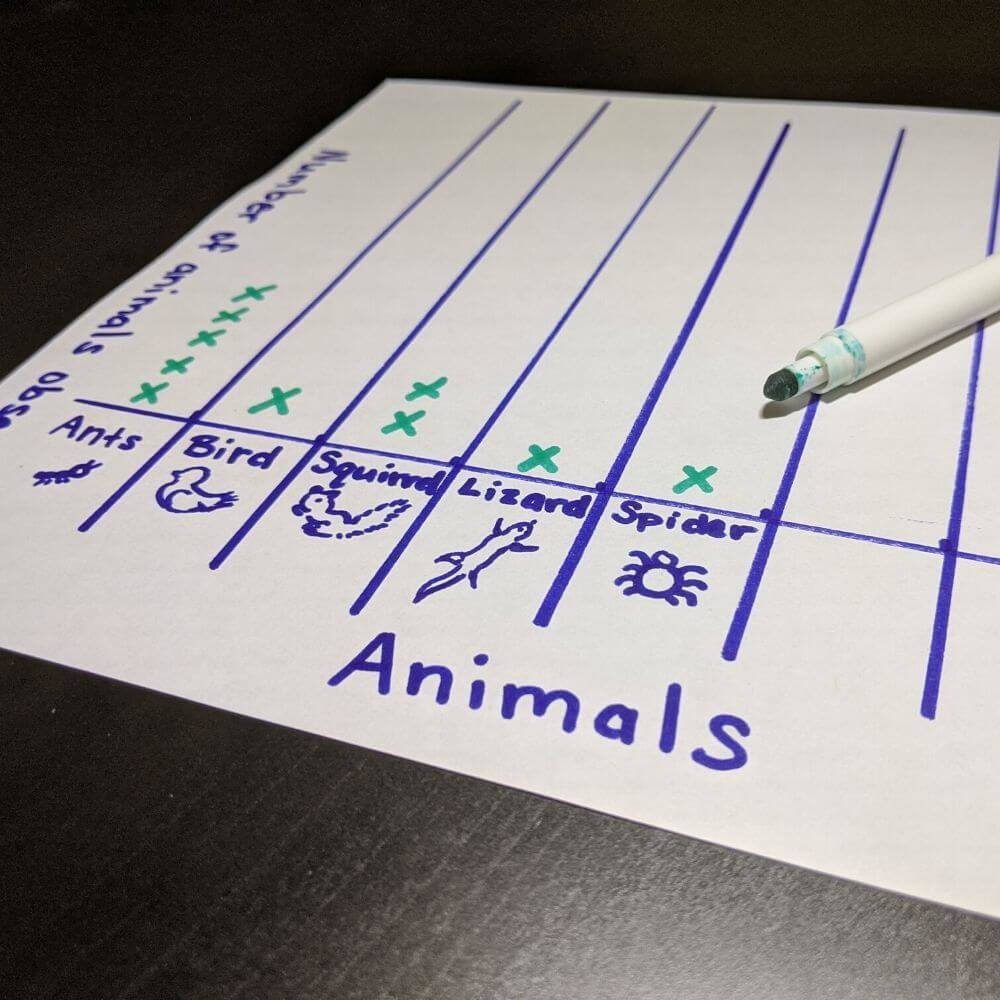
    chart is a way to keep track of information, this is one of the ways scientists collect data. In our chart we will keep track of which animals we see at the bottom, and how many of that animal we see in the top columns (the tall skinny space above the animal)Be sure to add the date and time you are collecting your observations! 
STEP 2 
  • Attach your chart to a clipboard with your writing utensil and get ready to explore. Binoculars can help you see things that are far away (like up in a tree!) and magnifying glasses can help you see things that are small (like insects at the roots of a tree or on the tree’s bark). Bring binoculars and a magnifying glass if you have them. If not, you can still make amazing observations with just your eyes!  
You tools like binoculars or magnifying glass to help complete your animal chart activity
STEP 3 
  • You need to find a place around your home to observe. This could be in a yard, a nearby park, or out on a walk. Bring your supplies with you to start making observations!
    Always ask a grown-up before going outside!
STEP 4
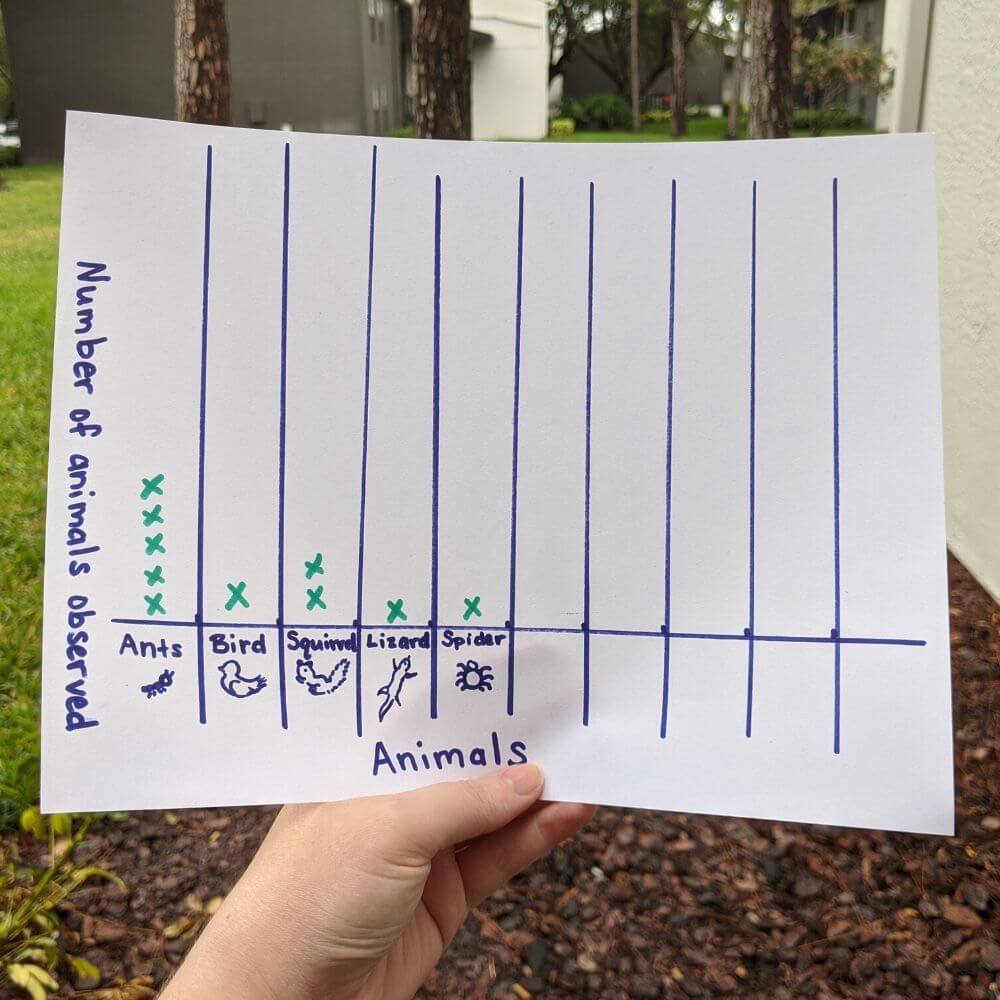
  • Pay attention to the animals you see around the trees near your home. When you see an animal, write the name of the animal or draw a picture at the bottom of your chart.

Using your animal activity chart, go outside to observe animals and complete chart
STEP 5
  • Make one “x” in the column above an animal for each one you see. Only count an individual animal once! If you see the same squirrel again, don’t make another “x”. If you see a different squirrel, make an “x”. This will make our data more accurate!
STEP 6
  • When you are done observing and collecting data, count how many of each animal you wrote down on your chart. Analyze or think about the information from your chart. Which animal did you see the most? Which animal did you see the least? Why might that be?
Mark which animals you see on your animal activity chart
STEP 7
  • This is an experiment that you can repeat. Some animals are more active during different times of day. Choose a different time of day to collect data from your observations, then compare and contrast the data you have collected. Did you notice more of a certain animal during the evening than during the day? If you repeat this experiment all year, you may notice different animals are busier during certain seasons.
STEP 8
  • Enjoy getting to know your animal neighbors!
collect data by marking the animals you observe on your animal activity chart

Be a citizen scientist!

You can become a citizen scientist when you use the data you collect while watching animals around your home to help real-life scientists with their projects! Check out the projects below to see how you can help.

Always ask a grown-up before visiting a new website and before posting anything online!


The Lost Ladybug Project

Website: http://www.lostladybug.org/

If you come across ladybugs during your observations, consider contributing to The Lost Ladybug Project. This project is investigating ladybug diversity and will help scientists better understand where all of the native ladybugs have gone as well as provide information for other insect species!


Project Noah

Website: https://www.projectnoah.org/

Share your observations with pictures and notes through Project Noah. Project Noah is a place where people like you can help keep track of wildlife by sharing what you see! Researchers can then use your observations to collect ecological data (that’s information about how living things depend on one another).


iNaturalist

Website: https://www.inaturalist.org/

Citizen scientists all over the world observe animals and plants just like you are in our activity! You can share your observations on iNaturalist with others who love nature. The data that you and others share can be used by scientists globally (that means all over the world!) to help them with their projects.

OSC At Home Emails

Get a round up of our latest activities and ideas delivered straight to your inbox so you don't miss a thing!

Find out when we release new resources by following us on social media!


Follow us on social media for even more science fun including fun facts, games, behind-the-scenes photos, and more!


Facebook Logo Instagram Logo YouTube Logo Twitter Logo

Support OSC At Home

In these ever-changing times, it is our pleasure to adapt quality Orlando Science Center experiences to engage with everyone while they are safe at home. Please consider supporting our operating fund to ensure we can continue developing resources today and well into the future. Thank you for your generosity and support!
Educational Messy Science Experiments from the OSC Vault!

We've ranked our favorite educational messy science experiments by messiness!

Every year, Orlando Science Center staff celebrates "Mess Month" which features some of gooiest, slimiest, messiest activities on a giant scale. Think foam-splosion, pendulum painting, pools of slime... you get the picture. We love our mess-tivities so much that we wanted to make sure you could enjoy educational messy science experiments all year long, so we adapted some of our favorites projects so you could try them at home!

 
From the ultimate slime time to some good clean fun will minimal clean-up,find them all in one place below! Be sure to use the Mess-O-Meter rating to find a mess-tivity fit for you! If you take any photos, don't forget to share them with us on social media by tagging Orlando Science Center and using #OSCatHome or you can submit them directly through our Science Showcase.

1. Ooey-GooeyOobleck

Mess-O-Meter Level: Very Messy

Make a big mess with just two ingredients! Learn about the states of matter and viscosity, practice lab skills like measuring and mixing with  this educational messy science experiment that's so fun, you won't even realize you're learning!

2. Cool and Colorful Ice Chalk 

Mess-O-Meter Level: Moderately Messy

The mess never bothered us anyway! Step up your driveway art with the coolest sidewalk chalk  around! Just be sure to wash away your artwork when you're finished to avoid stains. 

3. Forensic Science Spatter Painting

Mess-O-Meter Level: Moderately Messy

I spy with my little eye some messy fun! This educational messy science experiment will leave you with some new vocabulary words and a work of art!

4. Colorful Coffee Filter Experiment

Mess-O-Meter Level: Minimal Mess

Watch water defy gravity before your very eyes! This colorful experiment will help teach little learners about capillary action with a beautiful visual aid! And the best part is, it's all contained in a cup so cleanup is a breeze. 

5. Demonstrating Laminar Flow

Mess-O-Meter Level: Barely Messy

Looking for some good clean fun?  This experiment is maximum fun with minimal cleanup! Just make sure you're doing your demonstration outdoors. Let's learn how you can freeze time with water and a balloon!

OSC At Home Emails

Get a round up of our latest activities and ideas delivered straight to your inbox so you don't miss a thing!

Find out when we release new resources by following us on social media!


Follow us on social media for even more science fun including fun facts, games, behind-the-scenes photos, and more!


Facebook Logo Instagram Logo YouTube Logo Twitter Logo

Support OSC At Home

In these ever-changing times, it is our pleasure to adapt quality Orlando Science Center experiences to engage with everyone while they are safe at home. Please consider supporting our operating fund to ensure we can continue developing resources today and well into the future. Thank you for your generosity and support!
Salt Watercolor Painting Project • Paint Outside the Box

Brush up on your art skills with this salt & watercolor painting project

Think (or paint) outside the box wiht this unique painting technique! One-part experiment, one-part art experience, this salt & watercolor painting project will give you a wall-worthy finished project, while you learn some STEM skills along the way. 

Materials you will need:

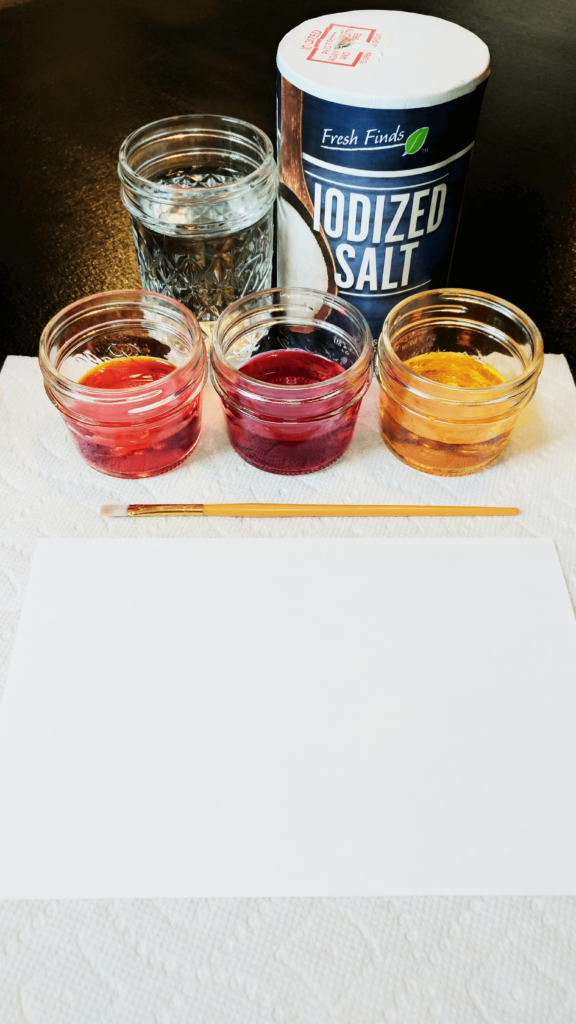
  • Paper (Watercolor paper works best, but cardstock or sketchbook paper can also work)
  • Paintbrush
  • Watercolor paints
  • Salt
  • Water to rinse your painbrush
Materials needed to complete Orlando Science Center's salt and watercolor painting project

Directions:

Step 1

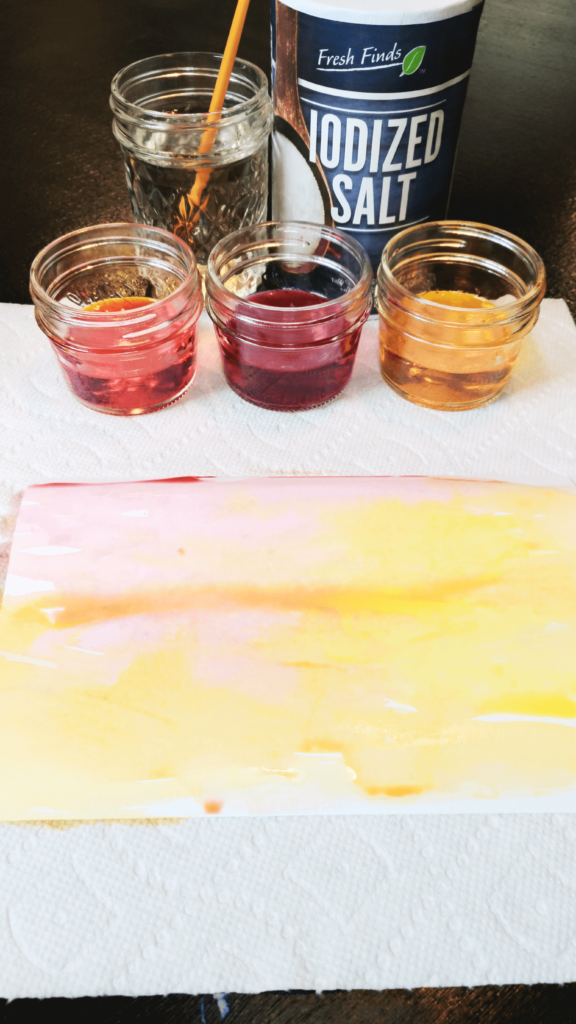
Set up your workspace and start painting! Keep in mind, your painting will change when you add the salt, so don’t worry too much about the details!

Begin your saltwater painting project by beginning to paint

Step 2

While your painting is still wet to the touch, sprinkle it with salt. Watch closely as the salt absorbs the water on your paper, and some of the color along with it! 

Observes salt on your watercolor painting project

Step 3 

When you’re finished, let your salt and watercolor painting project is completely dry, and gently rub the salt off the paper.

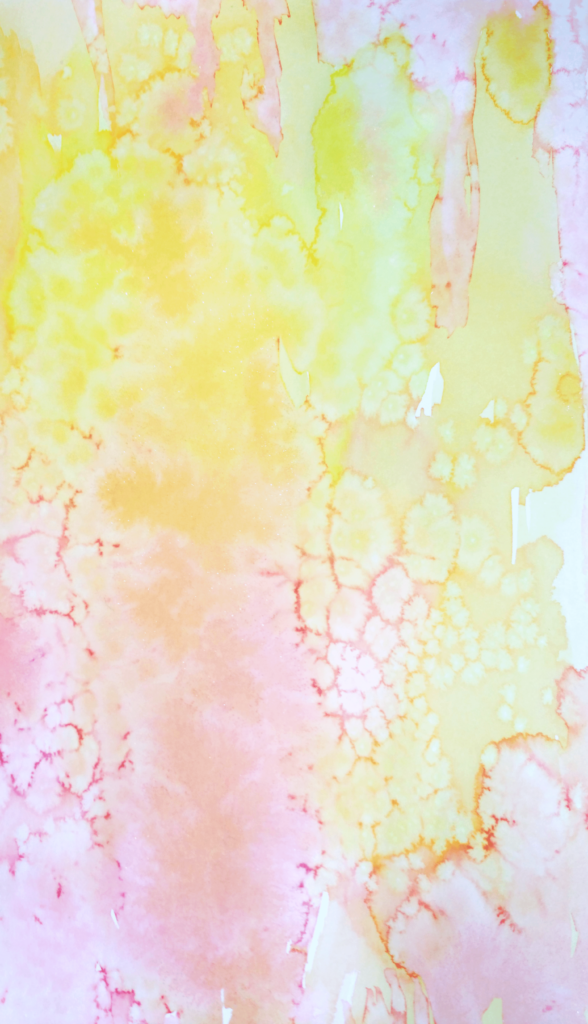
The result of salt and watercolor painting project

Expand on the Activity:

  • Try different kinds of salt! Table salt, sea salt, and rock salt are all great to try. How does the size of the salt grain impact what you see happen on your painting?

  • The amount of water on your paper will have a big impact on how it looks when you add the salt. Experiment with adding the salt at different points as your painting dries to see which effect is your favorite.

  • For another colorful activity with water, try this colorful coffee filter experiment!


Be sure to share your salt watercolor painting project with us by submitting a photo or video to our Science Showcase here or tag Orlando Science Center and use #OSCatHome on social media! You might be featured on our channels. 

OSC At Home Emails

Get a round up of our latest activities and ideas delivered straight to your inbox so you don't miss a thing!

Find out when we release new resources by following us on social media!


Follow us on social media for even more science fun including fun facts, games, behind-the-scenes photos, and more!


Facebook Logo Instagram Logo YouTube Logo Twitter Logo

Support OSC At Home

In these ever-changing times, it is our pleasure to adapt quality Orlando Science Center experiences to engage with everyone while they are safe at home. Please consider supporting our operating fund to ensure we can continue developing resources today and well into the future. Thank you for your generosity and support!
Colorful Coffee Filter Experiment: Defy Gravity with Capillary Action

See water flow upwards with this colorful coffee filter experiment!

Capillary action is the ability of a liquid to flow in narrow spaces. With capillary action, water can even flow upward against gravity!  You can observe capillary action all around you, for example, it's what moves the water up through plant roots and your tears through your tear ducts. 


It's hard to visualize but when you use our steps for this colorful coffee filter experiment to add an explosion of color, it will come together! Once your coffee filters have dried, you can use the them for other craft projects!


For more amazing experiments with water, see how you can freeze time through laminar flow


Materials:

  • Coffee filters
  • Markers
  • Water
  • A  small clear cup or glass

Directions:

STEP 1
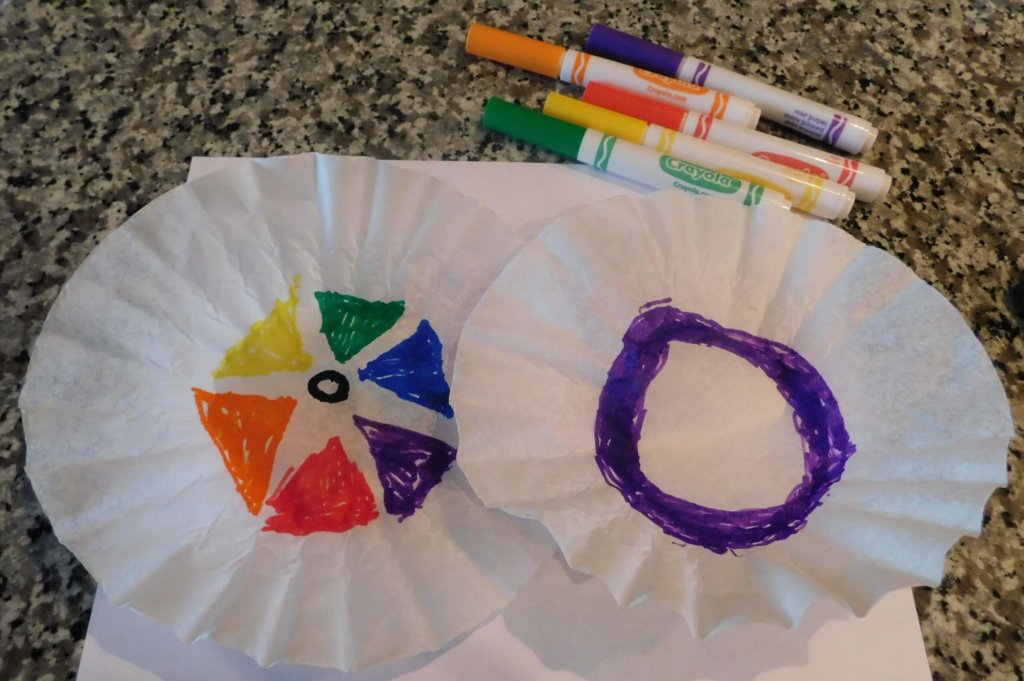
  • Use the markers to draw all over the coffee filter.

    The more colors you use, the more vibrant your colorful coffee filter experiment will be.

STEP 2
  • Fold the coffee filter in half.  Then in half one more time.
colorful markers patterns drawn on coffee filters
STEP 3
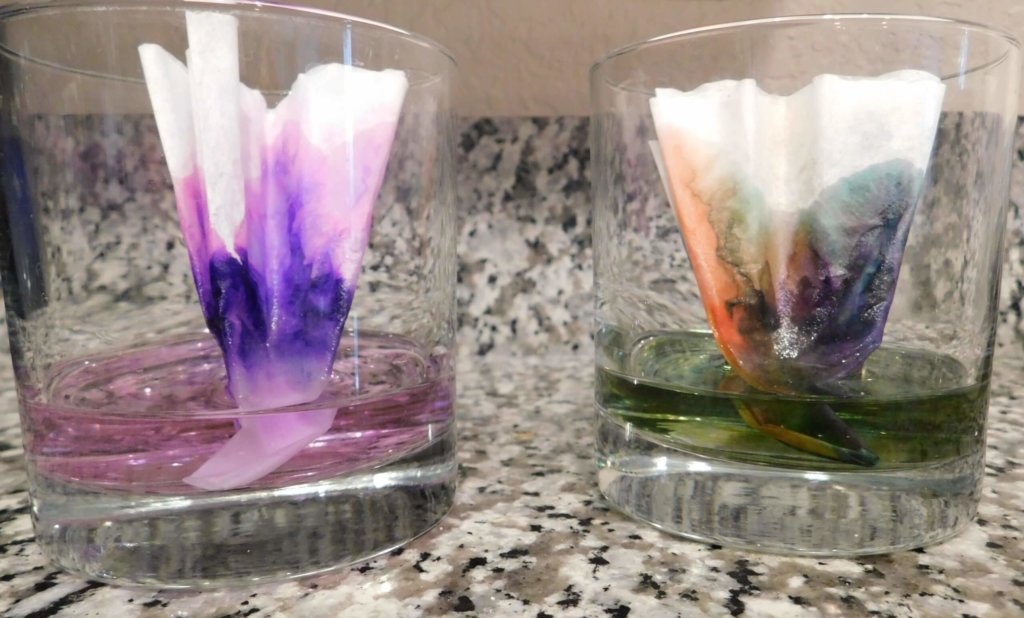
  • Add enough water to the cup to just barely cover the bottom and set your coffee filter in the cup.

This will take a few minutes, so you can use this time to talk about capillary action or ask these questions to expand on the activity:

  1. How do the colors change as they move up the coffee filter?
  2. Do you see any colors mix? What new colors do you see?
  3. Did any colors disappear?
  4. Why do you think this is happening?
     
soak colorful coffee filters in water to see capillary action
STEP 4
  • Once the water has reached the top of the coffee filter or has stopped moving, remove your coffee filter from the cup and open it up!


STEP 5
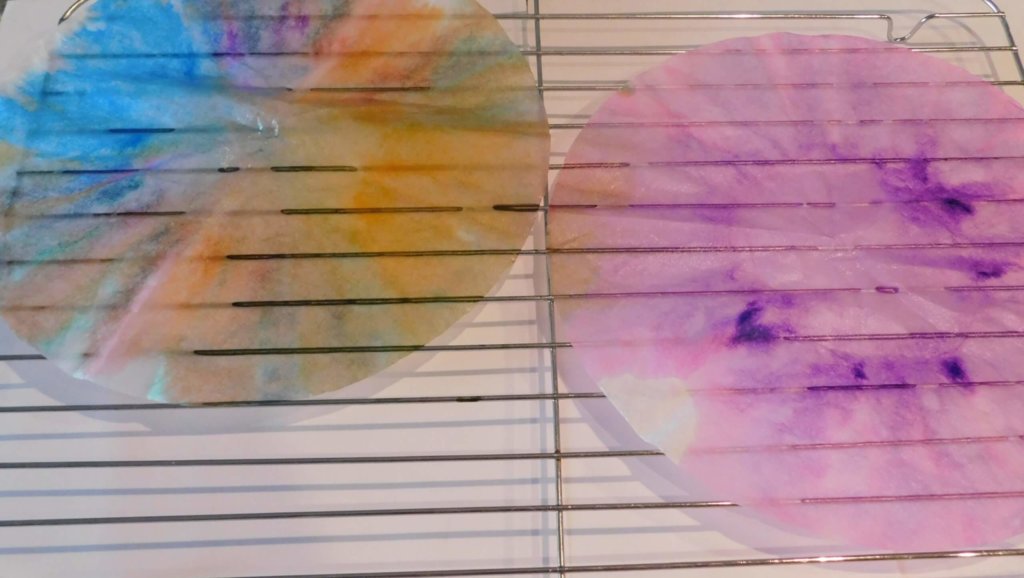
  • Let your colorful coffee filter experiment dry and then upcycle it for your next maker project!
Wet colorful capillary coffee filters drying

Expand on the Activity:

  • What happens if you only use one color, like green or black? How does the color of the ink change as it spreads out? Why do you think this happens?
  • Once they’ve dried, the coffee filters can be used as colorful tissue paper in craft projects. Try making flowers, snowflakes, monsters, butterflies, or any other creation you can think of!


If you had fun learning about capillary action and snapped some photos, be sure to submit it to our Science Showcase here or tag Orlando Science Center and use #OSCatHome on social media! You might be featured on our channels. 

The Science: Capillary Action & Chromatography

  • Water molecules are “sticky.”
    • Water molecules like to stay close together because of a force called cohesion.
    • However, they also are attracted and like to stick to other substances, like glass, cloth, soil, and fibers. This is known as adhesion.
    • When there is more adhesion than cohesion (or when the water molecules stick the surrounding surfaces more than each other), capillary action occurs, causing the water molecules to move up or across the surface.
  • In your experiment, water uses this process to move along the tiny gaps in the fiber of the coffee filter. It will keep going up the filter until the pull of gravity is too much for it to overcome.
  • Where does capillary action occur in the real world?
    • Plants suck up water through their roots, and capillary action is what moves the water up through the roots and throughout the plants.
    • Your tears undergo capillary action to move through your tear ducts.
    • Capillary action is in play in sucking water up a straw.
  • As the water moves up the coffee filter, it dissolves the ink from the markers. The dissolved ink travels with the water and spreads out, coloring the coffee filter.

Learn More: Paper Chromatography

  • Inks are mixtures of many different-colored molecules. Paper chromatography separates out the molecules, showing all the individual colors.
  • How does this work?
  • A solvent (a liquid that dissolves a substance) is used is dissolve the ink. The most common solvents in paper chromatography are water and rubbing alcohol.
  • Through capillary action, the solvent keeps moving up the paper and carries the different molecules in the ink with it.
  • The different-colored molecules are also different sizes. Larger molecules move more slowly and not as far. Smaller molecules move more quickly and farther. The difference in molecule sizes causes the colors to separate.
  • Scientists use paper chromatography to separate colored pigments, to monitor reactions, to isolate and purify substances, to analyze food dyes, and to investigate evidence found at crime scenes.

OSC At Home Emails

Get a round up of our latest activities and ideas delivered straight to your inbox so you don't miss a thing!

Find out when we release new resources by following us on social media!


Follow us on social media for even more science fun including fun facts, games, behind-the-scenes photos, and more!


Facebook Logo Instagram Logo YouTube Logo Twitter Logo

Support OSC At Home

In these ever-changing times, it is our pleasure to adapt quality Orlando Science Center experiences to engage with everyone while they are safe at home. Please consider supporting our operating fund to ensure we can continue developing resources today and well into the future. Thank you for your generosity and support!
How to Make Marbleized Paper to Create Custom Cards and Artwork

Create a stunning masterpiece when you follow these step-by-step instruction for how to make marbleized paper – a sensory STEAM project for kids and adults alike!


It’s always fun to use materials in new ways, and this is likely one way you’ve never used shaving cream before! Use our directions for how make marbleized paper and follow along with the questions included to help you make observations as you create! Not only will you have a wall-worthy finished project, you'll also learn some neat STEM skills along the way. 

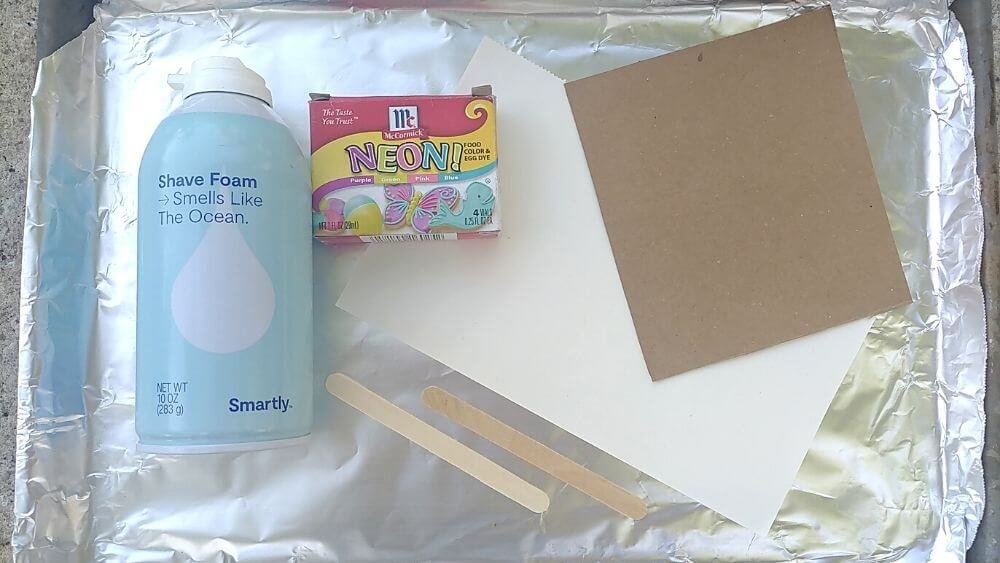
Materials:

  • Shaving cream 
  • Paper (start with a heavier weight paper, like cardstock or construction paper) 
  • Food coloring* or washable paint such as liquid watercolor or tempera paint
  • Popsicle sticks 
    (If you don’t have popsicle sticks, read the directions
    carefulland substitute in a different tool. Tooth picks are great for creating the marble effect and a ruler or spatula work well to remove the shaving cream from your paper at the end!)


*Warning: Food coloring can stain! If you're worried about mess, substitute washable paint. Either way, mess-friendly play clothes are recommended for this activity!

Material for how to make marbleized paper

Directions:

STEP 1
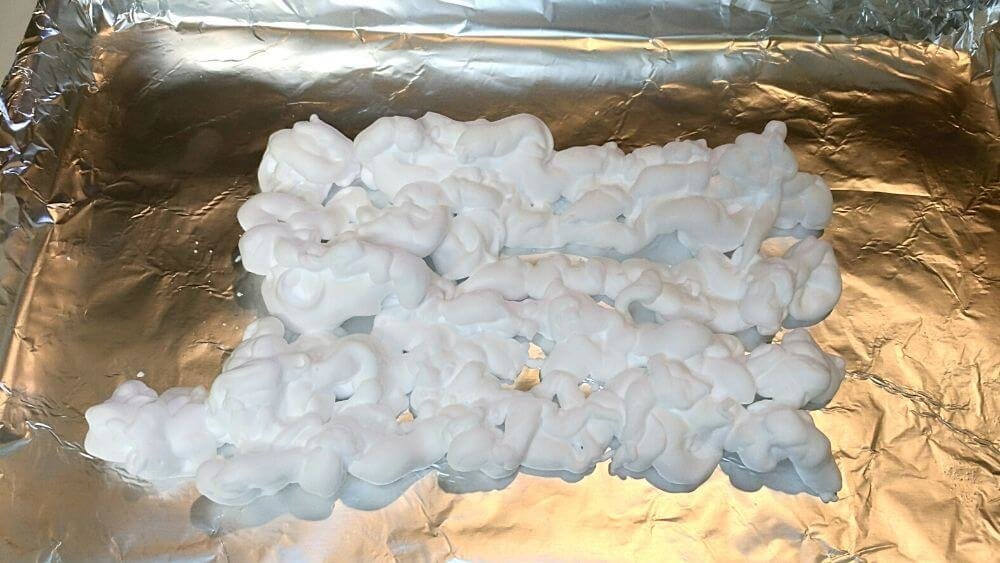
  • Spray some shaving cream onto protected work surface.
STEP 2 
  • Spread the shaving cream out so it’s about ½ an inch thick.  

    How does the shaving cream feel? Is it a liquid or a solid? Do your best to describe it. 
Spread shaving cream onto protected work surface
STEP 3
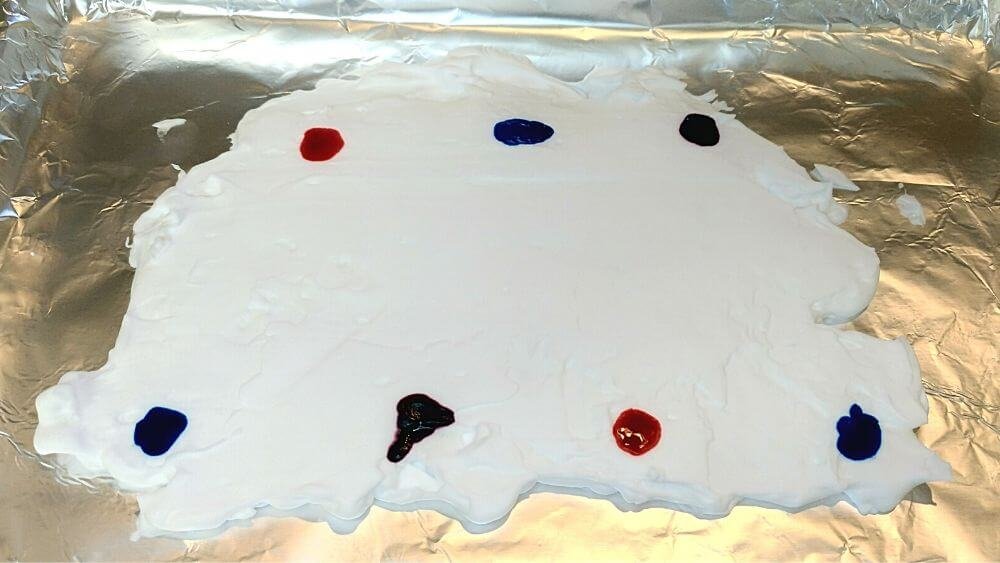
  • Add a few drops of food coloring on top of the shaving cream. Make sure you leave some space between each drop. 

    What do you observe as you drip the food coloring onto the shaving cream? Does it mix in? Does it sit on top? Sink to the bottom? Spread out flat? What do you see happening? 
Add dye to shaving cream make marbleized paper
STEP 4
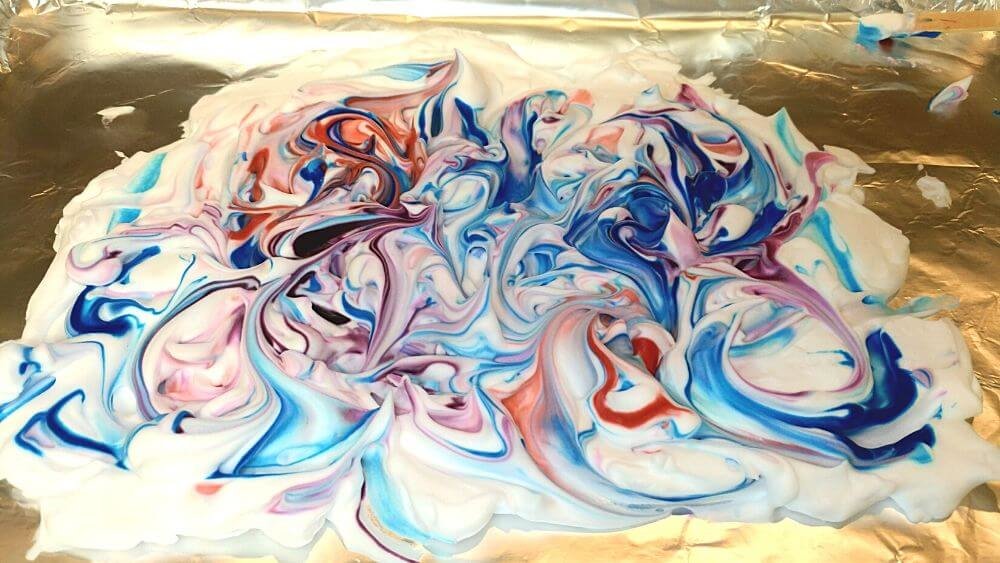
  • Use a popsicle stick to drag the food coloring around on the top of the shaving cream, creating a marbled effect. 

    Do the colors mix with the shaving cream? Do they stay separate? Do they mix with each other? 
Swirl shaving cream colors together to make marbleized effect
STEP 5
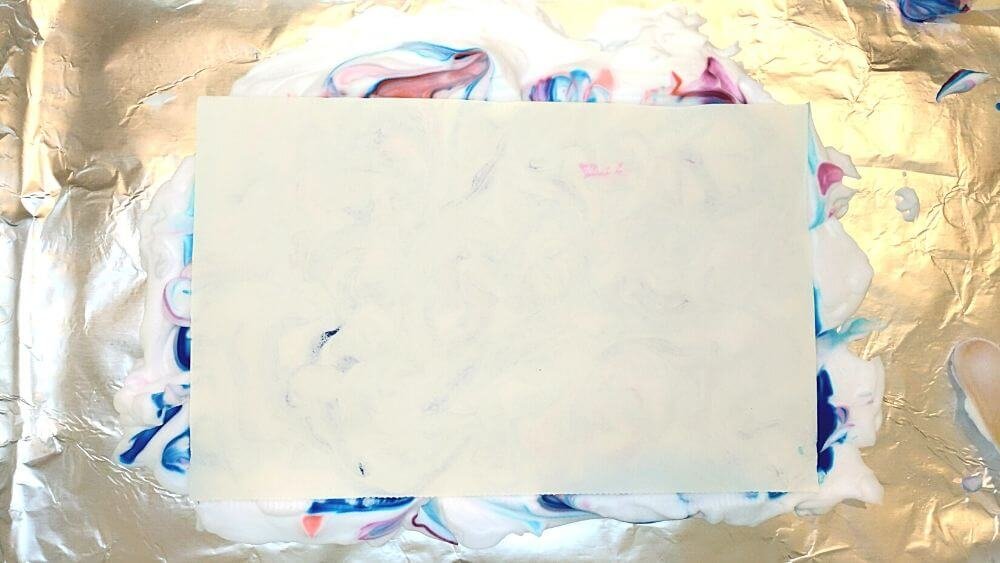
  • When you’re happy with the marble you’ve created, place your paper on top of the shaving cream and food coloring and gently press down. Depending on how thick your paper is, you may see the marble start to show through the other side. Let it sit for about 5-10 seconds.  
STEP 6
  • Carefully remove your paper and place it shaving cream side up on a protected work surface. 
Place paper on shaving cream to create marbleized paper effect
STEP 7
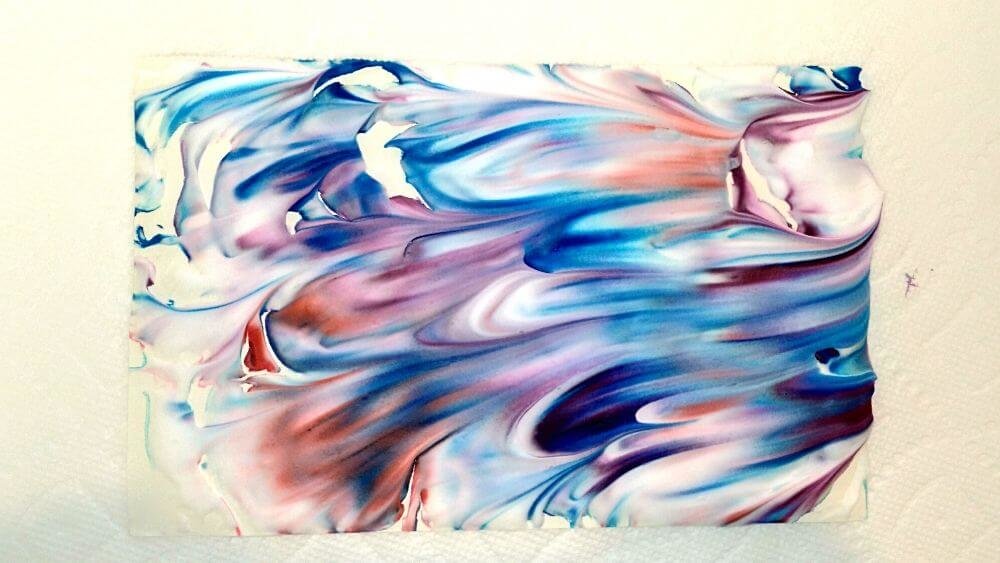
  • Use a popsicle stick to very gently scrape the shaving cream off your paper. This will likely take a few passes and it may help to remove the shaving cream from your popsicle stick between each pass.

    The food coloring has soaked into your paper, leaving behind a marbled pattern! How is the design on your paper similar to the design you saw on your shaving cream? How is it different? 

STEP 8
  • Let your paper dry for a few minutes. Once dry, use a tissue or paper towel to brush off any leftover little bits of shaving cream.
Swirl shaving cream colors together to create marbleization

Display your marbleized paper with pride, or add it to a larger project! Be sure to share your mess-terpieces with us by submitting them to our Science Showcase here or tag Orlando Science Center and use #OSCatHome on social media! You might be featured on our channels. 


NOTE: It’s best to let the paper dry completely before cutting it or writing on it.

Expand on the Activity!

  • Try this again and try using more or less food coloring. How do your results change? 
  • Test out different kinds of paper. What happens when you try this with printer paper, newspaper, tissue paper, cardboard, or colored construction paper? What kind of paper works best? 
  • Experiment with making different shapes and patterns with the food coloring in the foam. How many different patterns can you make? 

OSC At Home Emails

Get a round up of our latest activities and ideas delivered straight to your inbox so you don't miss a thing!

Find out when we release new resources by following us on social media!


Follow us on social media for even more science fun including fun facts, games, behind-the-scenes photos, and more!


Facebook Logo Instagram Logo YouTube Logo Twitter Logo

Support OSC At Home

In these ever-changing times, it is our pleasure to adapt quality Orlando Science Center experiences to engage with everyone while they are safe at home. Please consider supporting our operating fund to ensure we can continue developing resources today and well into the future. Thank you for your generosity and support!
DIY Lava Lamp Experiment • Explore Density and Fizzy Reactions

Learn about density with this simple DIY Lava Lamp Experiment!

Density has to do with how much space something takes up in relation to what its mass is. While density can be a tricky concept for younger scientists to understand right away, this DIY lava lamp experiment is a great opportunity to observe density in action and make some initial observations while enjoying some fizzing good fun!

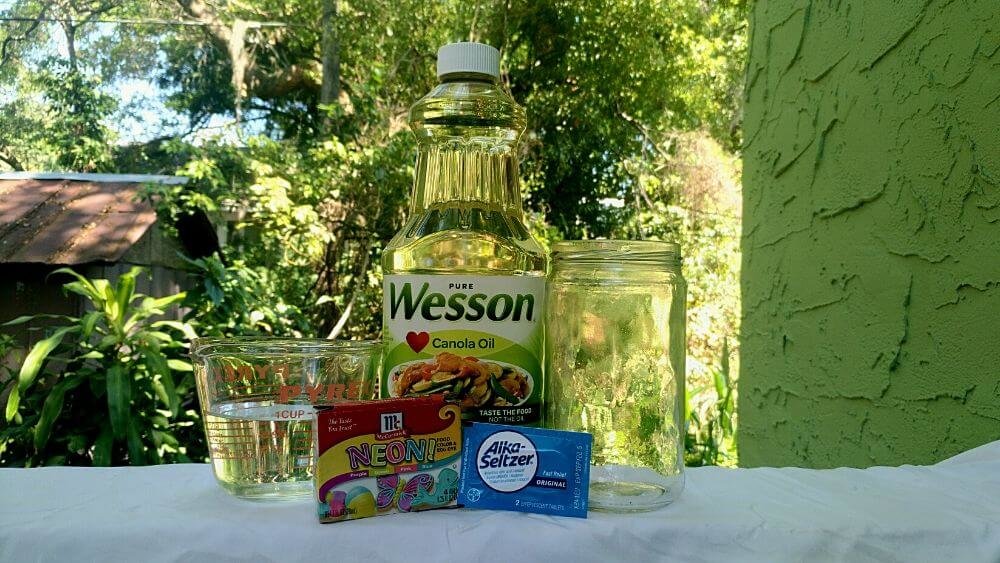
Materials:

  • Canola oil 
  • Measuring cup 
  • Water 
  • Tall, clear container (we used a clean salsa jar) 
  • Alka-Seltzer tablets (or any other effervescent tablets) 
  • Food coloring
    *Warning: Food coloring can stain! Feel free to substitute in washable paint such as liquid watercolor or tempera paint if you’re worried about mess. Either way, mess-friendly play clothes are recommended for this DIY lava lamp experiment!
Collection of experiment materials including a bottle of canola oil, a measuring cup of water, a tall clear container, Alka-Seltzer tablets, and a box of food coloring

Directions:

STEP 1
  • Fill your measuring cup with 1 cup water.
     
STEP 2
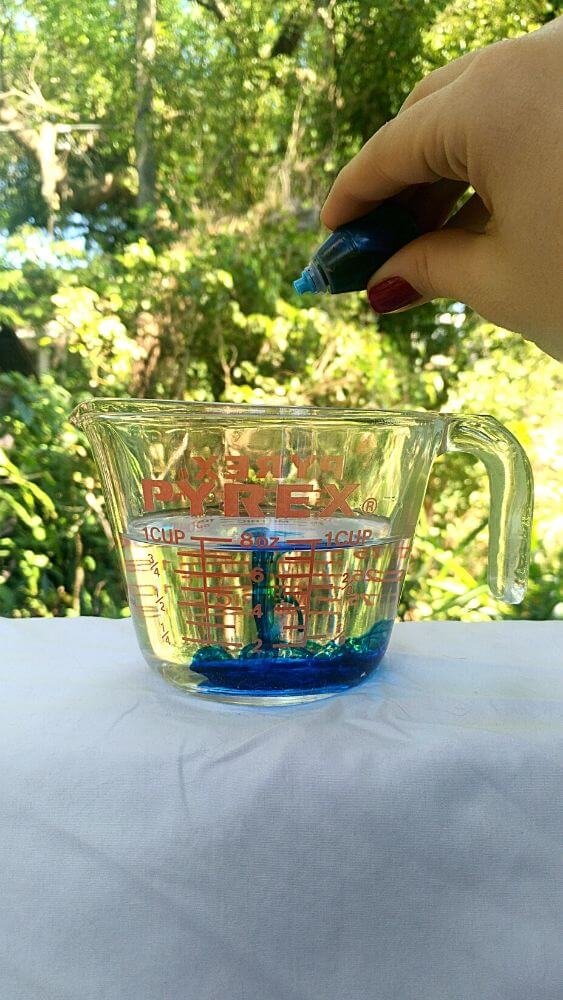
  • Add 10-15 drops of food coloring to your water then stir.

    Observe the food coloring drops as they enter the water. What do you notice? Do they float? Do they sink? Does the food coloring mix well into the water? What do you see?
Add drops of food coloring to cup of water
STEP 3
  • Fill a clear container ¾ of the way with canola oil.

STEP 4
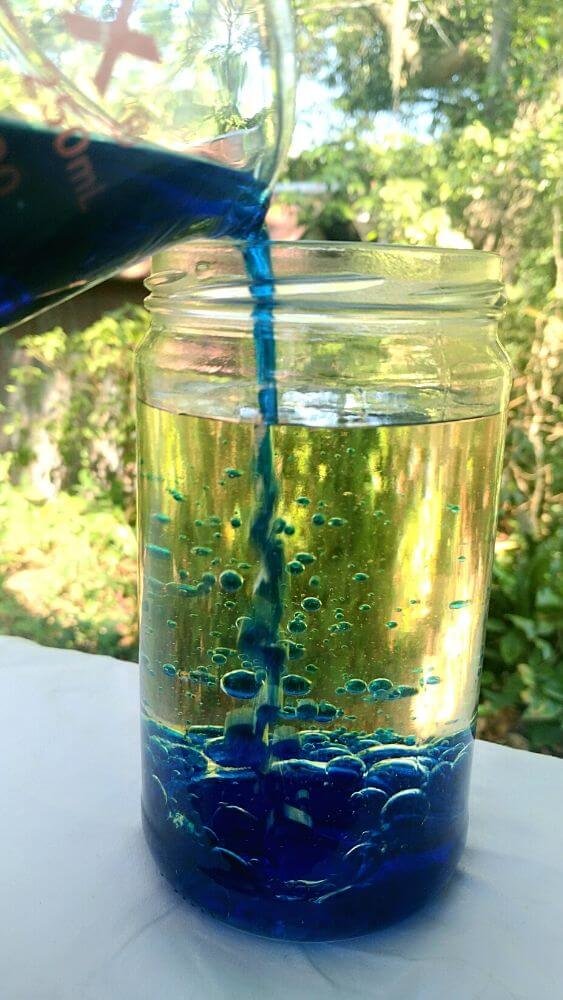
  • Pour the dyed water into your clear container, along with your canola oil.

     
    What do you notice about the water and the canola oil?  Do they mix together?
    Which one sinks to the bottom? Is this the same as what you observed with the food coloring and water?

Mix dyed water with canola oil
STEP 6
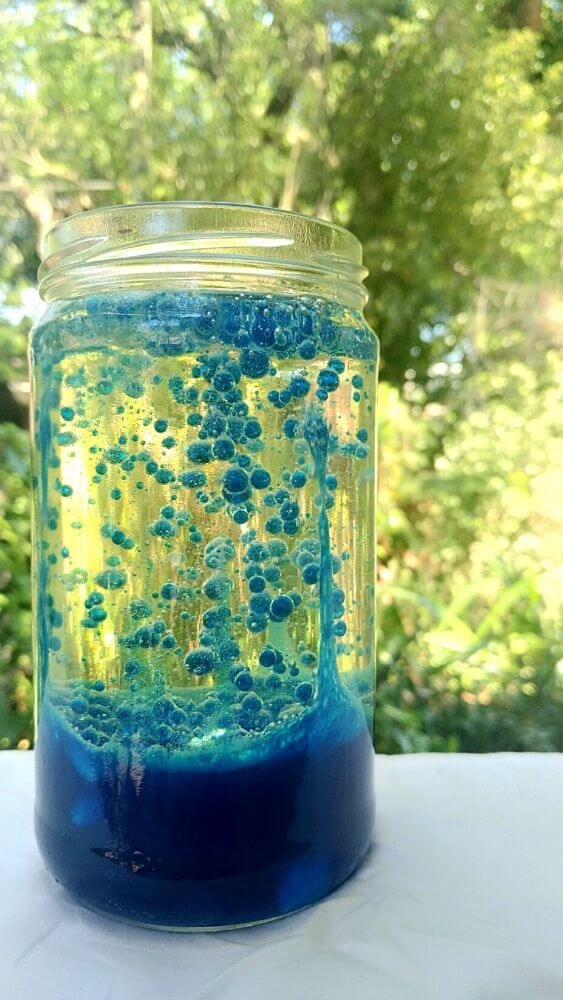
  • Break up your effervescent tablets into several small pieces, drop them into your clear container one at a time, and enjoy the show!


    What happens when you add the effervescent tablets? Practice your observation skills and describe what you notice!


STEP 7
  • You can continue adding effervescent tablets as the bubbles slow.


Bubbles rise and fall in DIY lava lamp density experiment

Expand on the Activity:

  • Experiment with your effervescent tablets! What happens when you drop a full tablet in your lava lamp? What happens when you drop in several pieces at once? What happens if you crush your tablet into dust and then add it to your lamp?
  • Make something to remember your experiment! Drop several pieces of effervescent tablet into your lava lamp and cover the top with a piece of paper. As the bubbles pop, the food coloring will leave a surprise behind on the paper for you.
  • Looking for more fun with a fizz? Check out our Ice Chalk DIY Recipe!


If you had fun learning about fizz and snapped some photos, be sure to  submit it to our Science Showcase here or tag Orlando Science Center and use #OSCatHome on social media! You might be featured on our channels. 

OSC At Home Emails

Get a round up of our latest activities and ideas delivered straight to your inbox so you don't miss a thing!

Find out when we release new resources by following us on social media!


Follow us on social media for even more science fun including fun facts, games, behind-the-scenes photos, and more!


Facebook Logo Instagram Logo YouTube Logo Twitter Logo

Support OSC At Home

In these ever-changing times, it is our pleasure to adapt quality Orlando Science Center experiences to engage with everyone while they are safe at home. Please consider supporting our operating fund to ensure we can continue developing resources today and well into the future. Thank you for your generosity and support!
How to Make Bubble Snakes With Items You Already Have at Home!

Learn how to make bubble snakes with this STEM-sational DIY activity!

Bubbles, bubbles, everywhereWhat are the differences between one bubble and lots of bubbles? We'll show you how to make bubble snakes in the directions below so you can find out! 


Our Early Childhood Specialists in KidsTown put together this fun bubble exploration activity so you can practice your observation and critical-thinking skills at home. 


There is something magical about experimenting with bubbles, isn't there? For more bubbly goodness, check out our fan-favorite Un-Poppable Bubble recipe.

Materials:

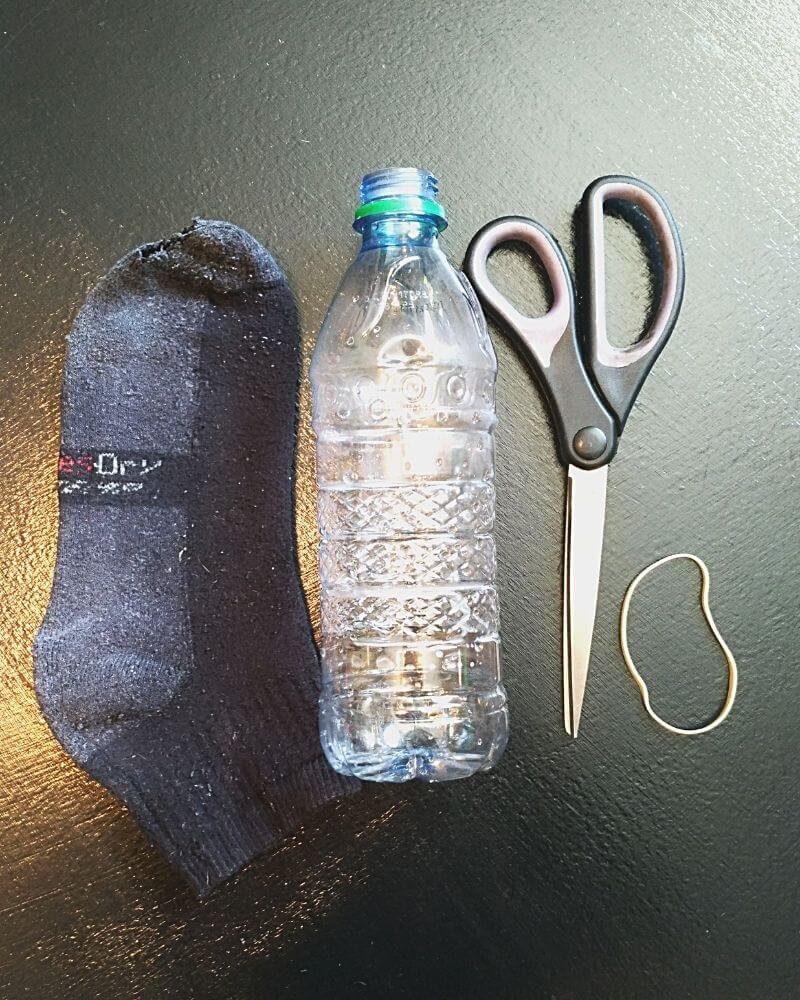
  • Plastic bottle 
  • A sock 
  • Rubber band 
  • Scissors (and adult supervision)
  • Bubble solution*
  • A wide, shallow container 
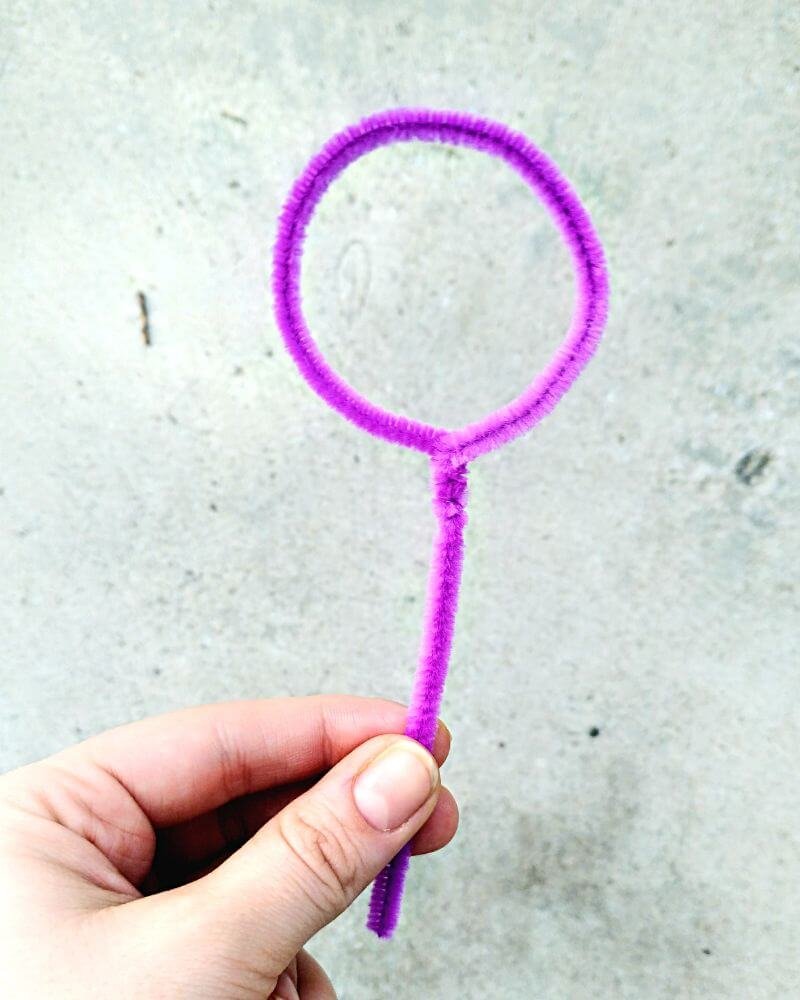
  • A bubble wand or a pipe cleaner 
  • Optional: Washable paint for extension activity
Materials for how to make a bubble snake

*If you don't have bubble solution on hand, a mixture of dish soap and water will work for this project but you may have to do some tinkering with the amount of dish soap you add if you'd like to blow bubbles with a regular bubble wand. Sounds like another great opportunity to experiment to us!

Directions:

  • Use a bubble wand* to blow one bubble.

    Observe your bubble closely. What shape is the bubble? What colors do you see? How big is the bubble? How does the bubble move? What does it look like when the bubble pops? 


    Write down or draw your observations so you can reference them later!


    *If you don’t have a bubble wand handy, a pipe cleaner twisted to look like one works, too!

    Once you’ve completed your bubble observations, you’re ready to learn how to make bubble snakes!
pink pipecleaner twisted into bubble wand
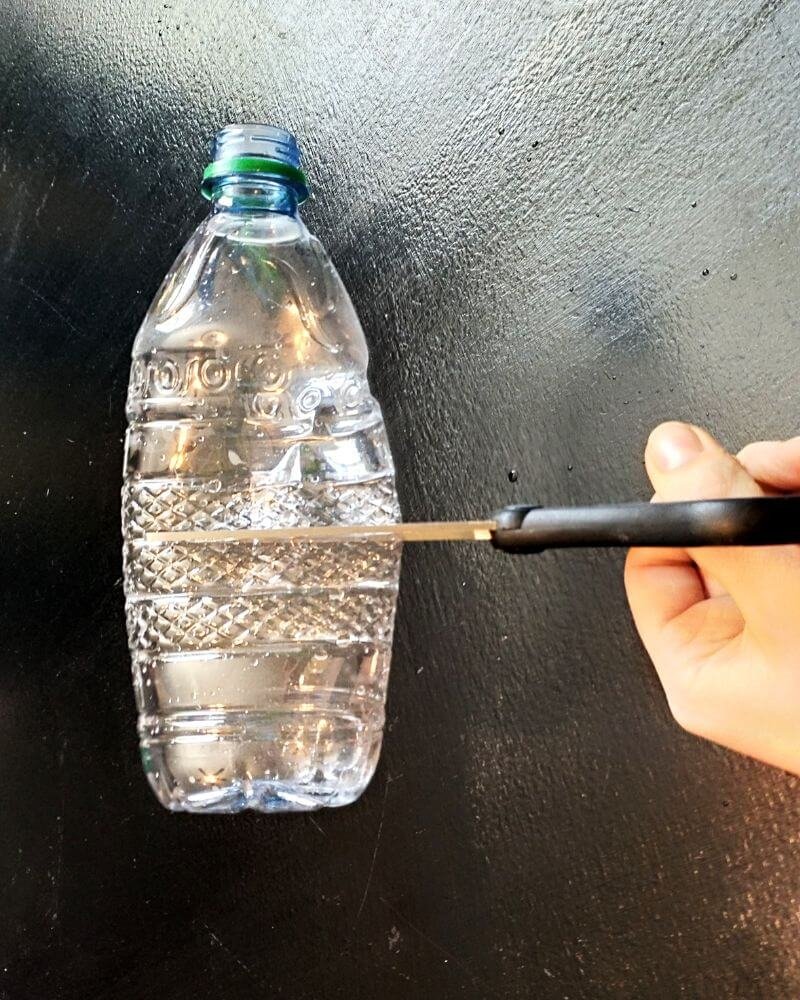
  • Carefully cut the bottom off your plastic bottle. 

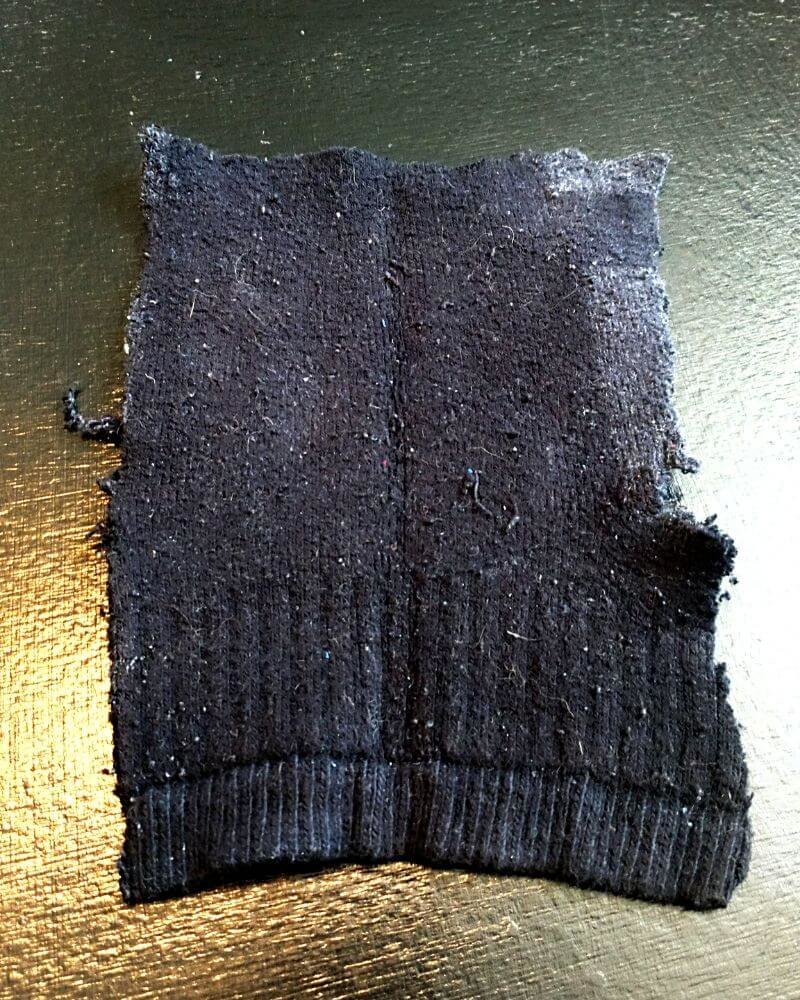
  • Cut your sock into a square that fits over the new opening in your plastic bottle with some room to spare on each side. 

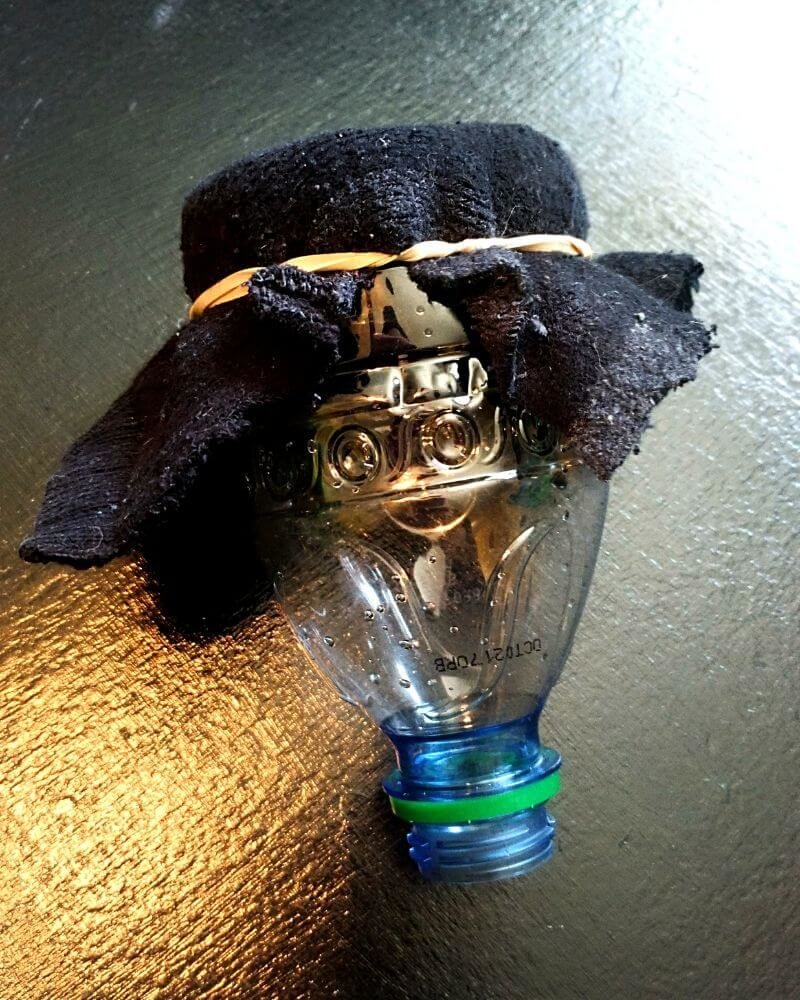
  • Secure the sock to the bottom of the plastic bottle with a rubber band. 

Attach sock to bottle with rubber band
  • Pour your bubble solution into the container. 
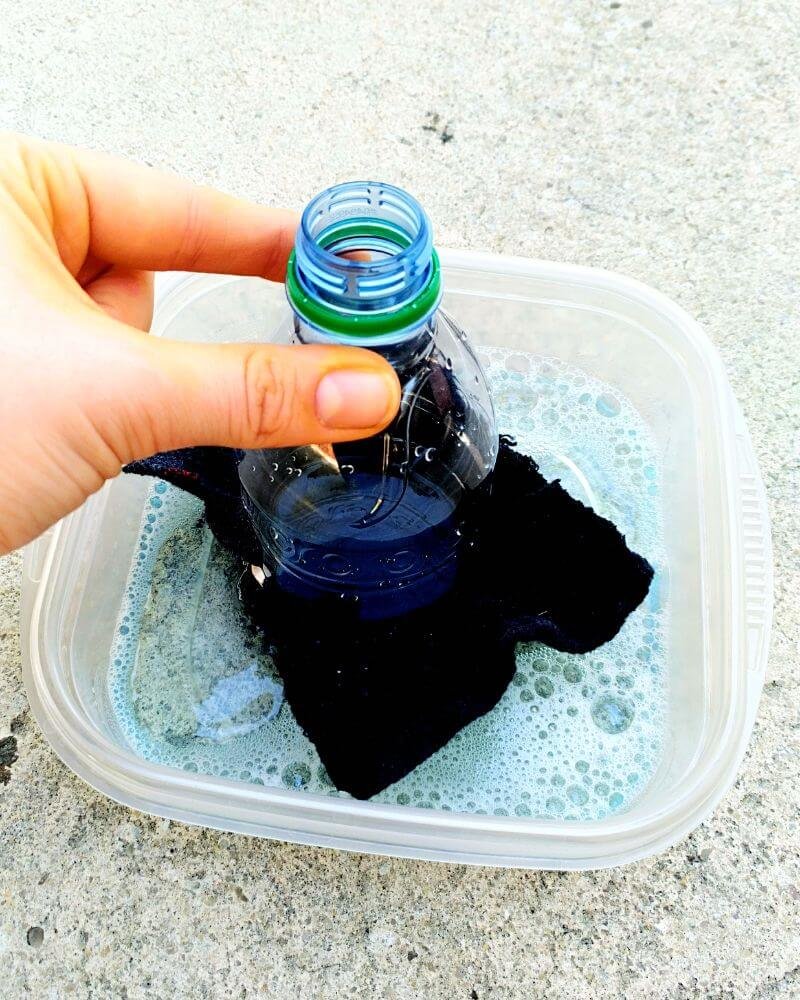
  • Dip the plastic bottle into your bubble solution, sock end first. 
Dip water bottle into bubble solution
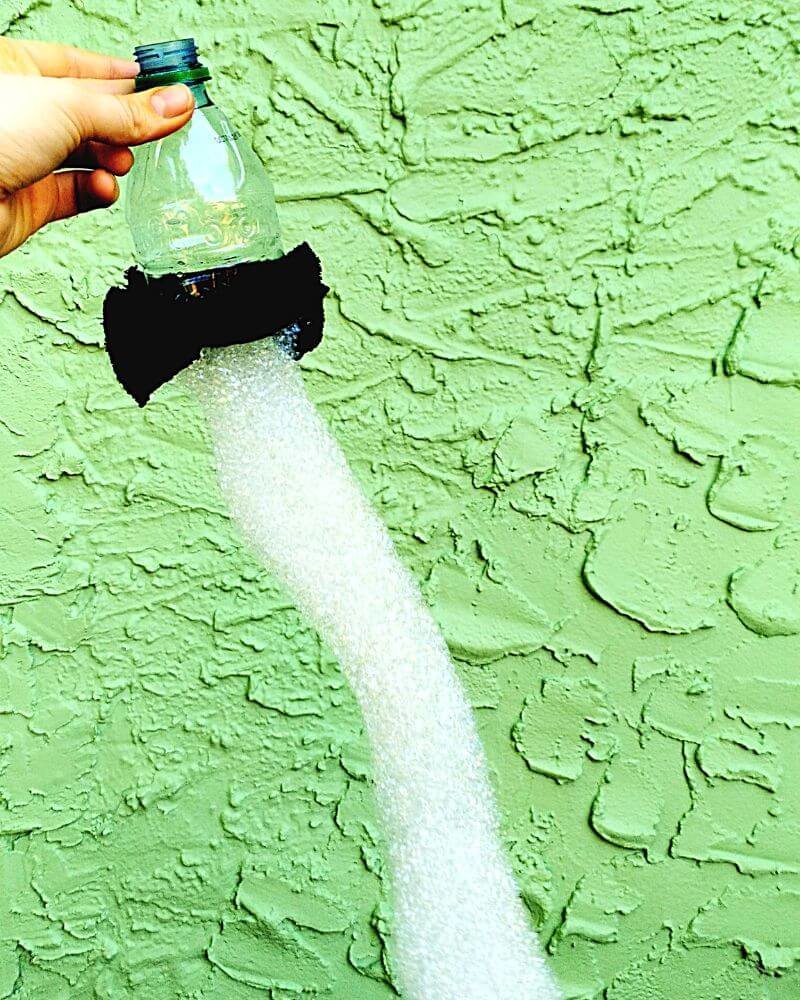
  • Blow into the plastic bottle from the end you would normally drink through and watch your bubble snake grow! 

  • Observe the bubbles in the bubble snake.

    What shape are these bubbles? What colors do you see? How big are these bubbles? How do they mo
    ve? What does it look like when the bubbles in the bubble snake pop? How is this group of bubbles the same as your first bubble, and how is it different? 
Bubble snake being blown out of a water bottle and sock

Expand on the Activity:

  • Experiment with the design of your bubble snake blower. 
    Try 
    using a plastic bottle with a different size or shape, experiment with different fabrics such as t-shirt or towel material, and give a few different bubble solution recipes a try. Which combination works best? 
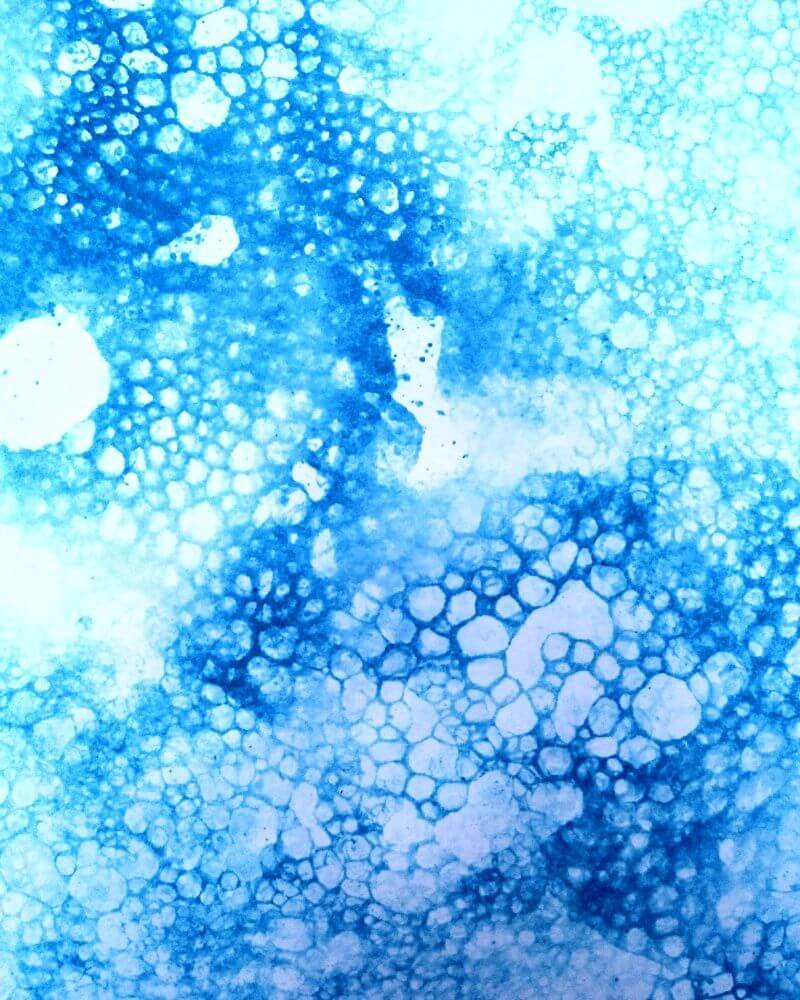
  • Mix some washable paint into your bubble solution, or apply it directly to the sock after dipping it in the bubble solution, and then blow your bubble snake onto a piece of paper. Quickly remove the bubbles from the paper to reveal your bubble-painted masterpiece!  
  • Remember to check out our Unpoppable Bubble Recipe for more fun with bubbles! 
Example of art made by mixing paint into bubble snake solution

Did you have a blast with bubble snakes! Snap a photo or video and submit it to our Science Showcase here or tag Orlando Science Center and use #OSCatHome on social media! You might be featured on our channels. 

OSC At Home Emails

Get a round up of our latest activities and ideas delivered straight to your inbox so you don't miss a thing!

Find out when we release new resources by following us on social media!


Follow us on social media for even more science fun including fun facts, games, behind-the-scenes photos, and more!


Facebook Logo Instagram Logo YouTube Logo Twitter Logo

Support OSC At Home

In these ever-changing times, it is our pleasure to adapt quality Orlando Science Center experiences to engage with everyone while they are safe at home. Please consider supporting our operating fund to ensure we can continue developing resources today and well into the future. Thank you for your generosity and support!
Ice Chalk DIY Recipe: A Frozen Sensory Sidewalk Art Project

A frozen twist on a classic favorite, ice chalk is a fun way to take your sidewalk art game to the next level! 

Sidewalk chalk is cool but ice chalk is even cooler, literally! Start in the kitchen concocting your chalk paintsicles, then, when they're ready, head outside and get to painting your pavement!


Let your worries about keeping children occupied melt away with this sensory outdoor activity. Using simple supplies you may already have in your kitchen, you can create batches of ice chalk to keep busy! 


In the event that you're using your ice chalk on a hot day, a paintbrush can extend the life of your activity! Once the ice chalk has melted, just switch from drawing to painting. 

Materials:

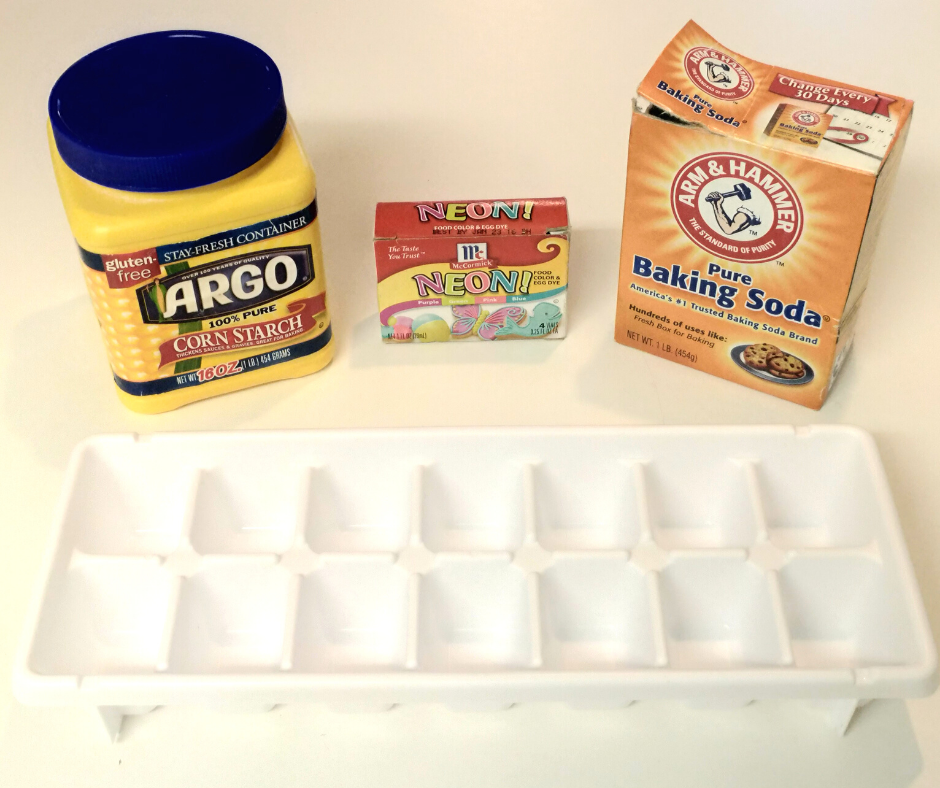
  • ¼ cup corn starch
  • ¼ cup baking soda
  • ½ cup water
  • Mixing bowl
  • Ice cube tray or freezable mold
  • Vinegar
  • Spray bottle(s)
  • Food coloring or washable paint such as liquid watercolor or tempera paint* 
  • Optional: Paintbrush 


*WARNING: Food coloring is edible but can stain! Either way, mess-friendly play clothes are recommended for this activity!

kitchen-ingredients-for-ice-chalk-kids-activity

Directions:

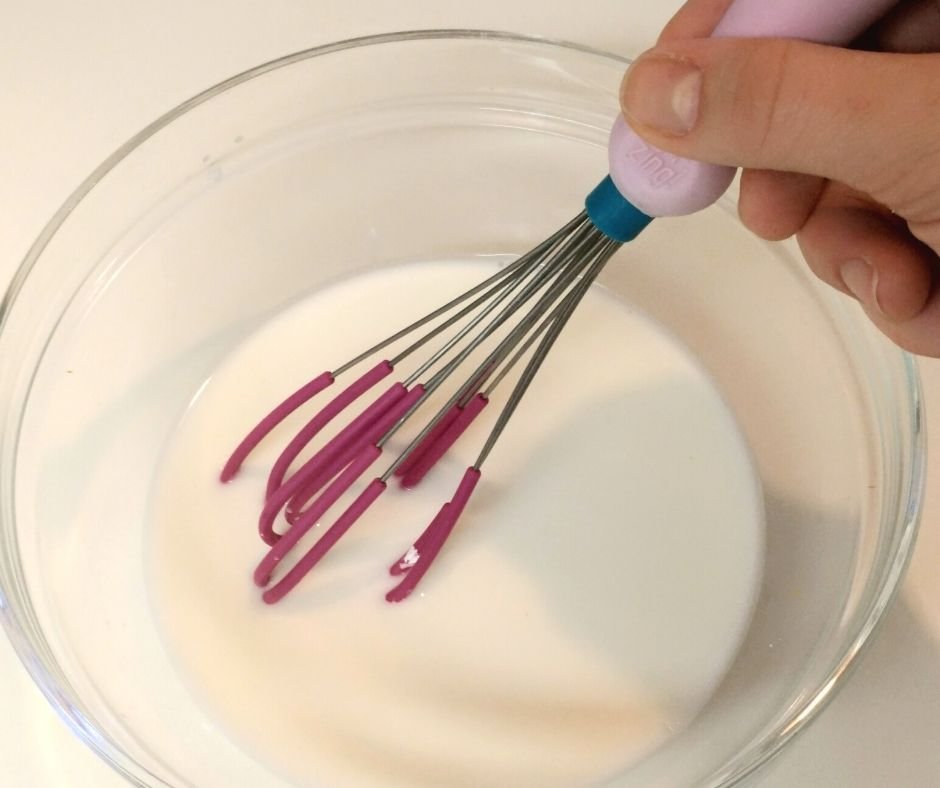
  • Mix ¼ cup of corn starch and ¼ cup of baking soda together in a mixing bowl.  
  • Pour ½ cup water into the mixing bowl and stir until the corn starch and baking soda dissolve. 
diy-ice-chalk-recipe-with-simple-kitchen-ingredients
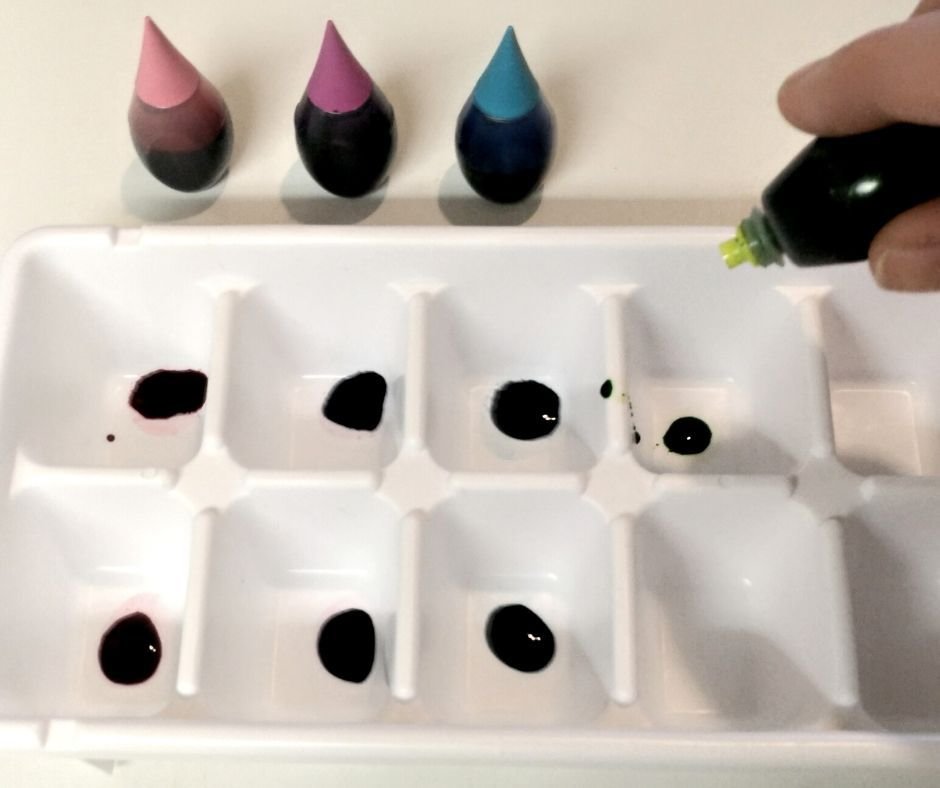
  • Drop several drops of food coloring into each section of your ice tray.
  • Carefully pour your mixture into your ice tray, filling up each cube about ¾ of the way full. 
food-coloring-for-colorful-ice-chalk-recipe
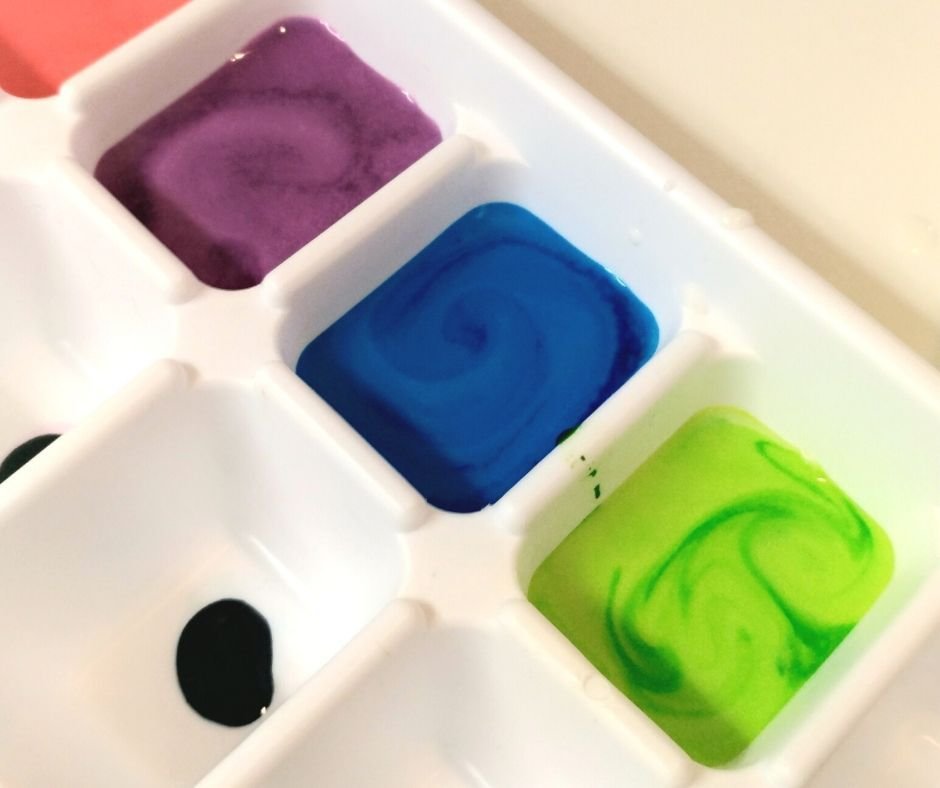
  • Gently mix each cube in your ice tray so the color is evenly distributed. You can use a toothpick, fork, or popsicle stick for this step. Remember to use a clean utensil for each new color! 
  • Chill your ice chalk in the freezer for 3-5 hours.  
ice-cube-tray-for-diy-ice-chalk-project
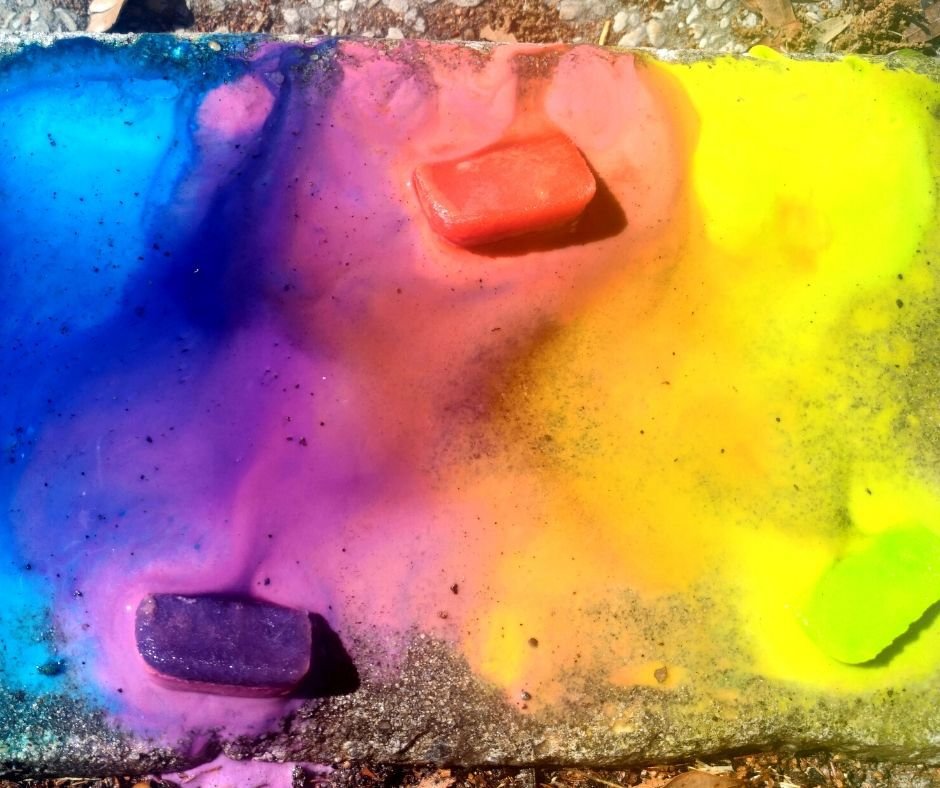
  • Carefully remove your chilled chalk from the ice tray, take it outside, and enjoy!
  • As your chalk melts, use a spray bottle to squirt vinegar onto your creations and watch them fizz! 
melted-ice-chalk-kids-sidewalk-activity

Expand on the Activity:


Encourage your artist to answer these questions!

  1. How does it feel to draw with your ice chalk?
  2. How is coloring with your DIY chalk different from coloring with “regular” chalk? How is it the same?
  3. What do you notice about the chalk as it melts? Can you describe it?
  4. As your chalk melts, do you see any colors mixing? What new colors do you see?
  5. What do you notice when you spray vinegar on your chalk creations? What do you see, hear, and smell? 


We would love to see your masterpieces! Snap a photo and submit it to our Science Showcase here or use #OSCatHome on social media!

OSC At Home Emails

Get a round up of our latest activities and ideas delivered straight to your inbox so you don't miss a thing!

Find out when we release new resources by following us on social media!


Follow us on social media for even more science fun including fun facts, games, behind-the-scenes photos, and more!


Facebook Logo Instagram Logo YouTube Logo Twitter Logo

Support OSC At Home

In these ever-changing times, it is our pleasure to adapt quality Orlando Science Center experiences to engage with everyone while they are safe at home. Please consider supporting our operating fund to ensure we can continue developing resources today and well into the future. Thank you for your generosity and support!