How to Make Bath Fizzers • Explore Science While you Scrub-a-Dub-Dub

Add some science to your self-care by learning how to make bath fizzers! 

We’re bubbling over with excitement to teach you how to make bath fizzers! With some materials you can buy at the grocery store and a few steps, you can make your own bath fizzers at home.

This recipe is customizable, so you can add whatever color or scent you like, as well as additional treats such as dried flower petals or biodegradable glitter to your DIY bath fizzers. 

Materials you will need:

  • ½ cup baking soda
  • ½ cup cornstarch
  • ¼ cup citric acid
    • Citric acid can be purchased in the canning department of Walmart, some craft stores, and online through retailers like Amazon.
  • ¼ cup Epsom salt
  • 1 teaspoon water
  • 1 ¼ teaspoon coconut oil
  • 5-10 drops of scented oil if you would like your bath fizzer to have a scent
  • 1-2 drops of food coloring if you would like your bath fizzer to have a color
  • A large bowl
  • A small bowl
  • Whisk
  • A mold
    • You can use bath fizzer molds, muffin tins, or even plastic cups to shape your bath fizzer.
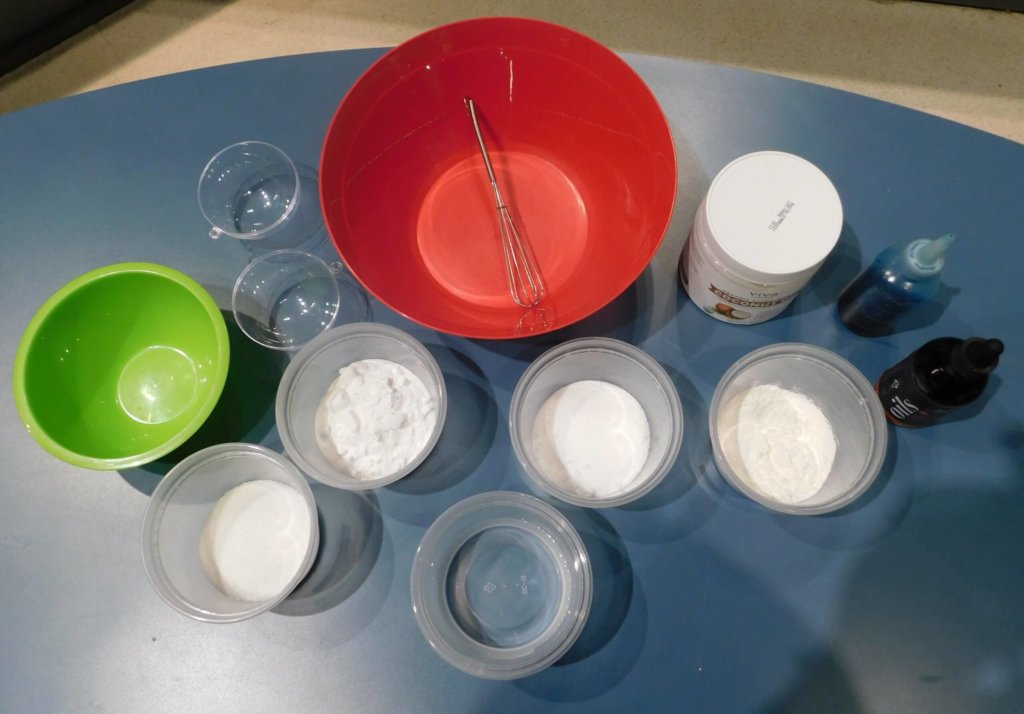
Materials for hot to make bath fizzers

 Ready to make your own? Watch along or follow the written steps below!

Watch this clip of WESH 2 News’ Adrian Whitsett creating his own moon sand at the Orlando Science Center. After making the moon sand, Whitsett participated in an activity to show how craters are made. With small rocks he was able to make large indents to recreate an asteroid knocking into the moon!

Are you ready to explore the moon, astronaut?

Directions:

Step 1:

Add the baking soda, citric acid, cornstarch, and Epsom salt to the large bowl. Whisk to combine the ingredients and remove clumps. Set the large bowl aside.
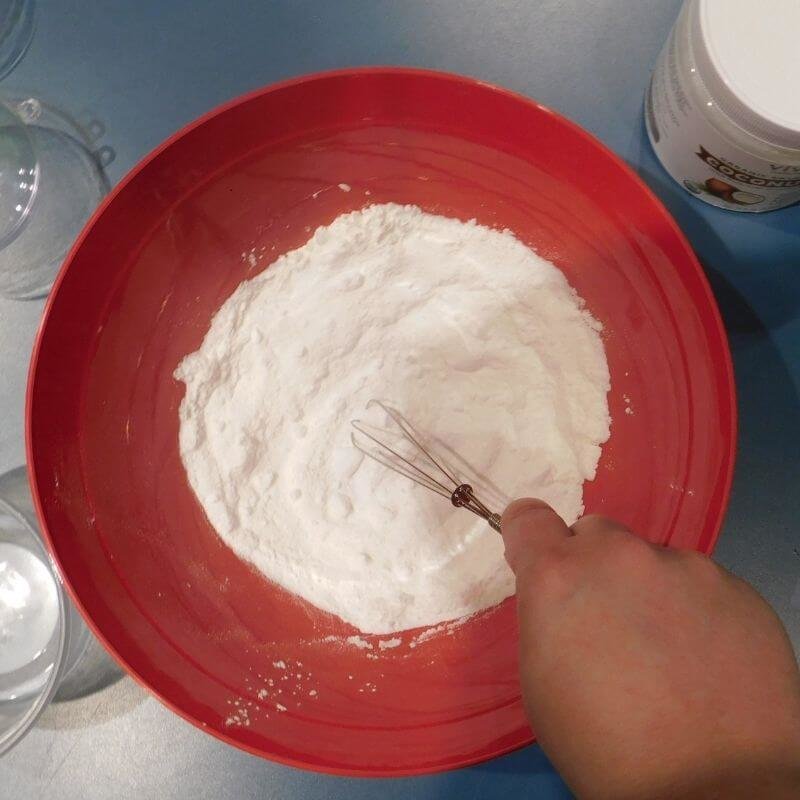
how to make bath fizzers

Step 2:

Melt coconut oil and add water, scented oil, and food coloring to the small bowl. Mix them together.

*Coconut oil melts with very little heat, so microwaving for a few seconds or heating the measured amount on a stove over low heat will melt it quickly.
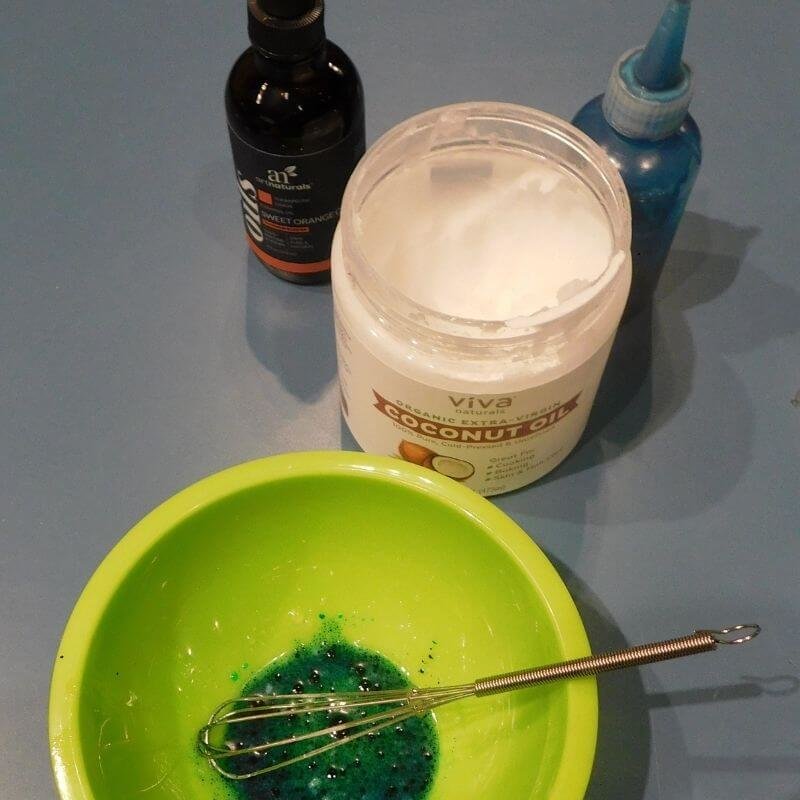
customize your bath fizzers

Step 3:

Now, add the wet ingredients to the dry ingredients a little bit at a time, whisking continually to combine. If the mixture fizzes excessively, you are adding the liquid too fast. You should end up with a slightly damp mixture that has started to clump together and resembles wet sand.

combine all the ingredients in your bath fizzers

Step 4:

Pack the mixture into your mold. If you are using a spherical mold, press the two halves together. Carefully remove the mold so it has room to expand. Let the fizzer dry on a foil-lined baking sheet. Fizzers are usually dry after 8 hours.
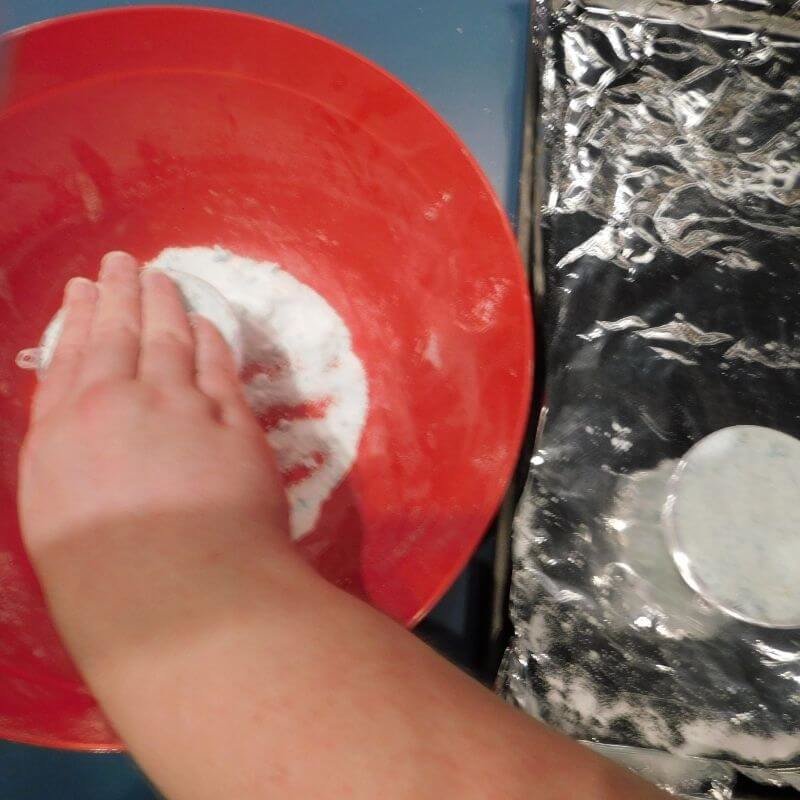
put bath fizzers in a mold

The Science: Acid-Base Reactions

Now that you've learned how to make bath fizzers, check out the science behind it!

If you’ve ever made a baking soda and vinegar volcano, you’ve seen a type of chemical reaction called an acid-base reaction. As vinegar (the acid) and baking soda (the base) mix together and react, they fizz and make an eruption of bubbles. This is exactly what’s happening in your bath fizzers, but with slightly different ingredients.

In bath fizzers baking soda is still the base, but citric acid is the acid instead of vinegar. Since both citric acid and baking soda are dry, they have to be dissolved in water to react. Once they’re dropped in the water together, they react and fizz, creating the bubbles you see in your bath fizzer. The bubbles carry any scent in the bath fizzer to the surface of the water, making the bath smell nice.

Cornstarch is the other main ingredient in all bath fizzers, but it isn’t an acid or base. It’s used for several different reasons. It helps keep the baking soda and citric acid from reacting when adding the liquid ingredients, it binds all of the ingredients together, it helps to thicken and harden the bath fizzer, and acts as a non-reactive dry “filler” that slows down the reaction and makes the fizzing last longer.

Expand on the Activity! 

Learn More Chemistry

  • pH is a measurement of how acidic or basic something is. It is measured on a scale of 0-14.
  • A substance with a pH of 7 (like distilled water) is neutral. A substance with a pH of less than 7 is an acid. The closer the number gets to zero, the stronger the acid is. A substance with a pH of more than 7 is a base. The closer the number is to 14, the stronger the base is.
  • There are several different definitions of acids and bases in chemistry.
  • A simple chemical definition of an acid is a substance that releases hydrogen ions (H+) when dissolved in water. A simple chemical definition of a base is a substance that makes hydroxide ions (OH-) when dissolved in water or a substance that takes hydrogen ions from an acid.
  • Ions are positively (+) or negatively (-) charged particles of an element.

OSC At Home Emails

Get a round up of our latest activities and ideas delivered straight to your inbox so you don't miss a thing!

Find out when we release new resources by following us on social media!


Follow us on social media for even more science fun including fun facts, games, behind-the-scenes photos, and more!


Facebook Logo Instagram Logo YouTube Logo Twitter Logo

Support OSC At Home

In these ever-changing times, it is our pleasure to adapt quality Orlando Science Center experiences to engage with everyone while they are safe at home. Please consider supporting our operating fund to ensure we can continue developing resources today and well into the future. Thank you for your generosity and support!

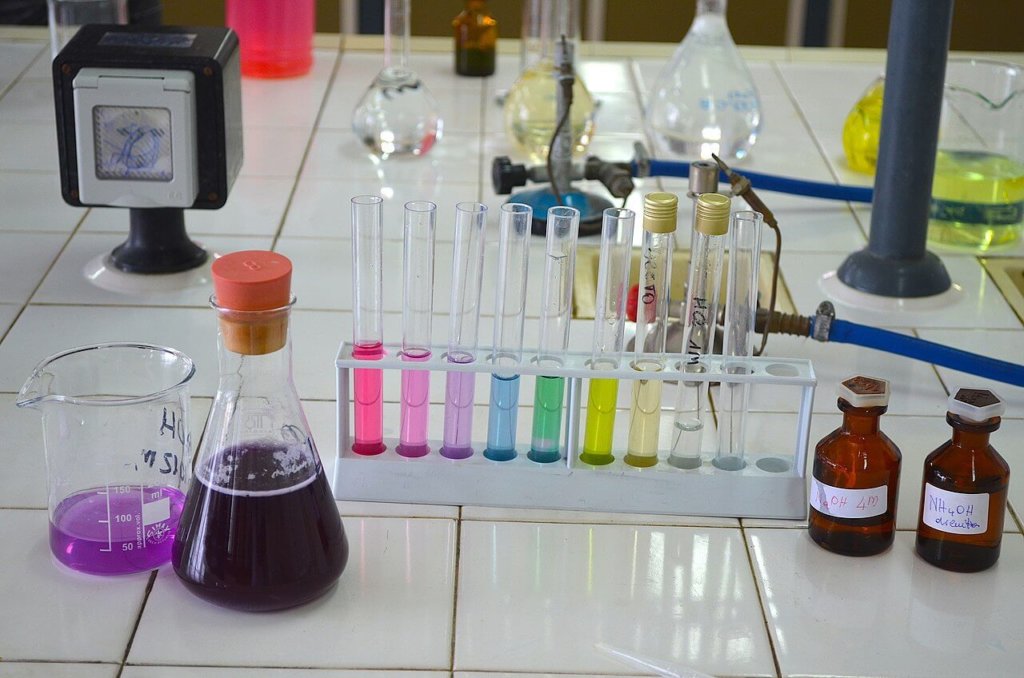
Educational Messy Science Experiments from the OSC Vault!

We've ranked our favorite educational messy science experiments by messiness!

Every year, Orlando Science Center staff celebrates "Mess Month" which features some of gooiest, slimiest, messiest activities on a giant scale. Think foam-splosion, pendulum painting, pools of slime... you get the picture. We love our mess-tivities so much that we wanted to make sure you could enjoy educational messy science experiments all year long, so we adapted some of our favorites projects so you could try them at home!

 
From the ultimate slime time to some good clean fun will minimal clean-up,find them all in one place below! Be sure to use the Mess-O-Meter rating to find a mess-tivity fit for you! If you take any photos, don't forget to share them with us on social media by tagging Orlando Science Center and using #OSCatHome or you can submit them directly through our Science Showcase.

1. Ooey-GooeyOobleck

Mess-O-Meter Level: Very Messy

Make a big mess with just two ingredients! Learn about the states of matter and viscosity, practice lab skills like measuring and mixing with  this educational messy science experiment that's so fun, you won't even realize you're learning!

2. Cool and Colorful Ice Chalk 

Mess-O-Meter Level: Moderately Messy

The mess never bothered us anyway! Step up your driveway art with the coolest sidewalk chalk  around! Just be sure to wash away your artwork when you're finished to avoid stains. 

3. Forensic Science Spatter Painting

Mess-O-Meter Level: Moderately Messy

I spy with my little eye some messy fun! This educational messy science experiment will leave you with some new vocabulary words and a work of art!

4. Colorful Coffee Filter Experiment

Mess-O-Meter Level: Minimal Mess

Watch water defy gravity before your very eyes! This colorful experiment will help teach little learners about capillary action with a beautiful visual aid! And the best part is, it's all contained in a cup so cleanup is a breeze. 

5. Demonstrating Laminar Flow

Mess-O-Meter Level: Barely Messy

Looking for some good clean fun?  This experiment is maximum fun with minimal cleanup! Just make sure you're doing your demonstration outdoors. Let's learn how you can freeze time with water and a balloon!

OSC At Home Emails

Get a round up of our latest activities and ideas delivered straight to your inbox so you don't miss a thing!

Find out when we release new resources by following us on social media!


Follow us on social media for even more science fun including fun facts, games, behind-the-scenes photos, and more!


Facebook Logo Instagram Logo YouTube Logo Twitter Logo

Support OSC At Home

In these ever-changing times, it is our pleasure to adapt quality Orlando Science Center experiences to engage with everyone while they are safe at home. Please consider supporting our operating fund to ensure we can continue developing resources today and well into the future. Thank you for your generosity and support!
DIY pH Indicators: Turn Your Kitchen Into a Chemistry Lab!

Turn your kitchen into a chemistry lab by making your own DIY pH Indicators!

pH is a measurement of how acidic or basic something is on a scale of 0-14. 


Testing how acidic or basic something is with a color-changing indicator is a staple of many chemistry experiments. Now you can try it too! Turn your kitchen into a chemistry lab with DIY pH indicators!


A substance with a pH of 7 (like distilled water) is neutral. A substance with a pH of less than 7 is an acid. The closer the number gets to zero, the stronger the acid is. A substance with a pH of more than 7 is a base. The closer the number is to 14, the stronger the base is.


Try making one of these two natural DIY pH indicators and use it to test the pH of things you find around your home!


Recommend Age: 8+ with adult help for chopping and boiling.

Materials you will need for a red cabbage pH indicator:

  • Red cabbage
  • Knife and cutting board
  • Warm water
  • Blender
  • Strainer or funnel with coffee filter
  • Container to collect indicator


WARNING: Cabbage and blueberry juices can stain clothes! Mess-friendly play clothes or coverings such as aprons are recommended for this activity.

You can can make a variety ph indicators with Orlando Science Center

Directions for making red cabbage pH indicator:

STEP 1
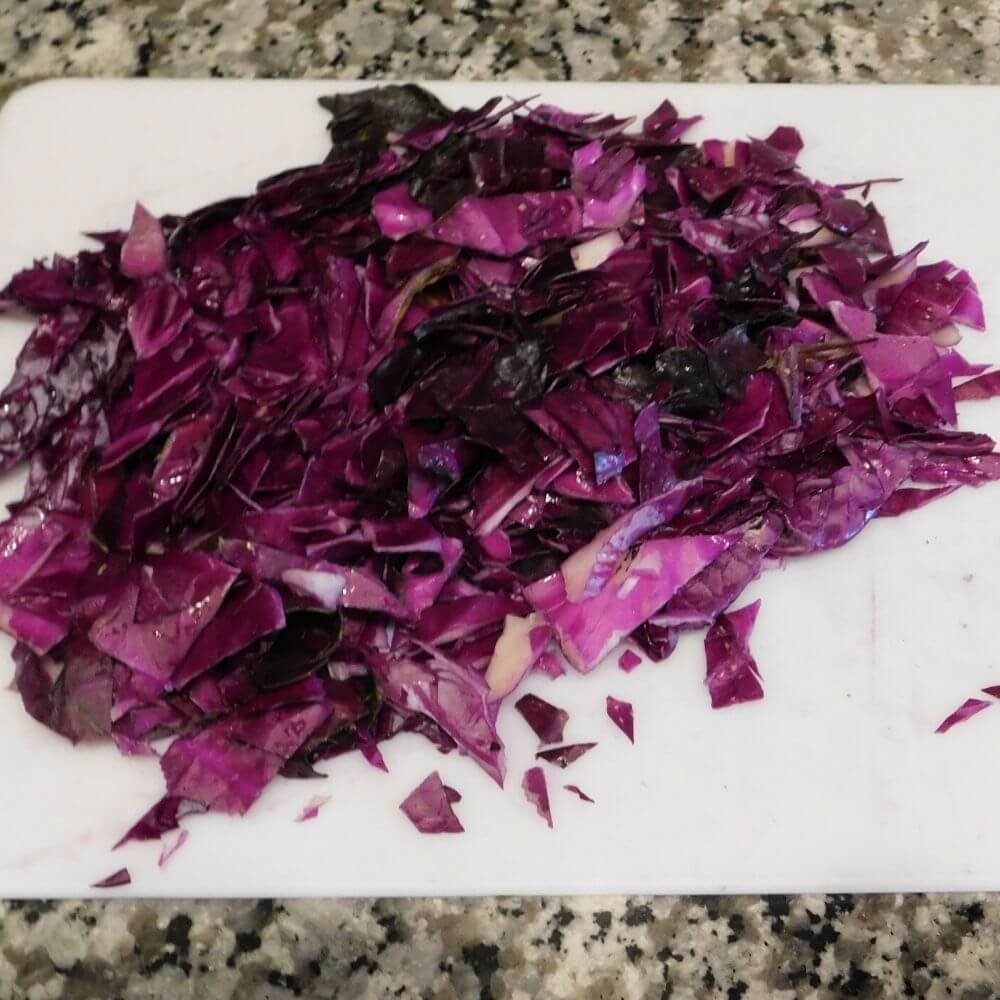
  • Peel 3 or 4 big leaves off a head of red cabbage and chop the leaves into small pieces.
  • Fill a blender halfway with hot water.
  • Add the chopped cabbage leaves to the blender.
  • Blend the leaves and water on high until the liquid turns purple and all the leaves are blended.

    *Alternatively, you can boil the chopped leaves in just enough water to cover them for a few minutes, then let steep for 30-60 minutes.

Red cabbage for DIY pH indicators
STEP 2 
  • Place a strainer or funnel lined with a coffee filter over a container to collect the indictor, such as bowl, pot, or bottle.
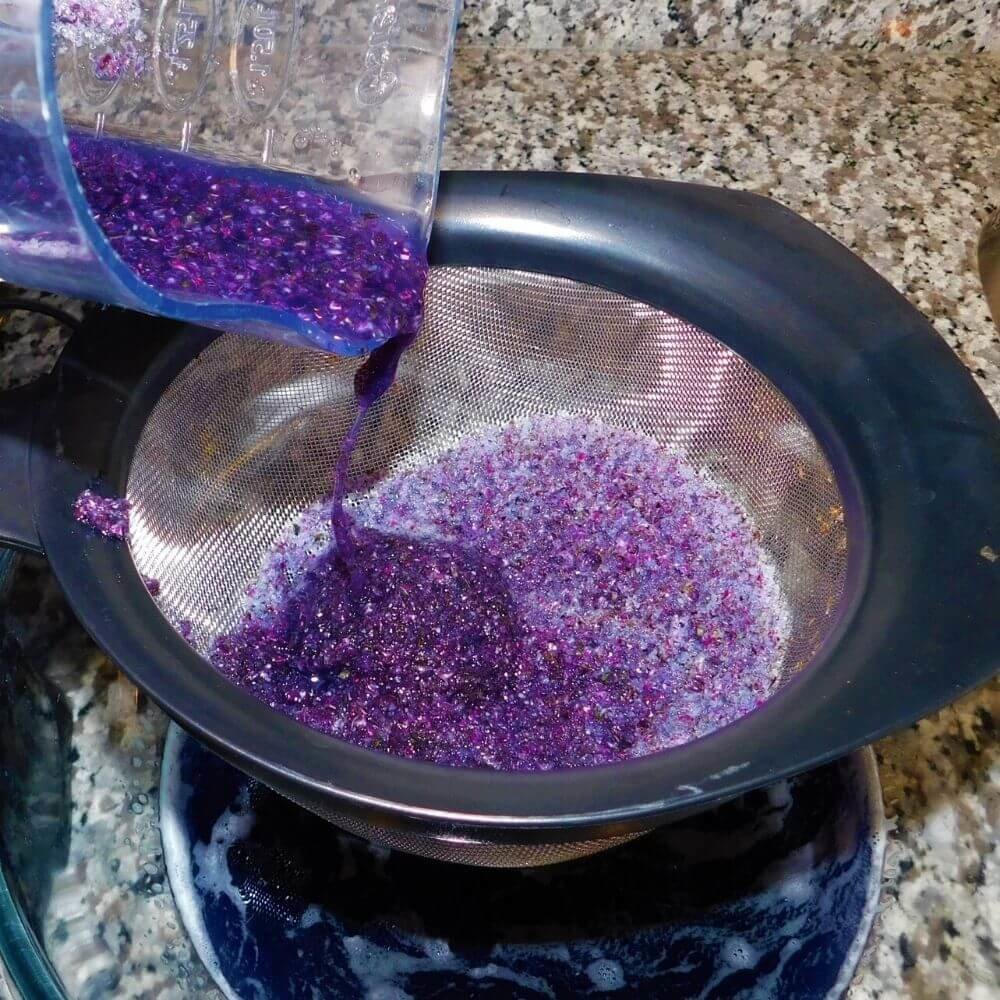
  • Pour the mixture through the strainer to remove the cabbage pulp.
  • Push down on the pulp in the strainer with a spoon or spatula to squeeze out more liquid.
strain blended cabbage for purple diy ph indicator
STEP 3
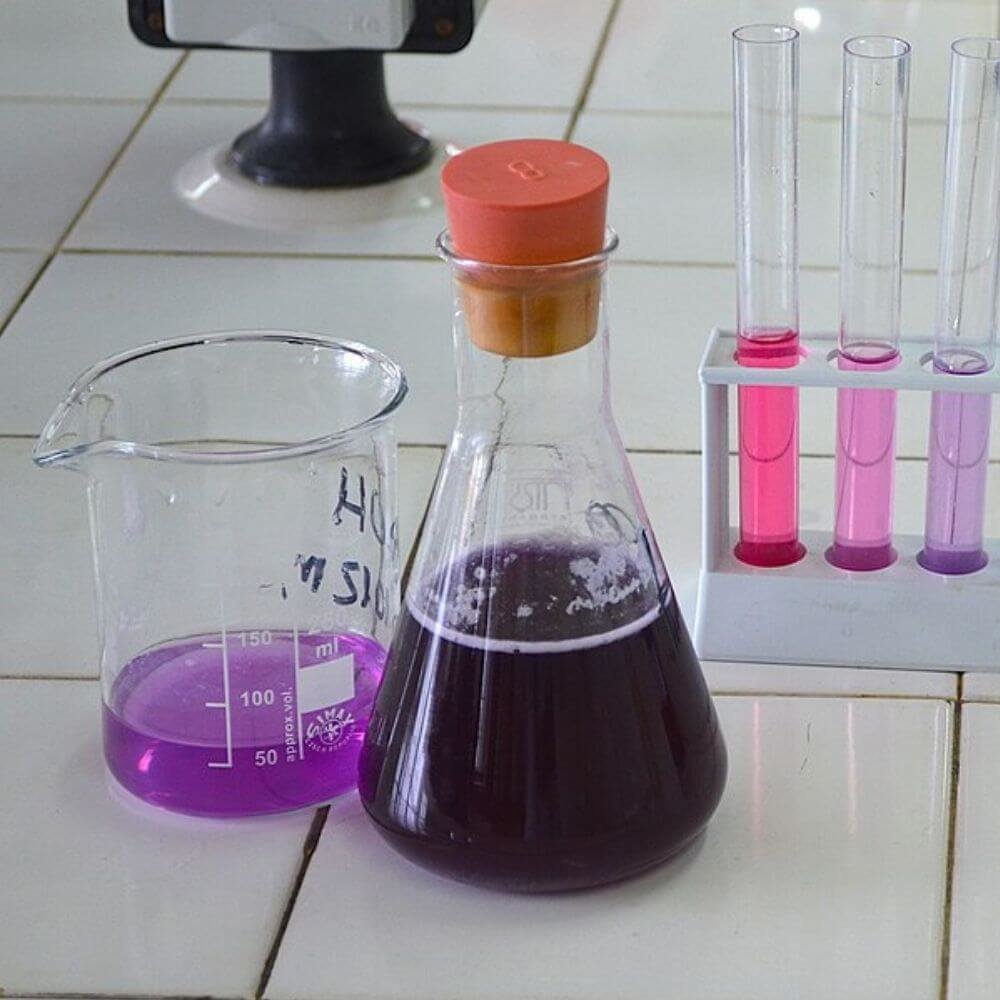
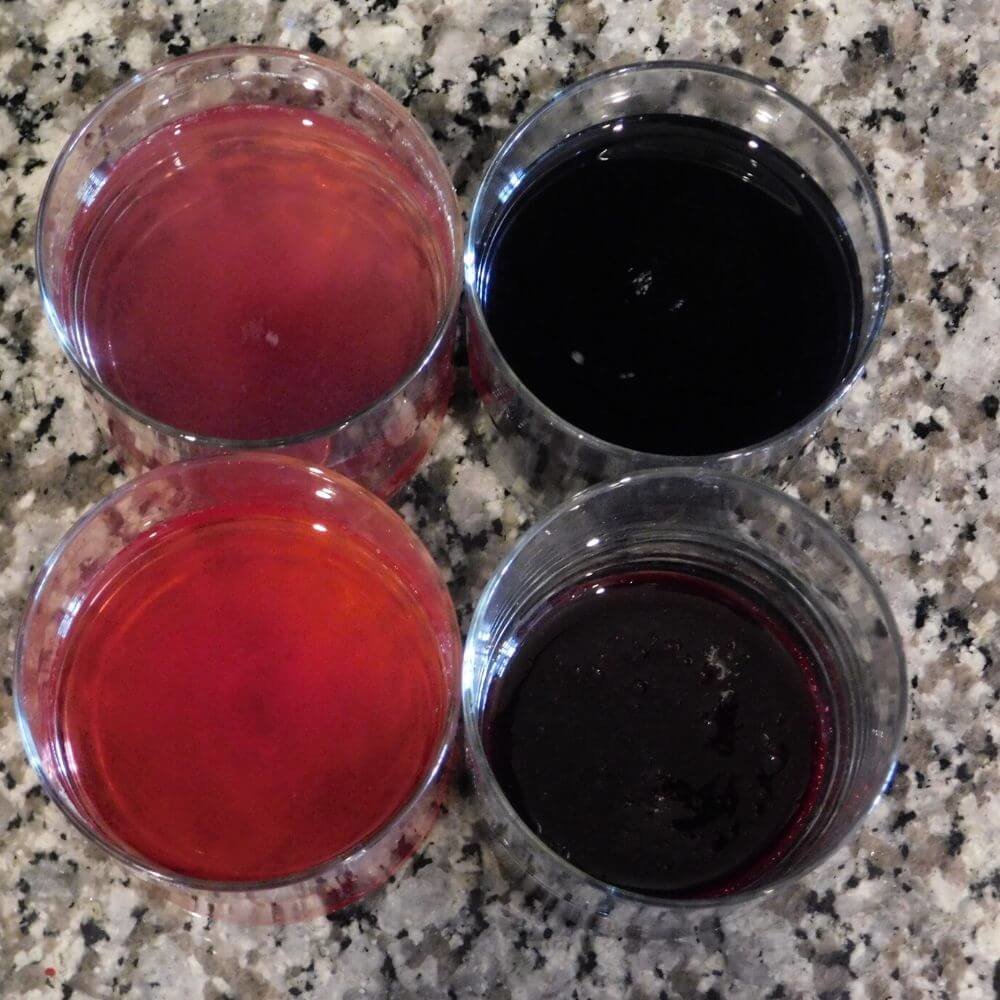
  • The purple liquid in your container is your indicator solution. The exact color will vary depending on the pH of the water you used.
  • Experiment with the indicator using the ideas below!
  • Red cabbage indicator can be saved in a sealed container in the refrigerator for up to 1 week.
Result of blending red cabbage to create diy ph indicator

Materials you will need for a blueberry pH indicator:

  • 200g blueberries
  • Masher, spoon, or spatula to mash blueberries
  • Water
  • Pot
  • Strainer or funnel with coffee filter
  • Container to collect indicator

Directions for making blueberry pH indicator:

STEP 1
  • Mash the blueberries in a bowl or pot to release the blueberry juice.
  • Add mashed blueberries, juice, and a half cup of water to a pot.
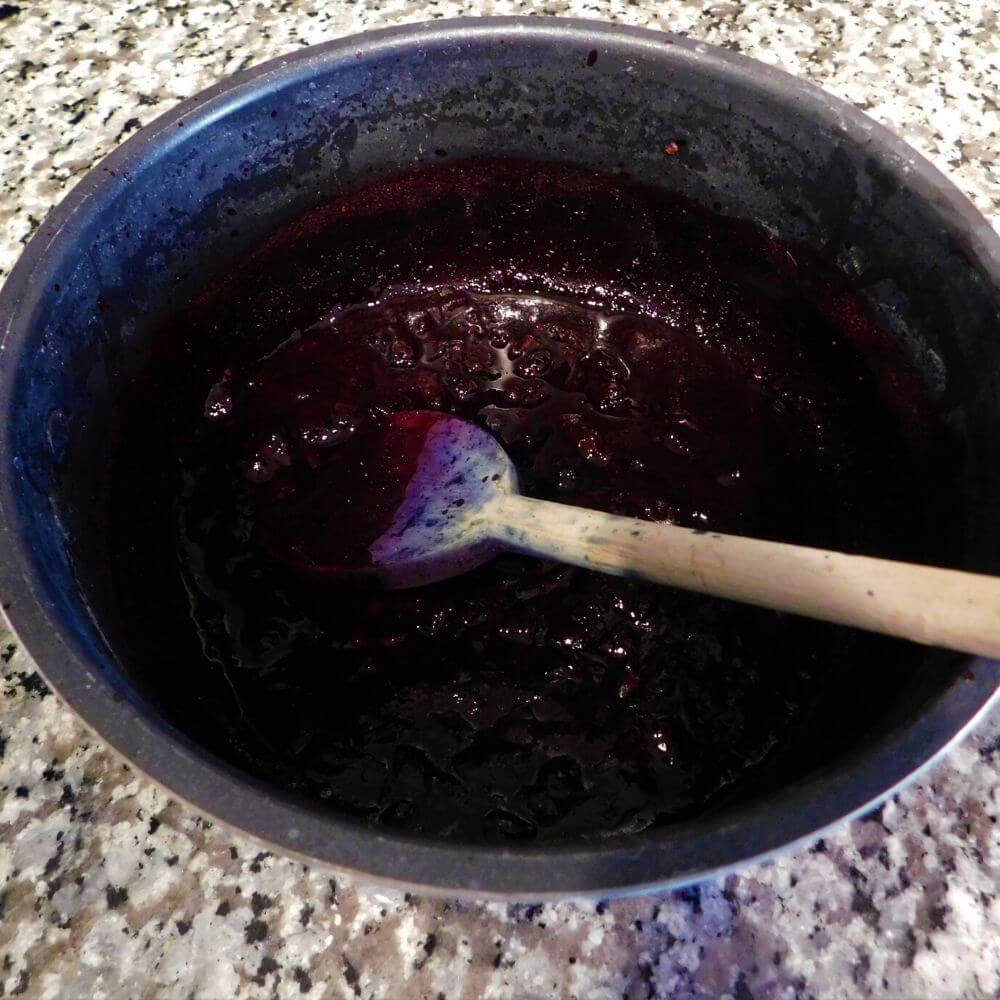
  • Boil the blueberries for 5-10 minutes. The blueberry juice will turn red-purple.
Mash and boil blueberries to make a blue DIY ph indicator
STEP 2
  • Place a strainer or funnel lined with a coffee filter over a container to collect the indictor.
  • Pour the mixture through the strainer to remove the blueberry skins.
  • Push down on the skins in the strainer with a spoon or spatula to squeeze out more liquid.
  • The purple liquid in your container is your indicator solution. The exact color will vary depending on the pH of the water you used.
result of using blueberries to make another diy ph indicator

What to do with your DIY pH indicators 

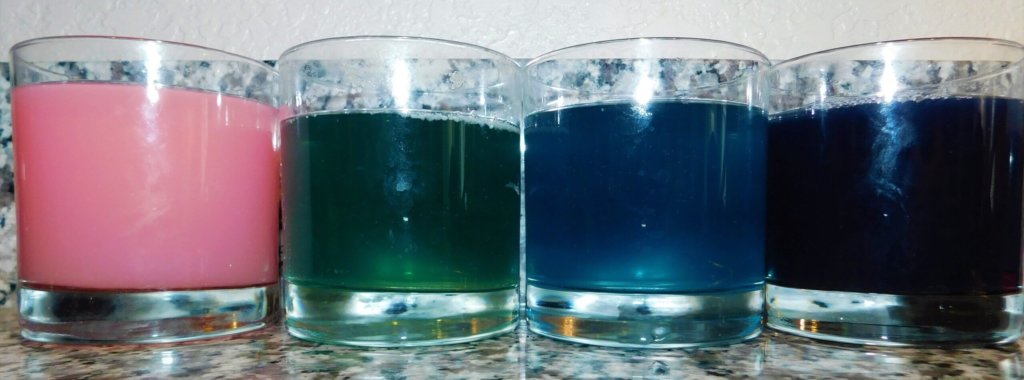
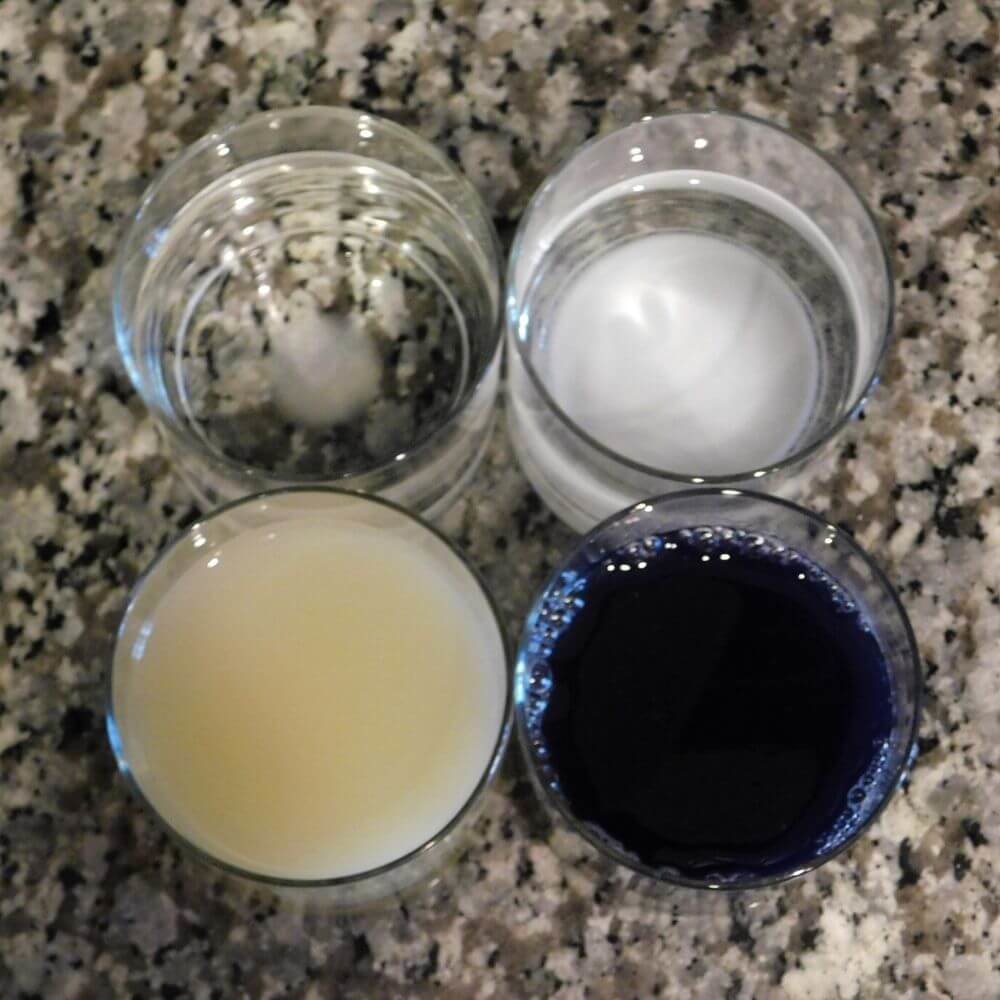
Now that you have your pH indicators, it's time to get to testing! Use household liquids such as salt or distilled water, different fruit juices, milk, liquid detergent or soap, and more!

  • Add each of the substances you would like to test to the cups. (Only add one substance to each cup.) 
  • Add a spoonful of indicator to the first cup, and stir the indicator into the substance.
  • Observe the color changes. What do you see? Encourage your scientist to write down what color each substance turns. You can use crayons or markers to help keep track of color changes.
You can use different household liquids to test you DIY indicators

Expand on the Activity:

  • What color changes did you see? Did you notice any patterns?
  • If you use vinegar or lemon juice, what do you think will happen to the color of the DIY pH indicator if you add baking soda or an antacid tablet

  • For another hands-on chemistry experiment, try making your own STEM slime activity

The Science: pH and pH indicators

  • pH is a measurement of how acidic or basic something is. It is measured on a scale of 0-14.
  • A substance with a pH of 7 (like distilled water) is neutral. A substance with a pH of less than 7 is an acid. The closer the number gets to zero, the stronger the acid is. A substance with a pH of more than 7 is a base. The closer the number is to 14, the stronger the base is.
  • Strong acids and bases can be very dangerous, while weaker acids and bases (those with a pH close to 7) are safer to use.
  • We find acids in many of the foods we eat, as well as in our stomachs. Acids found in foods give them a sour taste.
  • Bases are commonly found in cleaning products and antacid medications. Bases feel slippery and are rare in food because they taste bitter. For reference, think about the taste of soap!
  • pH indicators are compounds that change color in the presence of an acid or a base.
  • Different pH indicators have different ranges. Some may only be able to show whether something is acidic or basic, while others may have a wide range of colors that can show different strengths of acids and bases. Some may be better for showing the pH of acids, while others may be better at showing the pH of bases. In a lab, the best indicator to use depends on the pH range you want to see.

Learn More: Chemistry

  • There are several different definitions of acids and bases in chemistry.
  • A simple chemical definition of an acid is a substance that releases hydrogen ions (H+) when dissolved in water. A simple chemical definition of a base is a substance that makes hydroxide ions (OH-) when dissolved in water or a substance that takes hydrogen ions from an acid.
  • Ions are positively (+) or negatively (-) charged particles of an element.
  • Many red, purple, and blue plants contain chemicals called anthocyanins, which are weak acids that dissolve in water and change color in response to changes in pH. Because of this, plants with anthocyanins like red cabbage and blueberries can easily be made into pH indicators.

Did you make and test your own indicator? We’d love to see how it turned out! Snap a photo of you making or experimenting with your indicator and submit it to our Science Showcase here or use #OSCatHome on social media!

OSC At Home Emails

Get a round up of our latest activities and ideas delivered straight to your inbox so you don't miss a thing!

Find out when we release new resources by following us on social media!


Follow us on social media for even more science fun including fun facts, games, behind-the-scenes photos, and more!


Facebook Logo Instagram Logo YouTube Logo Twitter Logo

Support OSC At Home

In these ever-changing times, it is our pleasure to adapt quality Orlando Science Center experiences to engage with everyone while they are safe at home. Please consider supporting our operating fund to ensure we can continue developing resources today and well into the future. Thank you for your generosity and support!
Salt Watercolor Painting Project • Paint Outside the Box

Brush up on your art skills with this salt & watercolor painting project

Think (or paint) outside the box wiht this unique painting technique! One-part experiment, one-part art experience, this salt & watercolor painting project will give you a wall-worthy finished project, while you learn some STEM skills along the way. 

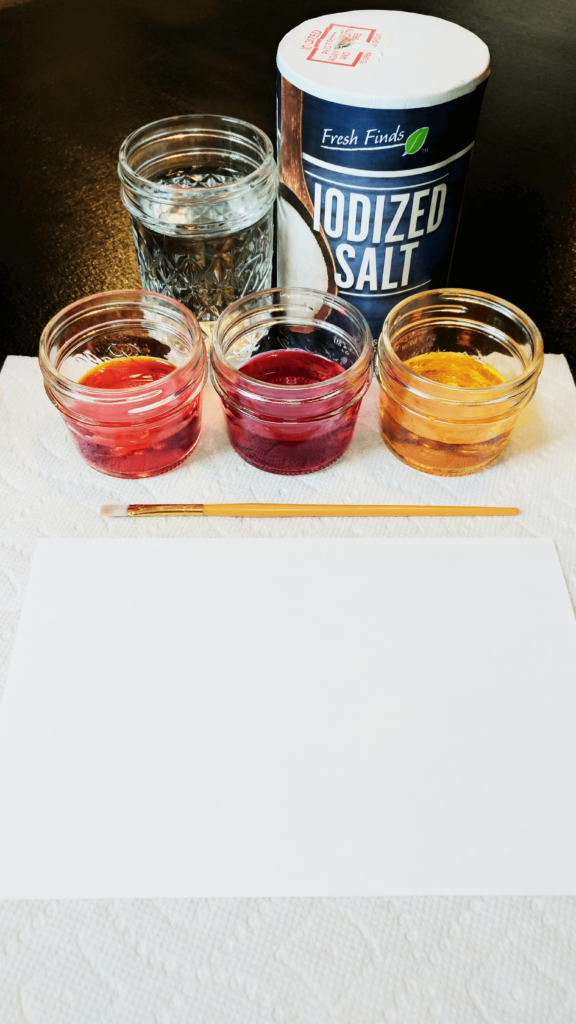
Materials you will need:

  • Paper (Watercolor paper works best, but cardstock or sketchbook paper can also work)
  • Paintbrush
  • Watercolor paints
  • Salt
  • Water to rinse your painbrush
Materials needed to complete Orlando Science Center's salt and watercolor painting project

Directions:

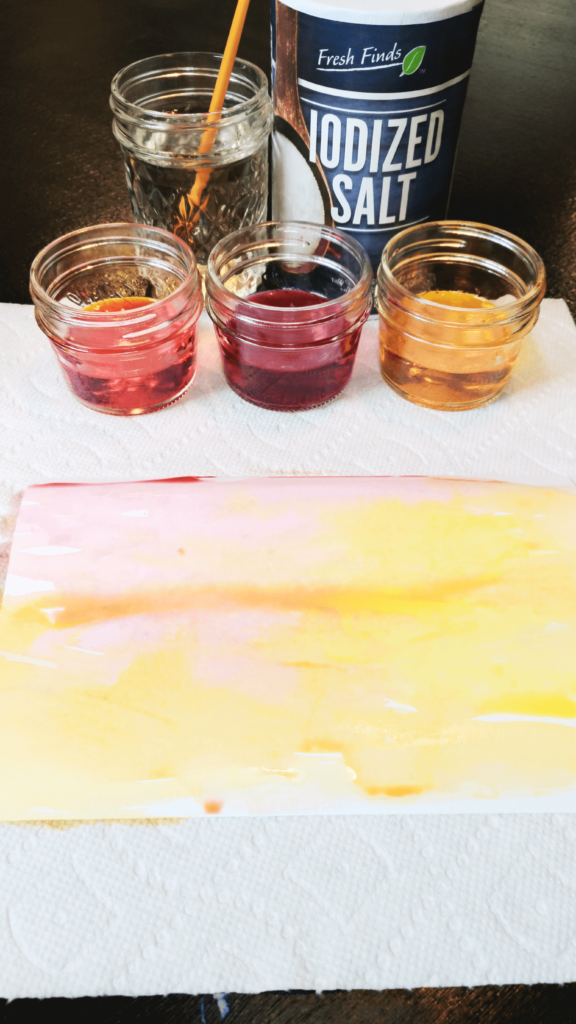
Step 1

Set up your workspace and start painting! Keep in mind, your painting will change when you add the salt, so don’t worry too much about the details!

Begin your saltwater painting project by beginning to paint

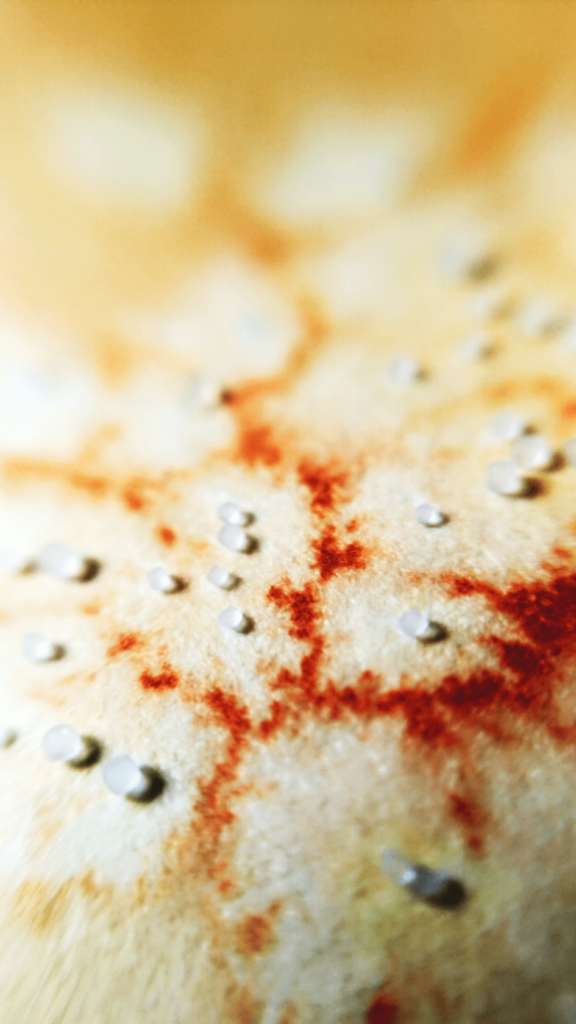
Step 2

While your painting is still wet to the touch, sprinkle it with salt. Watch closely as the salt absorbs the water on your paper, and some of the color along with it! 

Observes salt on your watercolor painting project

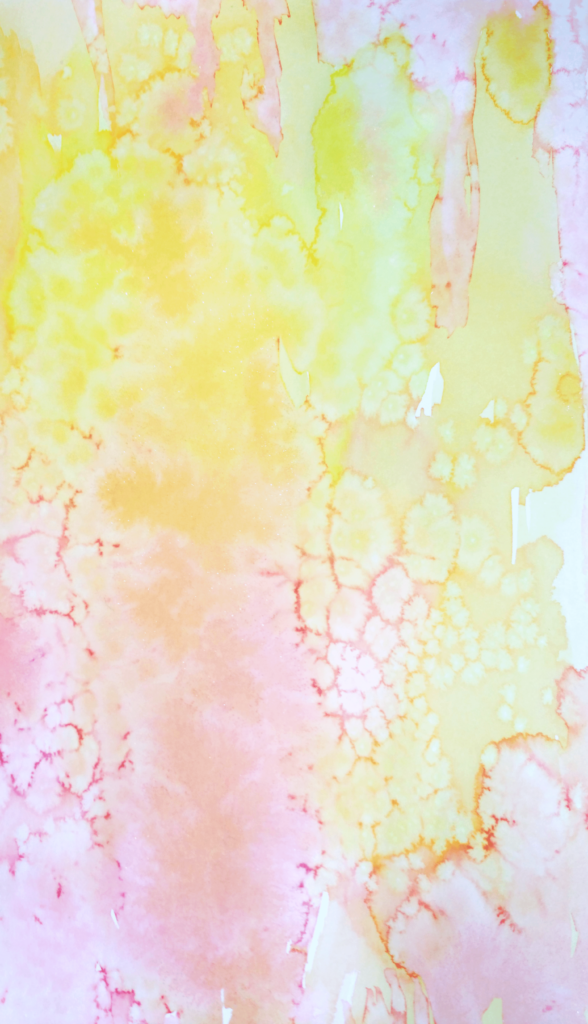
Step 3 

When you’re finished, let your salt and watercolor painting project is completely dry, and gently rub the salt off the paper.

The result of salt and watercolor painting project

Expand on the Activity:

  • Try different kinds of salt! Table salt, sea salt, and rock salt are all great to try. How does the size of the salt grain impact what you see happen on your painting?

  • The amount of water on your paper will have a big impact on how it looks when you add the salt. Experiment with adding the salt at different points as your painting dries to see which effect is your favorite.

  • For another colorful activity with water, try this colorful coffee filter experiment!


Be sure to share your salt watercolor painting project with us by submitting a photo or video to our Science Showcase here or tag Orlando Science Center and use #OSCatHome on social media! You might be featured on our channels. 

OSC At Home Emails

Get a round up of our latest activities and ideas delivered straight to your inbox so you don't miss a thing!

Find out when we release new resources by following us on social media!


Follow us on social media for even more science fun including fun facts, games, behind-the-scenes photos, and more!


Facebook Logo Instagram Logo YouTube Logo Twitter Logo

Support OSC At Home

In these ever-changing times, it is our pleasure to adapt quality Orlando Science Center experiences to engage with everyone while they are safe at home. Please consider supporting our operating fund to ensure we can continue developing resources today and well into the future. Thank you for your generosity and support!
Science Prototyping Fails from Orlando Science Center Staff

Prototyping fails are a part of science. Check out some of ours!

Sometimes you don't get it right on the first try, or the second, or the thirtieth. But that's OK! In science, prototyping fails are a big part of the process. We try to always showcase our best work, but here are some messiest mistakes with you in honor of Mess Month! Enjoy!

Rainbow So-dud

We tried to do a Diet Coke and Mentos style fountain with different colored sodas to make a rainbow! We even invited some guests to watch us prototype, but as you can see it did not make for a quality show.

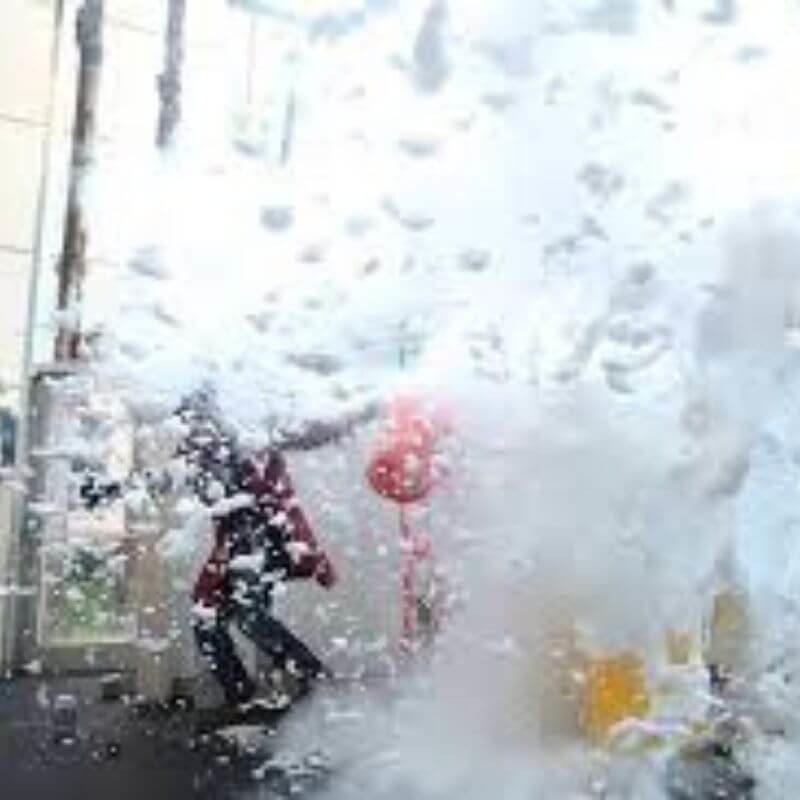
Indoor Foam-splosion

Leading up to Mess Fest last year, we invited some news anchors to come experience the mess with us outdoors. The weather didn’t cooperate with our plans, so we moved inside. We had forgotten how messy a foam explosion really is!

Foam explosion science fail inside Orlando Science Center

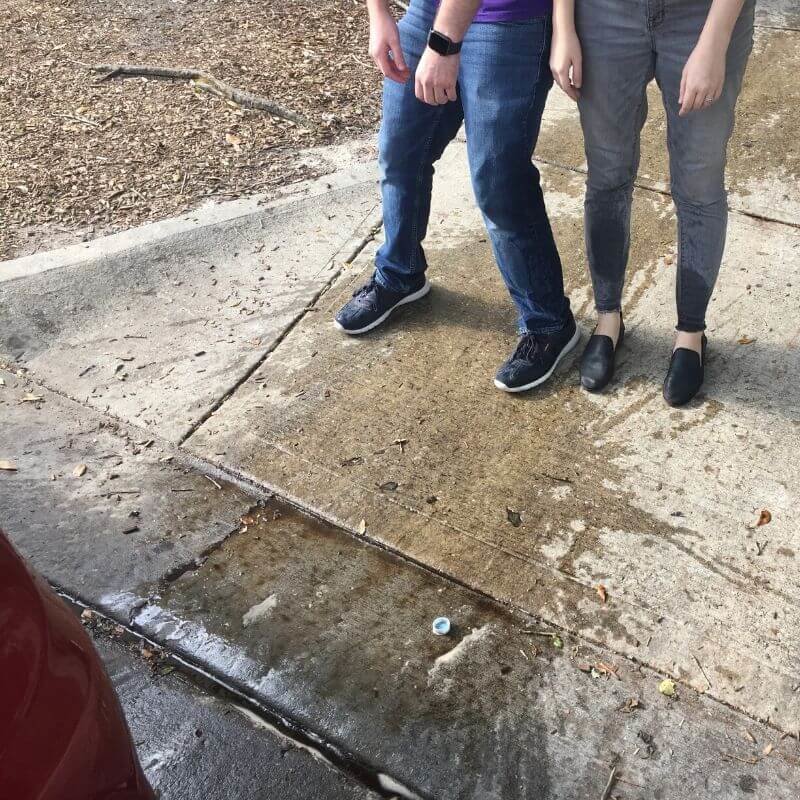
Diet Coke Disaster

During Mess Fest, we do several Diet Coke and Mentos fountains. In 2019, we bought 30 Diet Coke bottles for the occasion. Only 29 made it inside – one exploded at our loading dock.

two people standing in a puddle of diet coke

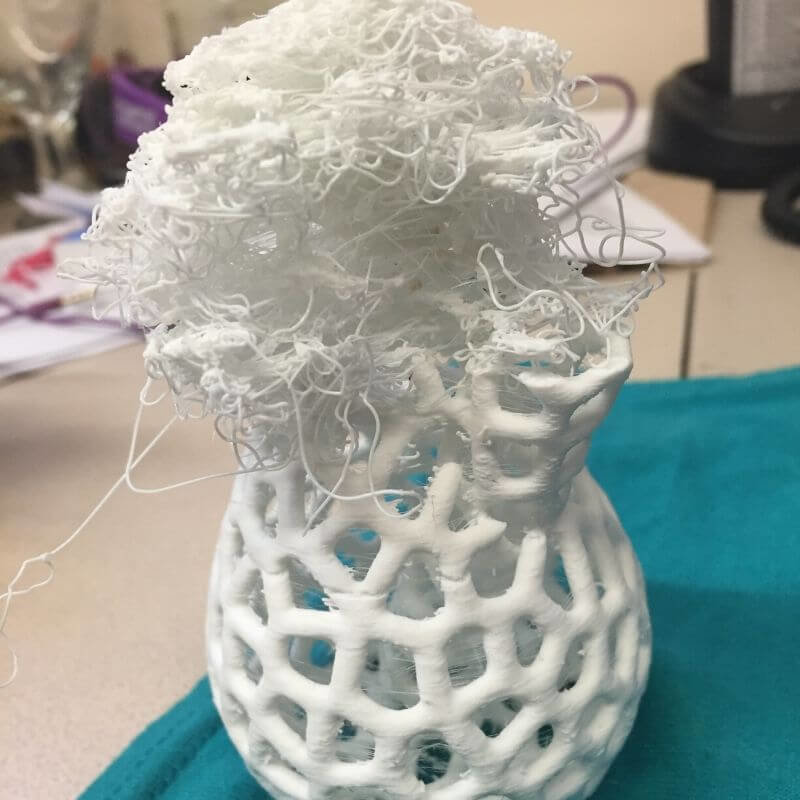
You Don't Want to Eat This Spaghetti

If you’ve done our 3D Design workshop in The Hive, you know how that even the smallest flaw in a 3D print can make things go awry. Whether it was the leveling of the print bed, the design sticking to the extruder, or something else, this vase did not turn out as expected.

3D printed vase prototyping fail

Basket Weaving Misadventure

We’ve been pretty lucky with our open make activities in The Hive. Usually, we prototype for a day or two, make adjustments, and end up with a successful activity. Basket weaving did not go this way! We ended up using most of our supplies in one day and ending up with a tangled mess of paper rods.

A failed attempt at basket weaving

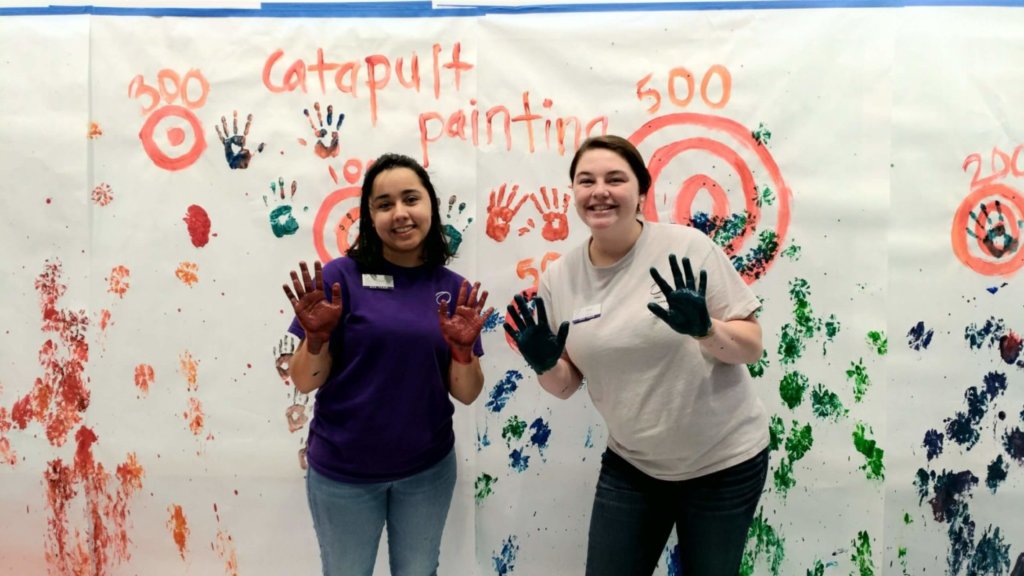
A Colossal Cleanup

KidsTown gets messy on purpose pretty often – sensory play is an engaging way to learn fine motor skills, cause and effect, and more. But the cleanup can be a different story! Our staff and interns had to scrub for a long time to get all the paint off their hands!

Two people with paint on their hands at orlando science center in kidstown

What science mishaps have you had?

Be sure to submit your photos and videos of your experiments to our Science Showcase here or tag Orlando Science Center on social media and use hashtag #OSCatHome for a chance to be featured on our channels! 

As Miss Frizzle says, take chances, make mistakes, and get messy!

OSC At Home Emails

Get a round up of our latest activities and ideas delivered straight to your inbox so you don't miss a thing!

Find out when we release new resources by following us on social media!


Follow us on social media for even more science fun including fun facts, games, behind-the-scenes photos, and more!


Facebook Logo Instagram Logo YouTube Logo Twitter Logo

Support OSC At Home

In these ever-changing times, it is our pleasure to adapt quality Orlando Science Center experiences to engage with everyone while they are safe at home. Please consider supporting our operating fund to ensure we can continue developing resources today and well into the future. Thank you for your generosity and support!
Colorful Coffee Filter Experiment: Defy Gravity with Capillary Action

See water flow upwards with this colorful coffee filter experiment!

Capillary action is the ability of a liquid to flow in narrow spaces. With capillary action, water can even flow upward against gravity!  You can observe capillary action all around you, for example, it's what moves the water up through plant roots and your tears through your tear ducts. 


It's hard to visualize but when you use our steps for this colorful coffee filter experiment to add an explosion of color, it will come together! Once your coffee filters have dried, you can use the them for other craft projects!


For more amazing experiments with water, see how you can freeze time through laminar flow


Materials:

  • Coffee filters
  • Markers
  • Water
  • A  small clear cup or glass

Directions:

STEP 1
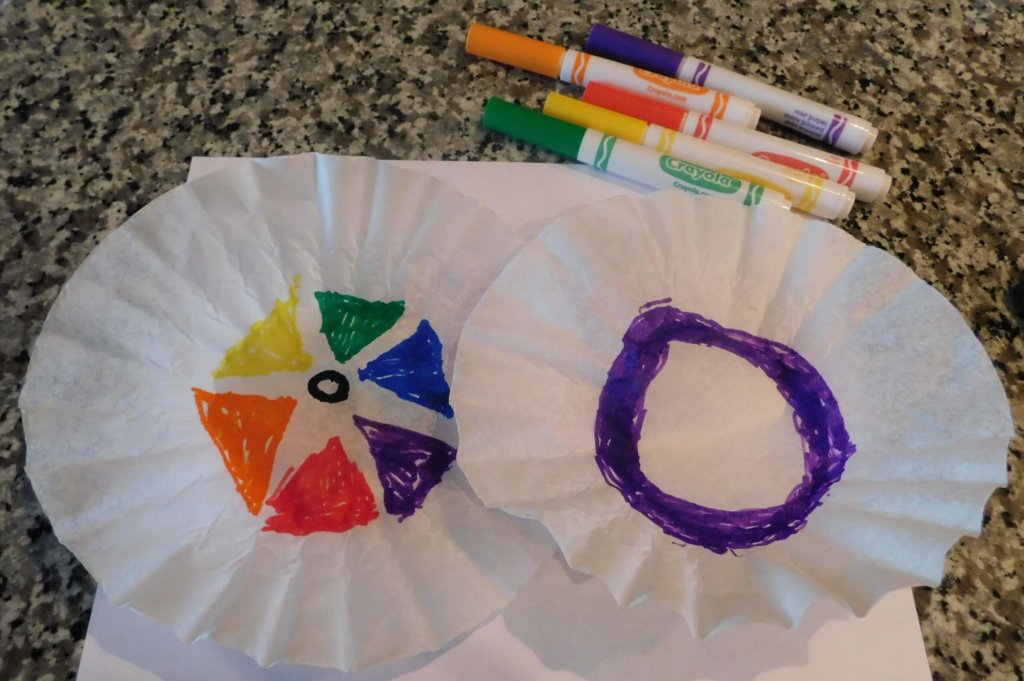
  • Use the markers to draw all over the coffee filter.

    The more colors you use, the more vibrant your colorful coffee filter experiment will be.

STEP 2
  • Fold the coffee filter in half.  Then in half one more time.
colorful markers patterns drawn on coffee filters
STEP 3
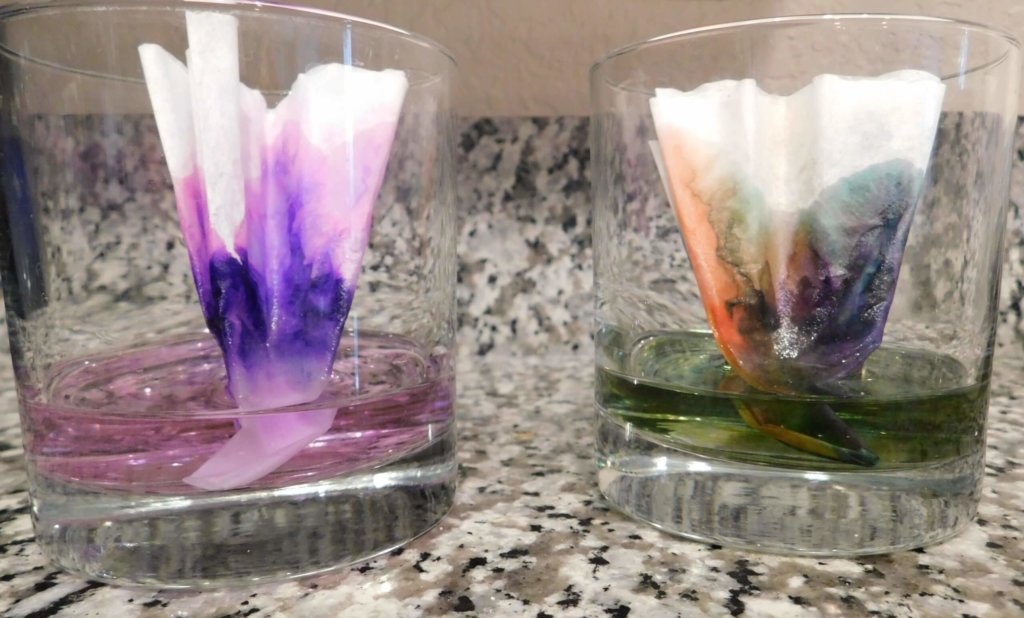
  • Add enough water to the cup to just barely cover the bottom and set your coffee filter in the cup.

This will take a few minutes, so you can use this time to talk about capillary action or ask these questions to expand on the activity:

  1. How do the colors change as they move up the coffee filter?
  2. Do you see any colors mix? What new colors do you see?
  3. Did any colors disappear?
  4. Why do you think this is happening?
     
soak colorful coffee filters in water to see capillary action
STEP 4
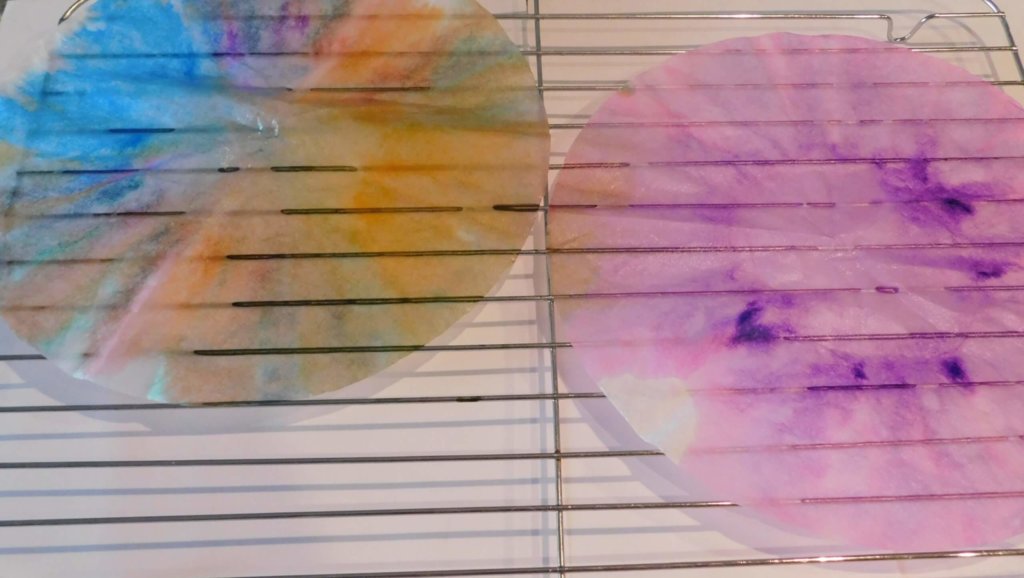
  • Once the water has reached the top of the coffee filter or has stopped moving, remove your coffee filter from the cup and open it up!


STEP 5
  • Let your colorful coffee filter experiment dry and then upcycle it for your next maker project!
Wet colorful capillary coffee filters drying

Expand on the Activity:

  • What happens if you only use one color, like green or black? How does the color of the ink change as it spreads out? Why do you think this happens?
  • Once they’ve dried, the coffee filters can be used as colorful tissue paper in craft projects. Try making flowers, snowflakes, monsters, butterflies, or any other creation you can think of!


If you had fun learning about capillary action and snapped some photos, be sure to submit it to our Science Showcase here or tag Orlando Science Center and use #OSCatHome on social media! You might be featured on our channels. 

The Science: Capillary Action & Chromatography

  • Water molecules are “sticky.”
    • Water molecules like to stay close together because of a force called cohesion.
    • However, they also are attracted and like to stick to other substances, like glass, cloth, soil, and fibers. This is known as adhesion.
    • When there is more adhesion than cohesion (or when the water molecules stick the surrounding surfaces more than each other), capillary action occurs, causing the water molecules to move up or across the surface.
  • In your experiment, water uses this process to move along the tiny gaps in the fiber of the coffee filter. It will keep going up the filter until the pull of gravity is too much for it to overcome.
  • Where does capillary action occur in the real world?
    • Plants suck up water through their roots, and capillary action is what moves the water up through the roots and throughout the plants.
    • Your tears undergo capillary action to move through your tear ducts.
    • Capillary action is in play in sucking water up a straw.
  • As the water moves up the coffee filter, it dissolves the ink from the markers. The dissolved ink travels with the water and spreads out, coloring the coffee filter.

Learn More: Paper Chromatography

  • Inks are mixtures of many different-colored molecules. Paper chromatography separates out the molecules, showing all the individual colors.
  • How does this work?
  • A solvent (a liquid that dissolves a substance) is used is dissolve the ink. The most common solvents in paper chromatography are water and rubbing alcohol.
  • Through capillary action, the solvent keeps moving up the paper and carries the different molecules in the ink with it.
  • The different-colored molecules are also different sizes. Larger molecules move more slowly and not as far. Smaller molecules move more quickly and farther. The difference in molecule sizes causes the colors to separate.
  • Scientists use paper chromatography to separate colored pigments, to monitor reactions, to isolate and purify substances, to analyze food dyes, and to investigate evidence found at crime scenes.

OSC At Home Emails

Get a round up of our latest activities and ideas delivered straight to your inbox so you don't miss a thing!

Find out when we release new resources by following us on social media!


Follow us on social media for even more science fun including fun facts, games, behind-the-scenes photos, and more!


Facebook Logo Instagram Logo YouTube Logo Twitter Logo

Support OSC At Home

In these ever-changing times, it is our pleasure to adapt quality Orlando Science Center experiences to engage with everyone while they are safe at home. Please consider supporting our operating fund to ensure we can continue developing resources today and well into the future. Thank you for your generosity and support!
How to Make Marbleized Paper to Create Custom Cards and Artwork

Create a stunning masterpiece when you follow these step-by-step instruction for how to make marbleized paper – a sensory STEAM project for kids and adults alike!


It’s always fun to use materials in new ways, and this is likely one way you’ve never used shaving cream before! Use our directions for how make marbleized paper and follow along with the questions included to help you make observations as you create! Not only will you have a wall-worthy finished project, you'll also learn some neat STEM skills along the way. 

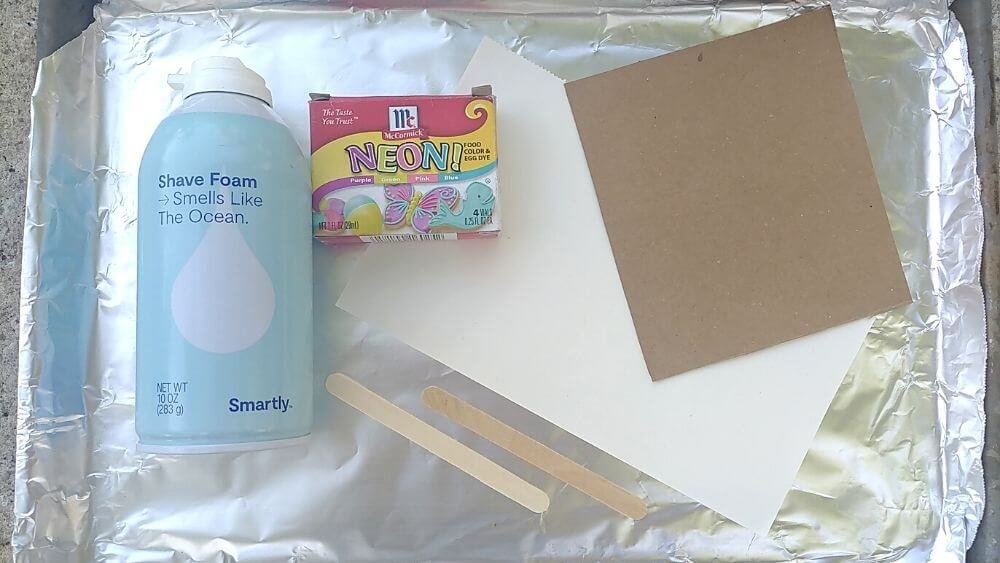
Materials:

  • Shaving cream 
  • Paper (start with a heavier weight paper, like cardstock or construction paper) 
  • Food coloring* or washable paint such as liquid watercolor or tempera paint
  • Popsicle sticks 
    (If you don’t have popsicle sticks, read the directions
    carefulland substitute in a different tool. Tooth picks are great for creating the marble effect and a ruler or spatula work well to remove the shaving cream from your paper at the end!)


*Warning: Food coloring can stain! If you're worried about mess, substitute washable paint. Either way, mess-friendly play clothes are recommended for this activity!

Material for how to make marbleized paper

Directions:

STEP 1
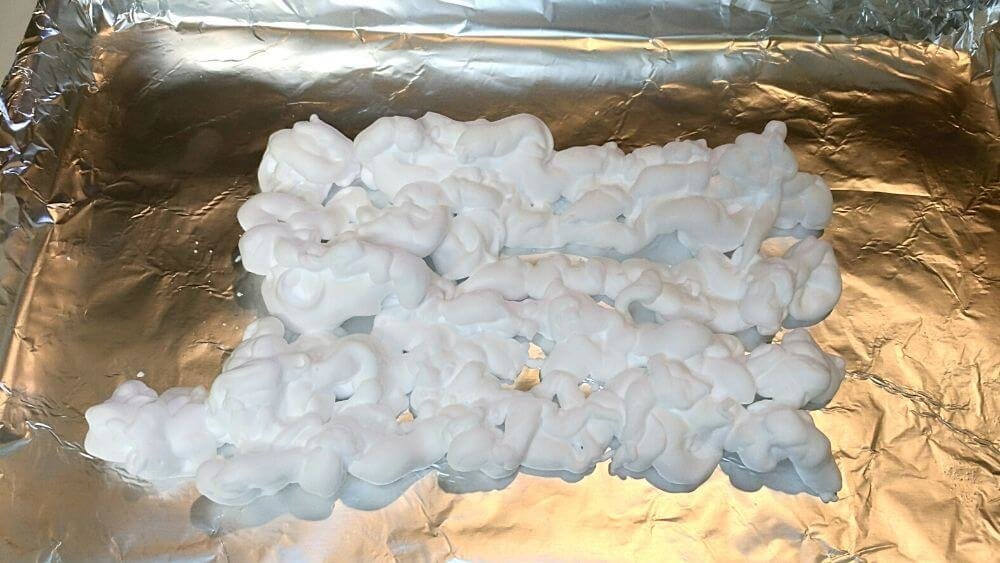
  • Spray some shaving cream onto protected work surface.
STEP 2 
  • Spread the shaving cream out so it’s about ½ an inch thick.  

    How does the shaving cream feel? Is it a liquid or a solid? Do your best to describe it. 
Spread shaving cream onto protected work surface
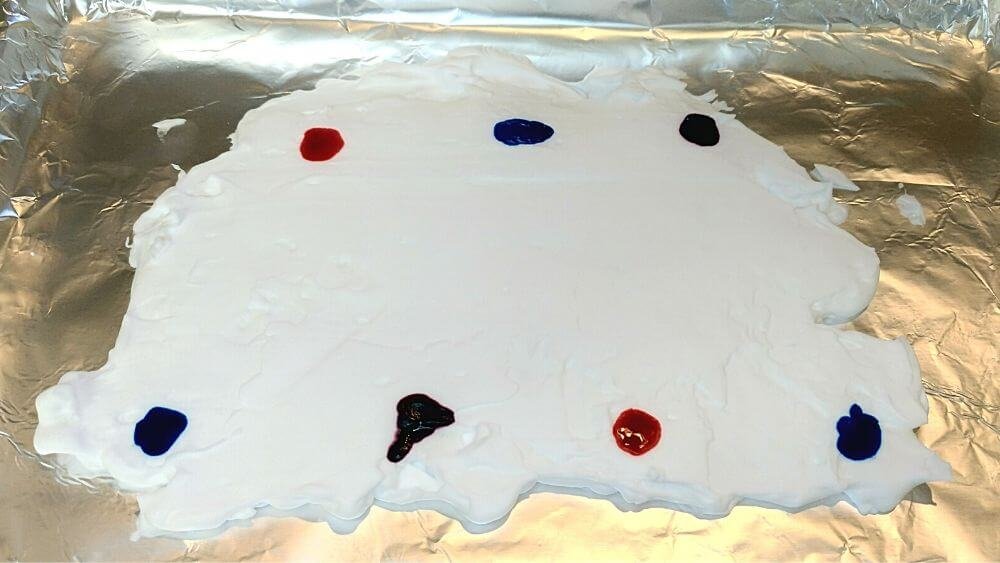
STEP 3
  • Add a few drops of food coloring on top of the shaving cream. Make sure you leave some space between each drop. 

    What do you observe as you drip the food coloring onto the shaving cream? Does it mix in? Does it sit on top? Sink to the bottom? Spread out flat? What do you see happening? 
Add dye to shaving cream make marbleized paper
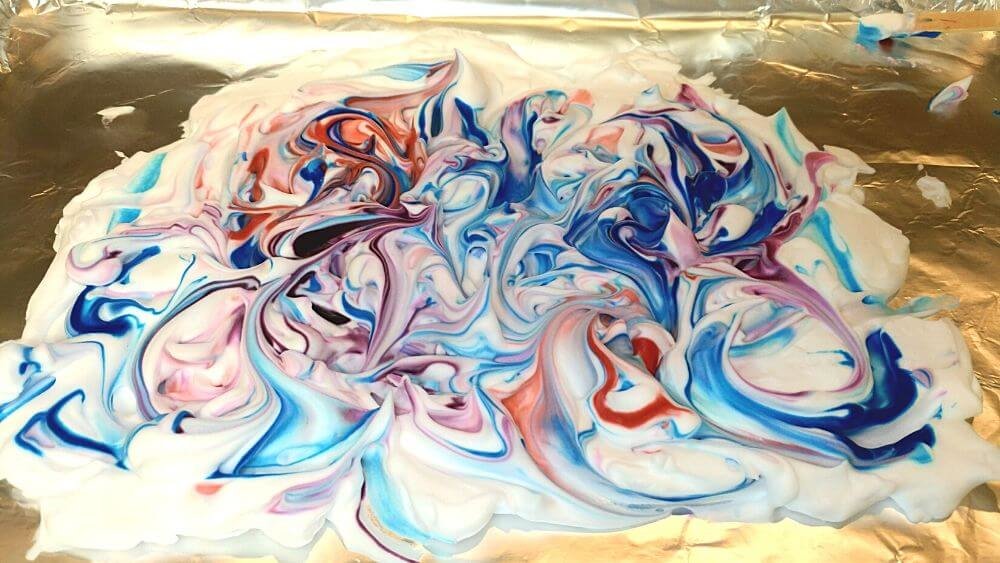
STEP 4
  • Use a popsicle stick to drag the food coloring around on the top of the shaving cream, creating a marbled effect. 

    Do the colors mix with the shaving cream? Do they stay separate? Do they mix with each other? 
Swirl shaving cream colors together to make marbleized effect
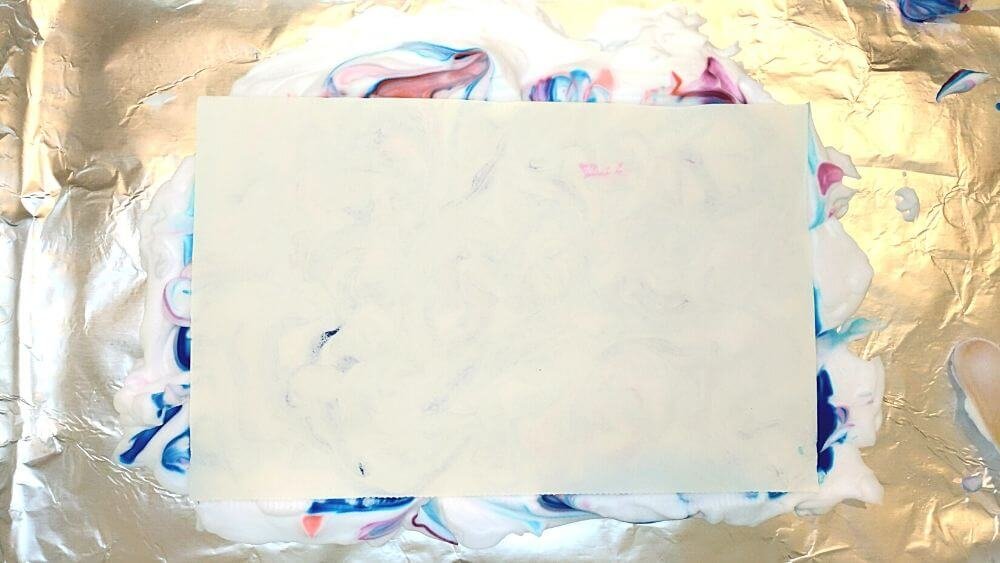
STEP 5
  • When you’re happy with the marble you’ve created, place your paper on top of the shaving cream and food coloring and gently press down. Depending on how thick your paper is, you may see the marble start to show through the other side. Let it sit for about 5-10 seconds.  
STEP 6
  • Carefully remove your paper and place it shaving cream side up on a protected work surface. 
Place paper on shaving cream to create marbleized paper effect
STEP 7
  • Use a popsicle stick to very gently scrape the shaving cream off your paper. This will likely take a few passes and it may help to remove the shaving cream from your popsicle stick between each pass.

    The food coloring has soaked into your paper, leaving behind a marbled pattern! How is the design on your paper similar to the design you saw on your shaving cream? How is it different? 

STEP 8
  • Let your paper dry for a few minutes. Once dry, use a tissue or paper towel to brush off any leftover little bits of shaving cream.
Swirl shaving cream colors together to create marbleization

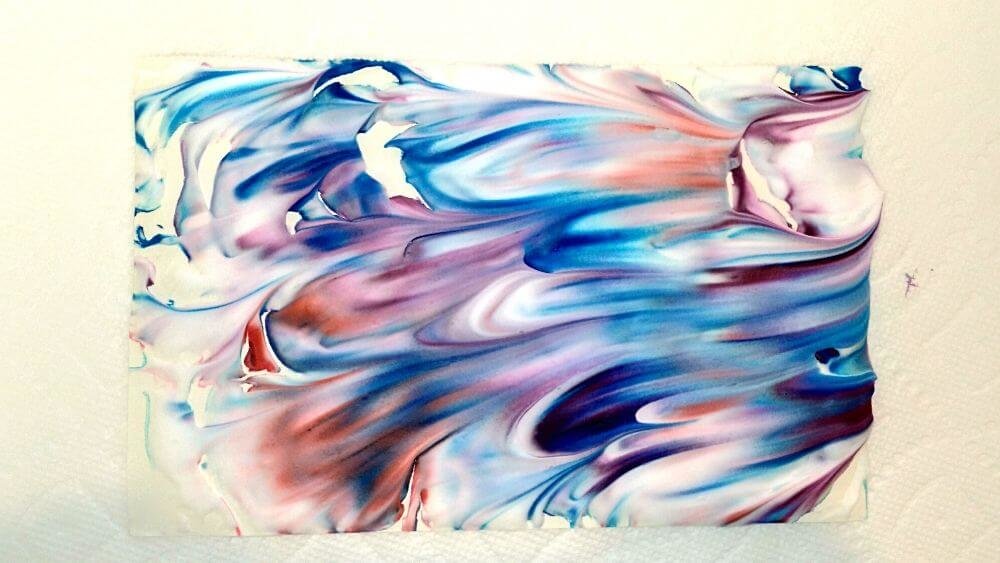
Display your marbleized paper with pride, or add it to a larger project! Be sure to share your mess-terpieces with us by submitting them to our Science Showcase here or tag Orlando Science Center and use #OSCatHome on social media! You might be featured on our channels. 


NOTE: It’s best to let the paper dry completely before cutting it or writing on it.

Expand on the Activity!

  • Try this again and try using more or less food coloring. How do your results change? 
  • Test out different kinds of paper. What happens when you try this with printer paper, newspaper, tissue paper, cardboard, or colored construction paper? What kind of paper works best? 
  • Experiment with making different shapes and patterns with the food coloring in the foam. How many different patterns can you make? 

OSC At Home Emails

Get a round up of our latest activities and ideas delivered straight to your inbox so you don't miss a thing!

Find out when we release new resources by following us on social media!


Follow us on social media for even more science fun including fun facts, games, behind-the-scenes photos, and more!


Facebook Logo Instagram Logo YouTube Logo Twitter Logo

Support OSC At Home

In these ever-changing times, it is our pleasure to adapt quality Orlando Science Center experiences to engage with everyone while they are safe at home. Please consider supporting our operating fund to ensure we can continue developing resources today and well into the future. Thank you for your generosity and support!
STEM Slime Activity: Explore Physics with This Oobleck Recipe

If they have fun while they're doing it, does it even count? Make a hypothesis and test it with this STEM slime activity. 

Enjoy messy science with one our favorite activities at the Orlando Science Center! Oobleck is a non-Newtonian fluid, meaning it can act like a solid or a liquid depending on what you do to it. With this STEM slime activity, you can learn about the states of matter and viscosity, practice lab skills like measuring and mixing, and have some ooey-gooey fun!


Be sure to explore the science behind oobleck toward the bottom of this page and try our other slime recipe so you can compare it to your oobleck! 


Recommended age range: Any age; younger scientists may need help measuring but will have fun mixing and playing. Older scientists can explore oobleck’s properties and the topics of polymers and viscosity.


Warning: This activity is messy! Mess-friendly play clothes are recommended for this activity! You may also want to set out newspaper or other materials to protect your surfaces, or work in an area you don’t mind getting messy. However, once oobleck dries, it can easily be cleaned up!

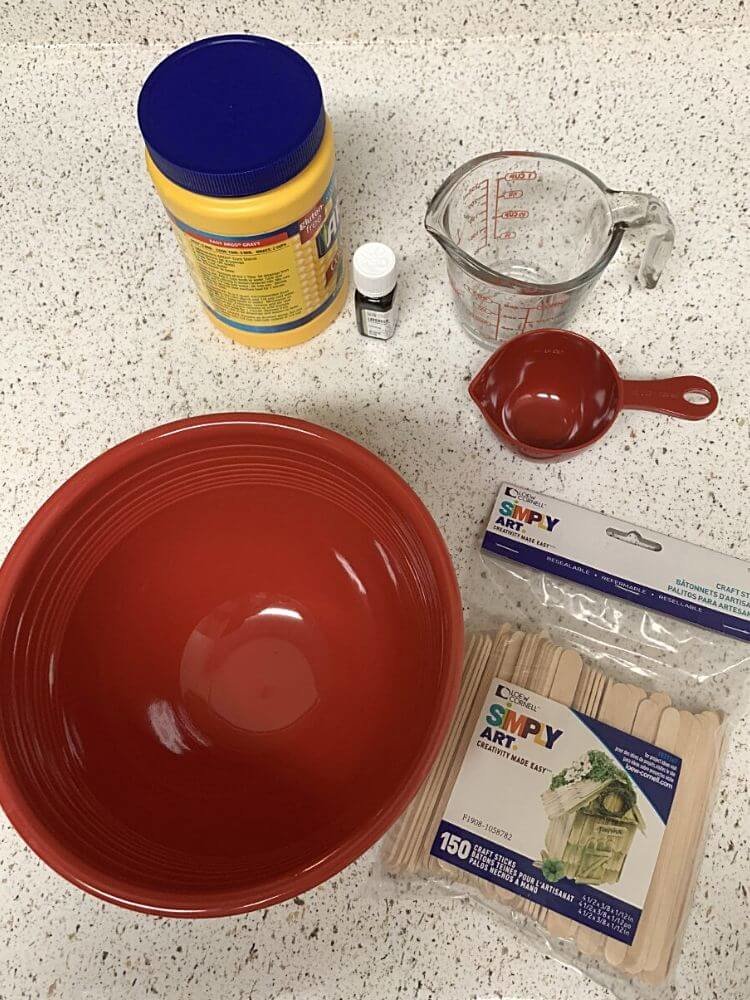
Materials:

  • ½ cup cornstarch

  • ¼ cup water

  • Optional: Washable paint or food coloring 

  • Optional: Scent (for example, orange scented oil or peppermint extract)

  • Mixing bowl

  • Craft stick or other stirring utensil

Photo of materials for STEM slime activity

Directions:

Step 1

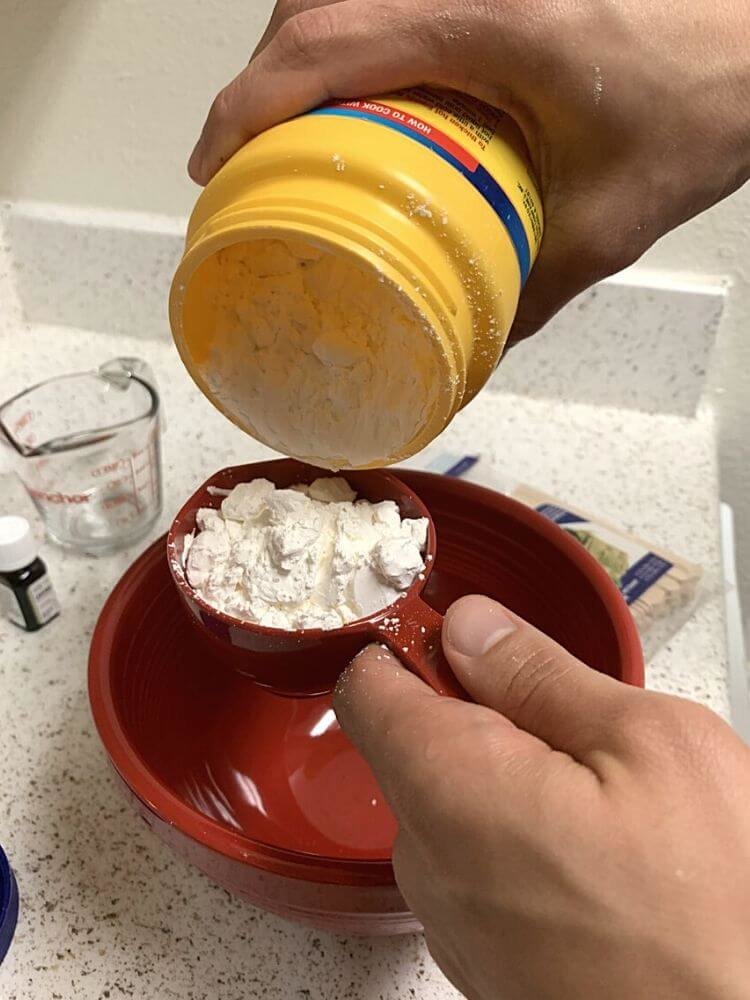
Measure ½ cup cornstarch and add it to your mixing bowl.

Add cornstarch to mixing bowl

Step 2

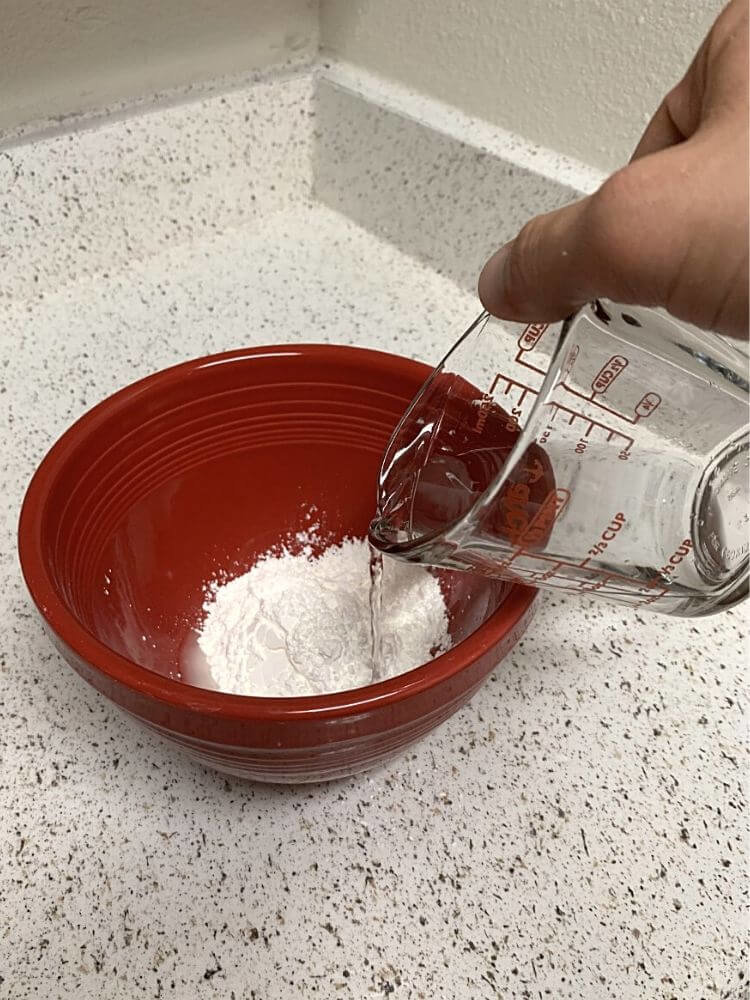
Next, measure ¼ cup water and add it to your mixing bowl.

Add water to mixing bowl

Step 3 (optional)

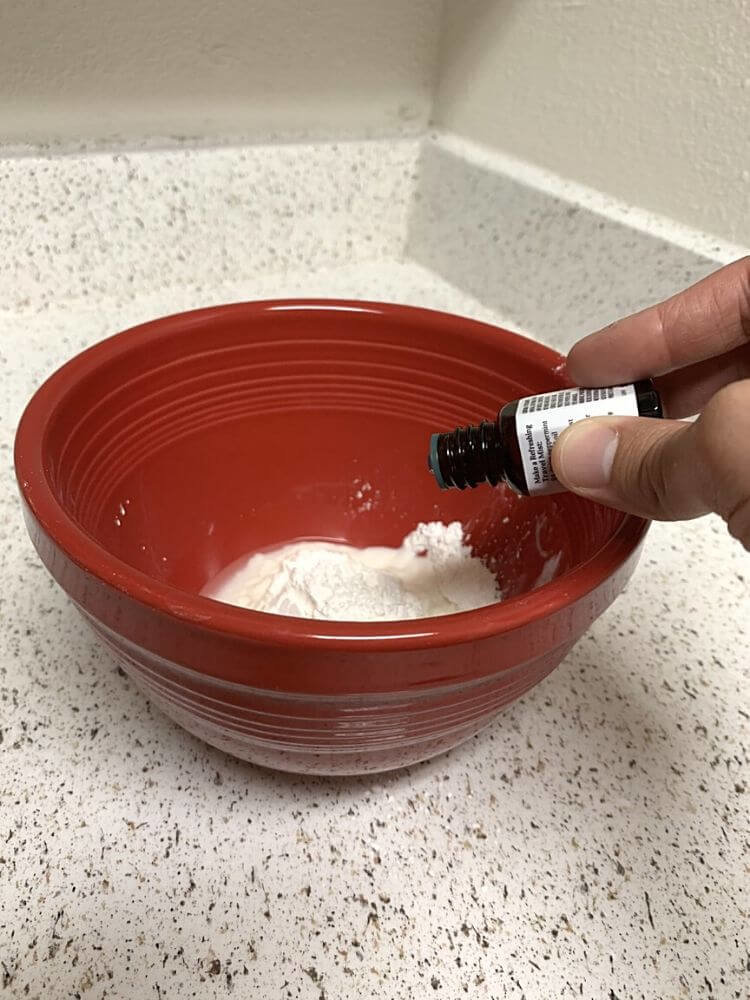
Add a few drops of color or scent to your mixture.

Add coloring or scent to mixing bowl

Step 4

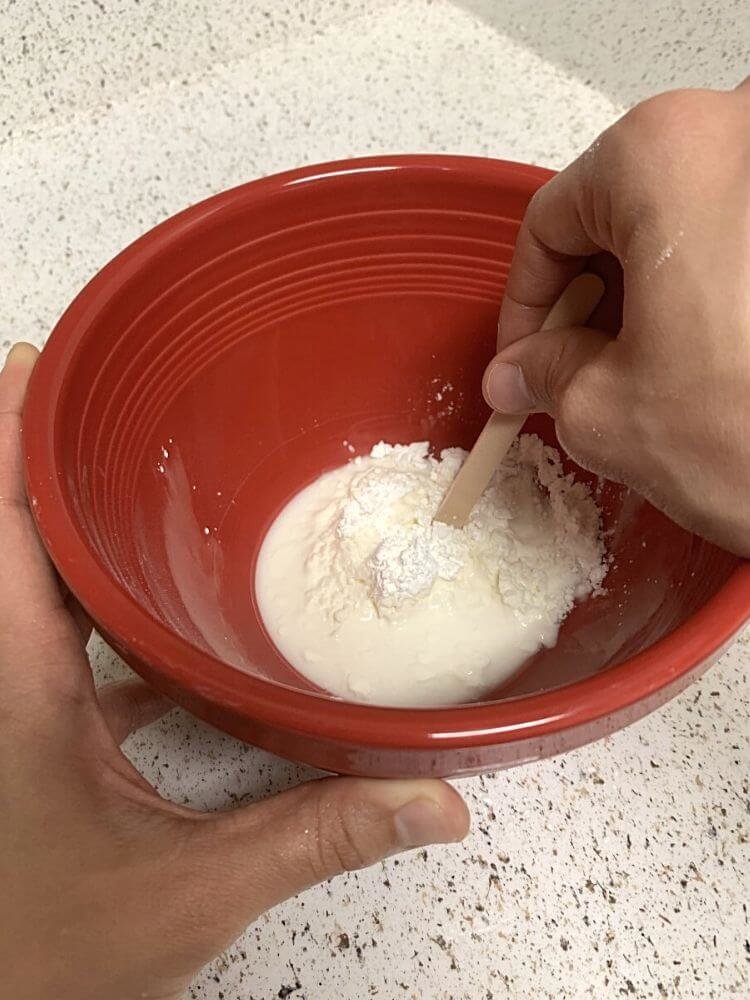
Stir until your mixture looks like glue... That’s it! You’ve made oobleck!

Stir STEM slime activity ingredients together

Step 5

Try some of the ideas below to expand on this activity and learn about oobleck's properties.

Experiment with oobleck STEM slime activity

Step 6

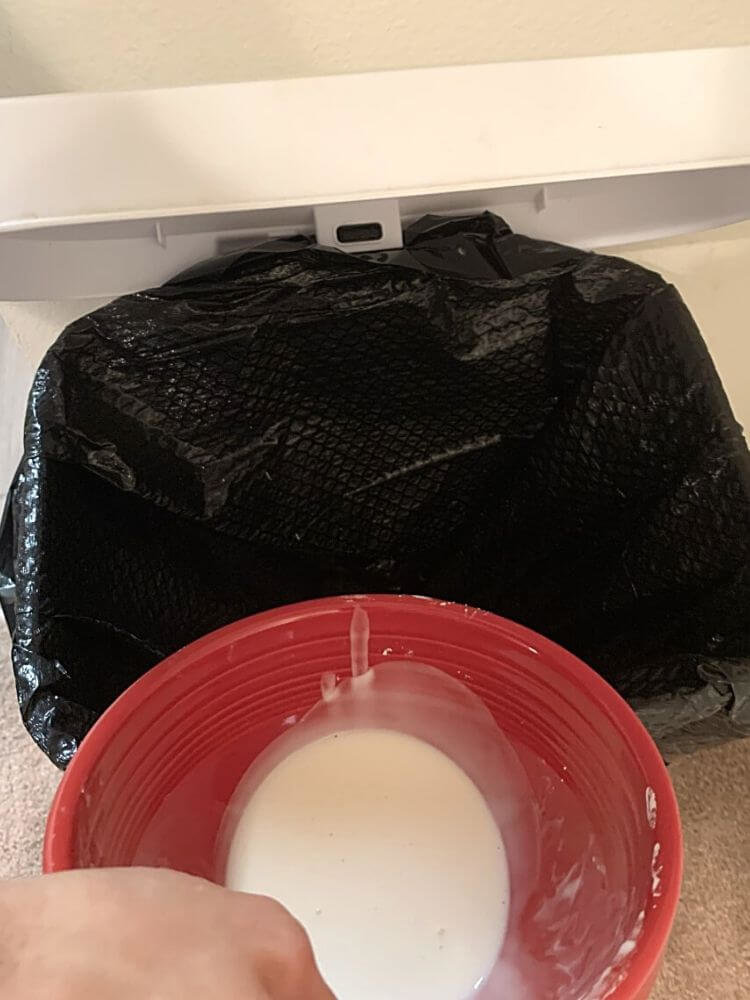
Throw your oobleck in the trash when you are finished. It will mold overnight and clogs drains!

Always dispose of oobleck in the trash can

Experiments:

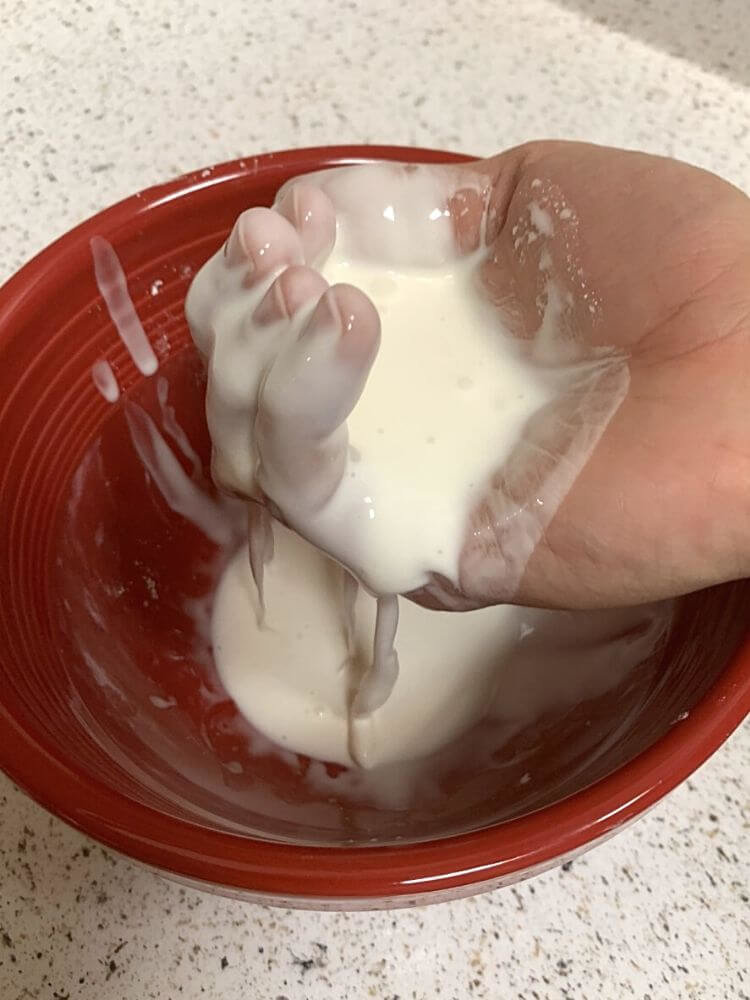
Once you’ve made your oobleck, it’s time to do some experiments! Before you perform you start this STEM slime activity, make some predictions. Is the oobleck a solid, a liquid, or a gas? What will happen if you poke it? What will happen if you let it sit in your hand?


TRY:
  • Poking the oobleck with your craft stick. How does it feel?
  • Gently stepping your craft stick on top of the oobleck. What happens?
  • Holding the oobleck in your hand. What happens when you squeeze it? What happens when you let go?

Expand on the Activity:

  • What happens if you pour oobleck through a container with holes in it, like a colander or a strainer?

  • What happens if you put plastic or LEGO figures in the oobleck? What stories can you tell? Use your imagination!

  • Use highlighter water to make oobleck that glows under a blacklight!

  • Make more! This recipe gives you a small amount of oobleck, but as long as you add twice as much cornstarch as water, you’ll have oobleck!

The Science Behind this STEM Slime Activity: Why Does Oobleck Act Like This?

  • Oobleck is made up of molecules called polymers, which are arranged in long chains. A great example of a polymer is a rubber band. The molecules can be stretched out or bundled up and stuck together like wet spaghetti.
  • When you put pressure on the oobleck, the molecule chains bundle up and stick together, making the oobleck act like a solid.
  • When there is no force on the oobleck, the polymers stretch out, and the oobleck acts like a liquid.
  • Since oobleck can be a solid or a liquid depending on whether you apply force to it, it is called a non-Newtonian fluid.

Learn More: Physics

  • In a solid, the molecules are tightly packed and vibrate in place. In a liquid, the molecules slip past each other, allowing liquids to flow. But have you ever noticed some liquids flow faster than others? Think about water versus honey. What makes them flow differently?
  • You can find out by rubbing your hands together quickly. What do you feel? That heat is from friction, or force that holds back the movement of a sliding object. As the molecules in a liquid slide past each other, they generate friction, too. The more friction they generate, the slower they move. Why is that? The force of the friction is holding back their movement, effectively slowing them down.
  • The friction between molecules in a liquid is called viscosity. The more viscous a liquid, the more energy it takes for it to flow. High visocity liquids, like honey or corn syrup, also tend to be thicker.
  • So what about oobleck? Oobleck is called a non-Newtonian fluid because it breaks the rules of Newtonian viscosity. On Earth, they’ll always be subject to the laws of gravity and the laws of motion Newton described. But the viscosity of oobleck, or the interactions and friction between the molecules, changes based on force you apply to applied to it.

Did you make your own oobleck and perform any experiments with it? We’d love to see how it turned out! Snap a photo of you making, testing, or playing with your oobleck and submit it to our Science Showcase here or tag Orlando Science Center and use #OSCatHome on social media! You might be featured on our channels. 

OSC At Home Emails

Get a round up of our latest activities and ideas delivered straight to your inbox so you don't miss a thing!

Find out when we release new resources by following us on social media!


Follow us on social media for even more science fun including fun facts, games, behind-the-scenes photos, and more!


Facebook Logo Instagram Logo YouTube Logo Twitter Logo

Support OSC At Home

In these ever-changing times, it is our pleasure to adapt quality Orlando Science Center experiences to engage with everyone while they are safe at home. Please consider supporting our operating fund to ensure we can continue developing resources today and well into the future. Thank you for your generosity and support!
How to Make Bubble Snakes With Items You Already Have at Home!

Learn how to make bubble snakes with this STEM-sational DIY activity!

Bubbles, bubbles, everywhereWhat are the differences between one bubble and lots of bubbles? We'll show you how to make bubble snakes in the directions below so you can find out! 
 

Our Early Childhood Specialists in KidsTown put together this fun bubble exploration activity so you can practice your observation and critical-thinking skills at home. 


There is something magical about experimenting with bubbles, isn't there? For more bubbly goodness, check out our fan-favorite Un-Poppable Bubble recipe.

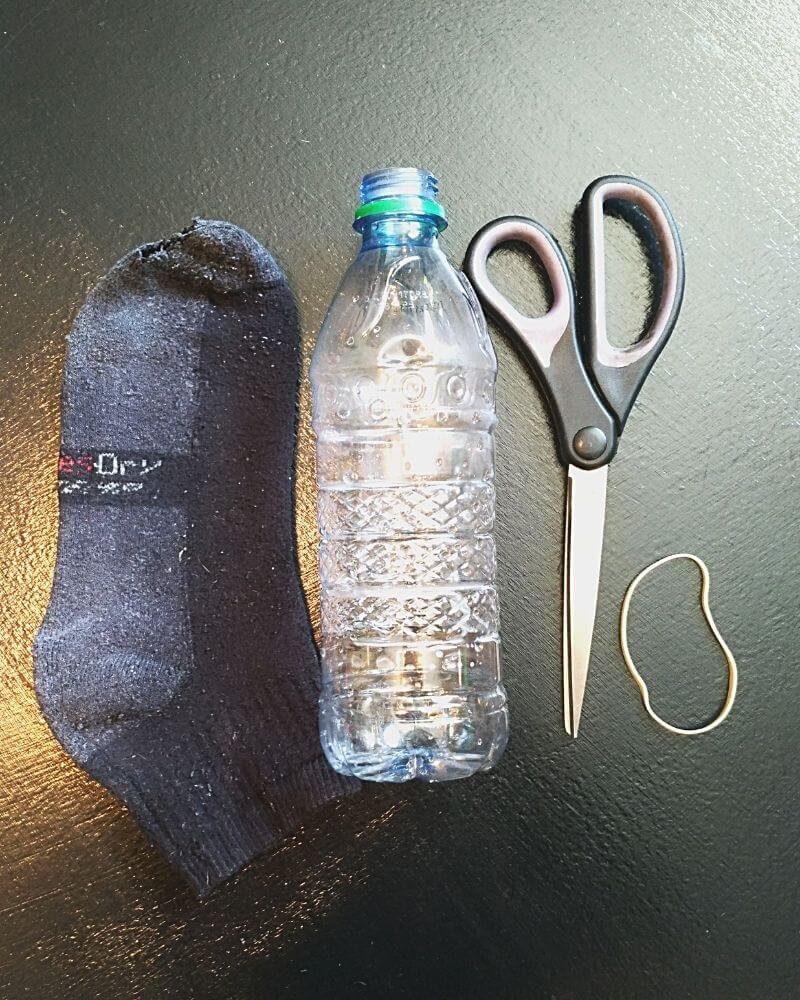
Materials:

  • Plastic bottle 
  • A sock 
  • Rubber band 
  • Scissors (and adult supervision)
  • Bubble solution*
  • A wide, shallow container 
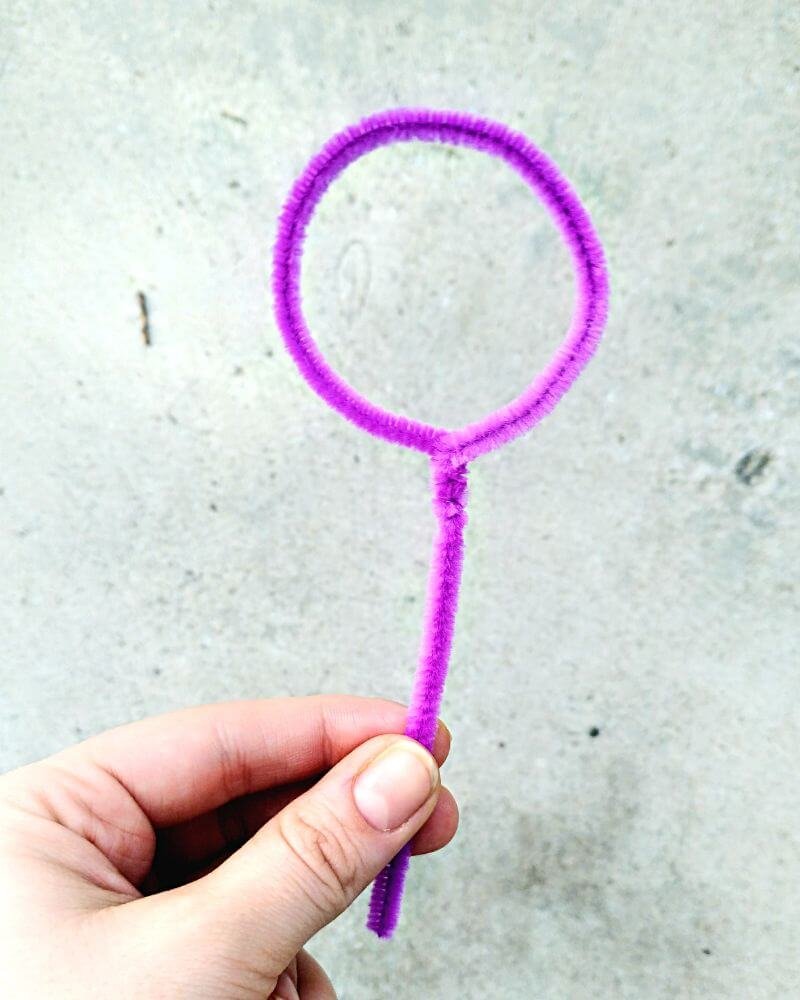
  • A bubble wand or a pipe cleaner 
  • Optional: Washable paint for extension activity
Materials for how to make a bubble snake

*If you don't have bubble solution on hand, a mixture of dish soap and water will work for this project but you may have to do some tinkering with the amount of dish soap you add if you'd like to blow bubbles with a regular bubble wand. Sounds like another great opportunity to experiment to us!
Directions:

  • Use a bubble wand* to blow one bubble.

    Observe your bubble closely. What shape is the bubble? What colors do you see? How big is the bubble? How does the bubble move? What does it look like when the bubble pops? 


    Write down or draw your observations so you can reference them later!


    *If you don’t have a bubble wand handy, a pipe cleaner twisted to look like one works, too!

    Once you’ve completed your bubble observations, you’re ready to learn how to make bubble snakes!
pink pipecleaner twisted into bubble wand
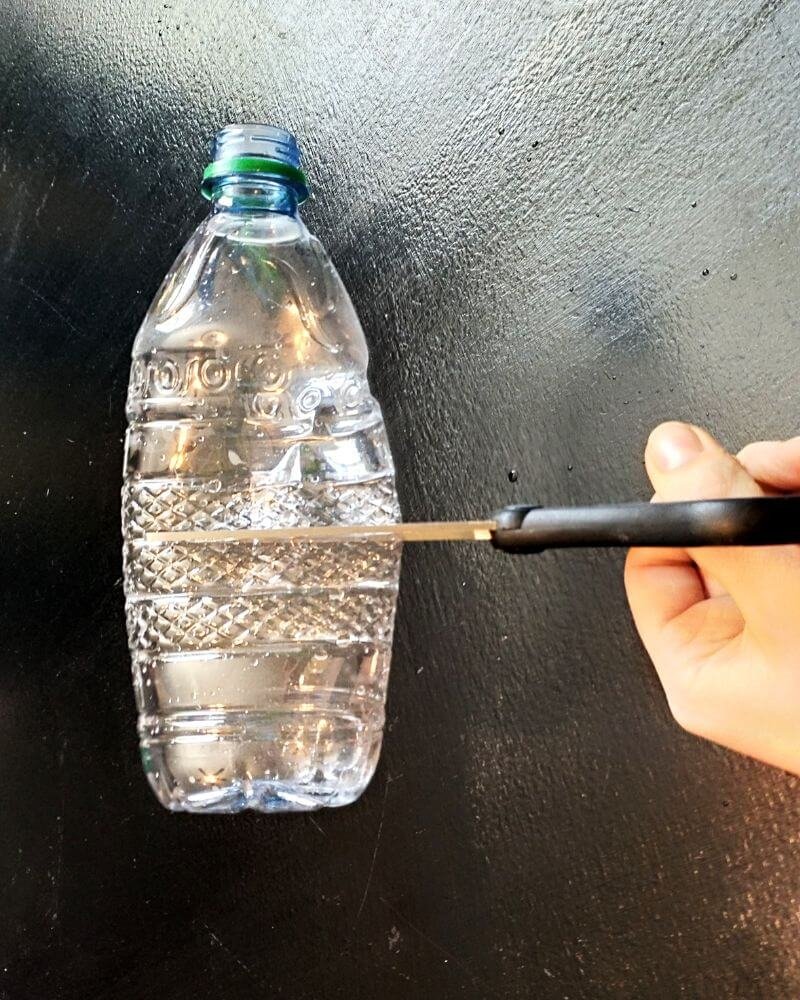
  • Carefully cut the bottom off your plastic bottle. 

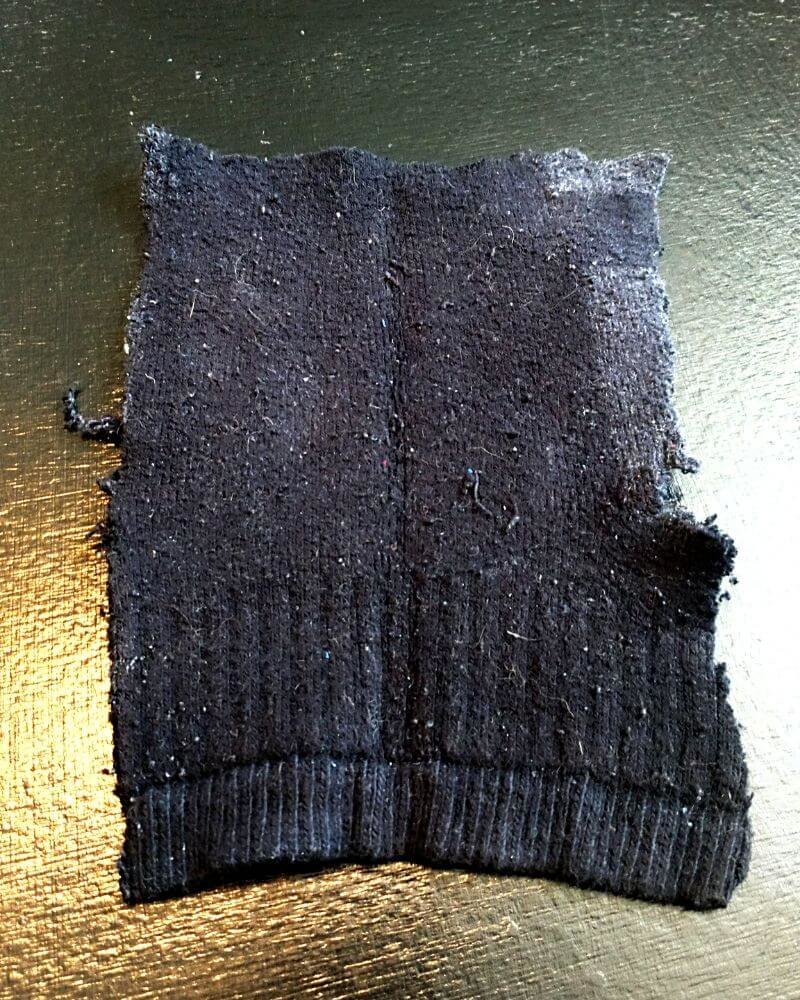
  • Cut your sock into a square that fits over the new opening in your plastic bottle with some room to spare on each side. 

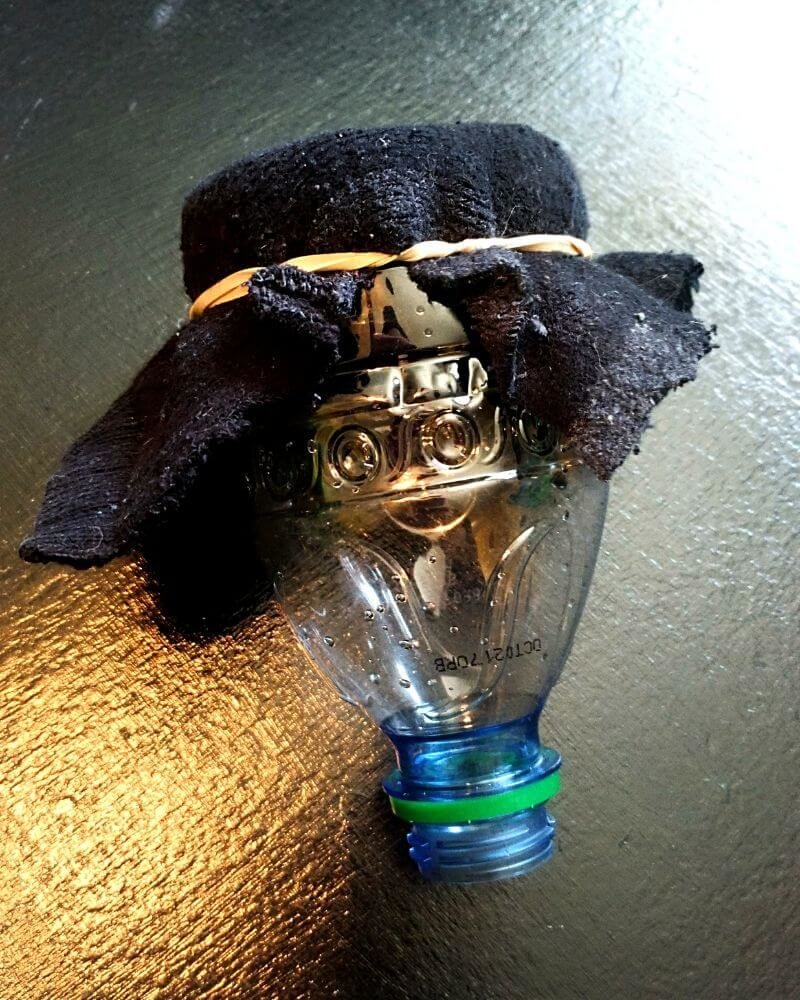
  • Secure the sock to the bottom of the plastic bottle with a rubber band. 

Attach sock to bottle with rubber band
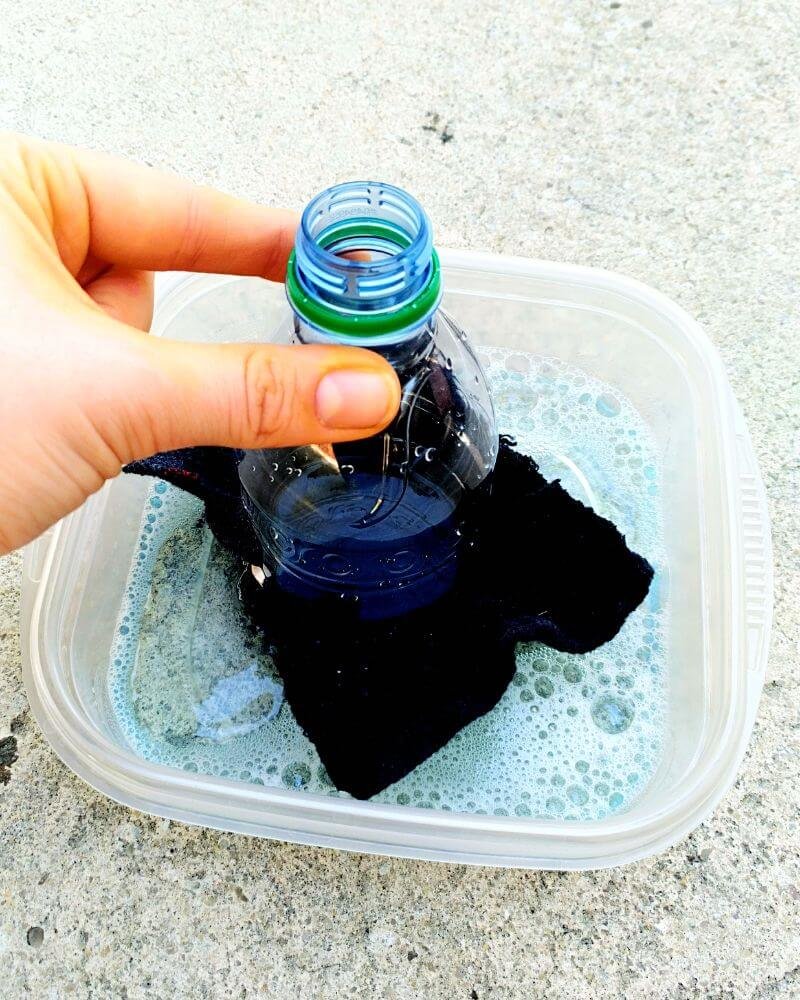
  • Pour your bubble solution into the container. 
  • Dip the plastic bottle into your bubble solution, sock end first. 
Dip water bottle into bubble solution
  • Blow into the plastic bottle from the end you would normally drink through and watch your bubble snake grow! 

  • Observe the bubbles in the bubble snake.

    What shape are these bubbles? What colors do you see? How big are these bubbles? How do they mo
    ve? What does it look like when the bubbles in the bubble snake pop? How is this group of bubbles the same as your first bubble, and how is it different? 
Bubble snake being blown out of a water bottle and sock

Expand on the Activity:

  • Experiment with the design of your bubble snake blower. 
    Try 
    using a plastic bottle with a different size or shape, experiment with different fabrics such as t-shirt or towel material, and give a few different bubble solution recipes a try. Which combination works best? 
  • Mix some washable paint into your bubble solution, or apply it directly to the sock after dipping it in the bubble solution, and then blow your bubble snake onto a piece of paper. Quickly remove the bubbles from the paper to reveal your bubble-painted masterpiece!  
  • Remember to check out our Unpoppable Bubble Recipe for more fun with bubbles! 
Example of art made by mixing paint into bubble snake solution

Did you have a blast with bubble snakes! Snap a photo or video and submit it to our Science Showcase here or tag Orlando Science Center and use #OSCatHome on social media! You might be featured on our channels. 

OSC At Home Emails

Get a round up of our latest activities and ideas delivered straight to your inbox so you don't miss a thing!

Find out when we release new resources by following us on social media!


Follow us on social media for even more science fun including fun facts, games, behind-the-scenes photos, and more!


Facebook Logo Instagram Logo YouTube Logo Twitter Logo

Support OSC At Home

In these ever-changing times, it is our pleasure to adapt quality Orlando Science Center experiences to engage with everyone while they are safe at home. Please consider supporting our operating fund to ensure we can continue developing resources today and well into the future. Thank you for your generosity and support!