Space exploration requires more than brave astronauts. They won't get far without engineers to build their space crafts! Do you think you can build a rocket that could launch astronauts into orbit? Build your engineering skills with this DIY stomp rocket project!
We'd like to thank our longtime friend and corporate partner, FINFROCK for sponsoring this blog!
Tightly wrap your sheet of paper length-wise (so you have a longer rocket rather than a shorter one) around one of the pieces of PVC pipe. The paper should fit snugly around the tube, but not be wrapped so tight that the tube can’t be slid off. Tape the paper tube shut. The entire seam should be covered so that it is airtight. This will be your rocket’s fuselage.
Cut out the cone template. Bring the straight edges together to create the cone and tape shut. Make sure that entire seam is covered so that it is airtight. If air escapes from the seam in the cone, the rocket won’t launch or won’t go far.
Tape the cone over one end of the fuselage. Be sure the cone is taped on securely and is airtight. If the cone isn’t on tightly enough or air can escape from this part of the rocket, the cone may fly off the rocket when you try to launch it.
Now choose how many fins you want and what shape they should be. You can use the templates provided, or make your own.
Cut out the fins you want. Fold on the dotted line, the tape the small flaps to end of the fuselage opposite the cone. The fins work best when they are evenly spaced and all facing the same way.
Making Your Launcher:
Fit 2 of the ½” x 12” pieces of PVC pipe in the cross fitting connector across from each other.
Place the end caps on these two pieces of PVC pipe to prevent air from escaping through the sides.
Fit the ½” x 2” piece of PVC pipe in the cross fitting connector between the two longer pieces.
Attach either the 45° or 90° PVC elbow on the other end of the 2” pipe. The angle of the elbow will determine the launch angle. If you want to launch the rocket straight up, use the 90° elbow. If you want to launch the rocket outwards, use the 45° angle.
Fit the remaining ½” x 12” piece of PVC pipe in the other end of the elbow. This will be where you place the rocket.
Fit the ½” x 15” piece of PVC pipe in the remaining opening of the cross fitting connector.
Tape the 2 liter bottle onto the end of the 15”-long piece of PVC pipe.
Launching Your Rocket:
Slide your rocket all the way onto the 12”-long piece of PVC pipe connected to the 45° or 90° elbow.
Stand next to, not behind, the bottle on your launcher.
Stomp down or jump on the bottle to launch the rocket.
To re-inflate the bottle, remove the 15”-long piece of PVC pipe from the cross fitting connector. Blow into the end of the PVC pipe. The bottle will inflate. If the bottle is damaged, it can be removed and a new bottle can be taped on.
Can you make your rocket go higher or farther? What happens if you change the shape and/or number of fins? Make changes to your rocket and launch it again to find out!
Orlando Science Center relies on partnerships with industry experts to provide insight on how science, technology, engineering, and mathematics and the incredible innovators within the industry are pushing the boundaries of possibilities. As a longtime friend and corporate partner, FINFROCK helps us inspire the next generation of STEM professionals and industry leaders. With their commitment and generous support, we are able to bring pivotal technology and engineering learning to life.
FINFROCK is committed to revolutionizing the technological advancement of engineering design and manufacturing. FINFROCK handles the design, manufacturing, and building of hundreds of projects a year for clients throughout Florida and across the nation. Learn more about FINFROCK!
Have you ever wonder what happens if astronauts don't wear a spacesuit in outer space? Take a Peep and find out!
Space travel is an experience that only a few people get in their lifetimes. Becoming an astronaut requires a lot of training in both science and safety. You may have noticed that astronauts wear special protective gear, but have you ever wondered what happens if astronauts if you don't wear a spacesuit? From freezing temperarures, to extreme radiation, take a peep into the science of space travel!
So why wear spacesuit?
Space is COLD! The coldest place on Earth is Antarctica at about -128 degrees Fahrenheit. Cold, right? Space is about four times as cold with temperatures at -454 degrees Fahrenheit. Spacesuits keep the astronauts warm while on spacewalks or doing repairs on the spaceship. Taking this off would cause the astronauts to freeze and shrink!
It’s a big vacuum Space is one large vacuum which means there’s little to no air and, of course, humans need air to live! Spaceships have special machines to make oxygen gas to keep astronauts breathing - even in the vacuum of space! And the suits are pressurized, which keeps the astronauts nice and human-shaped.
Radiation for days You’ve probably heard your parents tell you to always wear sunscreen when you’re outside. The sun gives off a lot of radiation that can hurt our skin. Thankfully Earth has a few defenses to protect us from the sun’s harmful rays, like the ozone layer and a powerful magnetic field. Space allows astronauts to get closer to the sun but there isn’t a layer to protect them. The suits and helmets completely cover the astronaut to act as a portable ozone layer.
Get a round up of our latest activities and ideas delivered straight to your inbox so you don't miss a thing!
Find out when we release new resources by following us on social media!
Follow us on social media for even more science fun including fun facts, games, behind-the-scenes photos, and more!
Support OSC At Home
In these ever-changing times, it is our pleasure to adapt quality Orlando Science Center experiences to engage with everyone while they are safe at home. Please consider supporting our operating fund to ensure we can continue developing resources today and well into the future. Thank you for your generosity and support!
From the moons of Endor to the moons of Jupiter, astronaut enthusiasts will love these books about exploring space!
Scientists from Albert Einstein to Carl Sagan have emphasized the importance of imagination. For something to be achieved, it must first be imagined. It’s little wonder then that science fiction has time and time again become reality.
Jules Vern imagined landing on the moon as far back as 1865 with From the Earth to the Moon. In 1953, Ray Bradbury described listening devices that sounds suspiciously like Bluetooth headsets in Fahrenheit 451. In 1898, the internet was described in a short story called “From the ‘London Times’ of 1904” by none other than Mark Twain. These are but a few examples.
In this spirit, here are some books about exploring space that you can find on your library’s shelves that complement the Science Center’s exhibit Our Planet. They’ll have you imagining what could be next!
Whether you're a Trekkie or a Wookie, these books about exploring space are phenomenal for all sci-fi fans!
Artemis by Andy Weir
Taking place in 2080, this novel is set in Artemis, the first and thus far only city on the Moon. The main character finds herself caught up in a conspiracy to control the city.
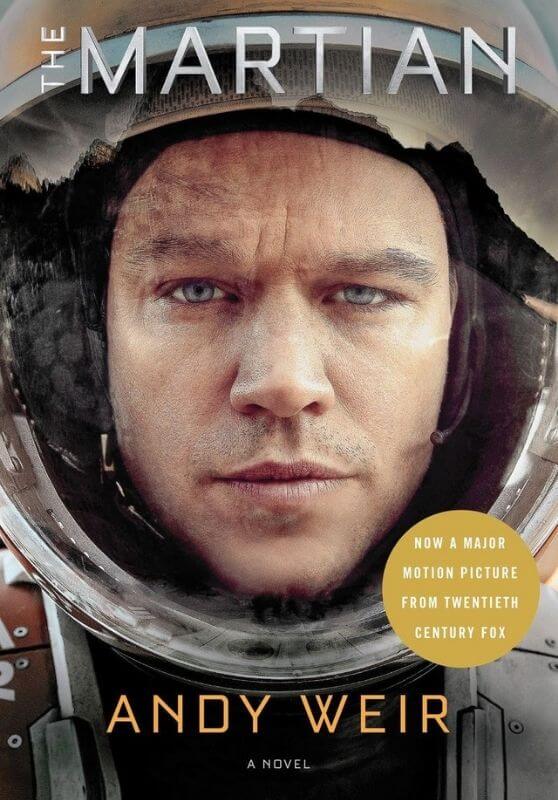
The Martian by Andy Weir
The story follows an American astronaut, Mark Watney, as he becomes stranded alone on Mars in 2035 and must improvise in order to survive.
Aurora by Kim Stanley Robinson
Jumping forward in time quite a bit, this novel is set in 2545 and concerns an interstellar ark starship launched to being a human colony. The story is narrated by the ship’s artificial intelligence.
The Terranauts by T.C. Boyle
A similar ark theme but set in a biosphere in 1994 as climate change threatens Earth. Human nature is under the microscope as eight scientists live and work in a prototype of a possible off-earth colony.
Saturn by Ben Bova
Part of the author’s Grand Tour Series, each novel follows the colonization of the Solar System by humans in the late 21st century.
Check out the history, herstory, and future of space travel with this non-fiction selection!
Chasing New Horizons: Inside the Epic First Mission to Pluto by Alan Stern and David Grinspoon
The story of the men and women behind this amazing mission and their decades-long commitment and persistence. You’ll also get a look into the political fights within and outside of NASA.
Spaceman by Mike Massimino
Have you ever wondered what it would be like to look back on Earth from outer space and see the surprisingly precise line between day and night? This author has been there and he puts you inside the astronaut suit with his book.
Rise of the Rocket Girls: The Women Who Propelled Us, from Missiles to the Moon to Mars by Nathalia Holt
Based on extensive research and interviews with all the living members of the team, this is the riveting true story of the women who launched America into space.
The Mighty Mars Rovers: The Incredible Adventures of Spirit and Opportunity by Elizabeth Rusch
For younger readers, this books tells of two Mars rovers that were intended to do research for three months and wound up exploring the red planet for six years.
Packing for Mars by Mary Roach
From the space shuttle training toilet to a crash test of NASA's new space capsule (cadaver filling in for astronaut), Roach takes you on a surreally entertaining trip into the science of life in space and space on Earth.
The Mars challenge: The Past, Present, and Future of Human Spaceflight by Alison Wilgus
This nonfiction graphic novel in which a teen who dreams of being the first woman on Mars is taken on a conceptual journey of what that might be like.
Try a Stellar Activity!
Have you ever looked up at night and thought "what does the moon feel like?"
Using our DIY Moon Sand recipe, you too can experiment and make your own moon craters and touch the surface of the moon!
Perseverance has landed on Mars, but what is the rover doing up there?
Humans have launched and successfully landed a brand new rover on the surface of Mars! Its name is Perseverance and it brings brand new technology that scientists can use to study the possibility of ancient life on the Martian surface. Check out some of the awesome details below to see what the Mars rover is doing!
Timeline
The Perseverance Rover took years to design and build, with the initial concepts dating all the way back to 2013. It eventually launched on July 30th, 2020 aboard an Atlas V rocket right here in Central Florida.
It then took about 7 months to fly to Mars where it successfully landed in the Jezero Crater on February 18th, 2021. Check out this awesome video to see the actual footage of the landing!
Scientific Equipment
Perseverance is largely modeled after our last Martian rover, Curiosity, but brings with it a whole host of new technology.
Percy brought a drill that will create rock samples for future missions to return to Earth… not to mention the first Martian oxygen experiment, tons of new cameras, and a state-of-the-art spectrometer that can scan rocks for signs of ancient life!
Ingenuity
Perseverance also brought a helicopter, named Ingenuity, which will mark the first powered flight on another world.
Mic Check 1..2..
A microphone on the side of NASA’s Perseverance Rover recorded these sounds. The wind is audible in the filtered section. This is the first time a Mars rover has been equipped with a microphone.
Perseverance Sticks the Landing!
Perseverance is an amazing and bold step in planetary science that paves the way for further exploration, and the flawless landing only marks the beginning of Percy’s incredible journey.
Make sure to pay attention to all the spectacular new science coming out of NASA for the years to come! And check out NASA’s press conference on the successful landing!
Expand Activity!
One of the goals of Perseverance is to seek signs of ancient life and collect rock and soil samples for a possible return to Earth. Learn how you can make your own time capsule!
Get a round up of our latest activities and ideas delivered straight to your inbox so you don't miss a thing!
Find out when we release new resources by following us on social media!
Follow us on social media for even more science fun including fun facts, games, behind-the-scenes photos, and more!
Support OSC At Home
In these ever-changing times, it is our pleasure to adapt quality Orlando Science Center experiences to engage with everyone while they are safe at home. Please consider supporting our operating fund to ensure we can continue developing resources today and well into the future. Thank you for your generosity and support!
We'd like to thank our partner, Florida Prepaid, for sponsoring this colorful activity! Today’s young scientists are tomorrow’s college graduates. Saving early for college sends your child a powerful message that you believe in their future — and want them to avoid debt later. Learn more about Florida Prepaid’s College Savings Plan at myfloridaprepaid.com.
Cheese or Sand? What does the moon feel like? Find out with this stellar activity!
Have you ever looked up at night and thought "what does the moon feel like?" The moon’s surface is made up of craters and rocks. Craters are holes in the Moon’s surface formed by impact from an asteroid, which is a chunk of rock and metal in outer space. Using our DIY Moon Sand recipe, you too can experiment and make your own moon craters and touch the surface of the moon!
These recipes call for various food items but it is not to be consumed! Keep an eye out for this when little ones are playing with their moon sand. We do recommend doing this activity outside if possible as it does tend to get messy.
Materials for DIY Moon Sand:
4 cups of all-purpose flour
1/2 cup of baby oil
Measuring cups
Mixing bowl
Rocks of various sizes
Mixing spoon *optional
Play bin *optional
Materials forGluten-Free DIY Moon Sand:
2 cups of baking soda/powder
2 cups of cornstarch
1 cup of baby oil
Measuring cups
Mixing bowl
Rocks of various sizes
Mixing spoon *optional
Play bin *optional
Directions:
STEP 1:
First, measure out your dry ingredients and add them to your mixing bowl, this will be your flour or baking soda/cornstarch base. When you scoop these ingredients into your measuring cups, make sure you level off the cup to make sure you get a full cup!
STEP 2:
Next, we will add in our liquid ingredients. Measure out the designated amount of oil to add to your mixture and carefully pour it into your bowl.
STEP 3:
Here’s where it starts to get messy! Start to mix all of your ingredients together. You can mix with your hands or a large mixing spoon. Your dry ingredients will absorb the oil and start to stick together while still remaining soft. The best moon sand texture is crumbly, but still able to be molded together.
Now that you have made your moon sand, you can start making your own craters!
Our moon sand is nice and soft but is perfect for making impressions. Gather a few rocks of different shapes and sizes. Through this activity, children will be able to experiment and make observations about their craters while changing variables of the activity. How will your results change?
Experiment:Even out your moon sand to form a layer at the bottom of your bowl or bin. Stand over your moon sand and gently drop different rocks onto the surface. You can measure the size of your craters with a ruler by how many inches wide or deep it is. Record your results, you can write or draw the way your crater looks and take note of your measurements to compare later.
Try some of these variations and observe how your craters change:
Drop your asteroids from different heights
Instead of an even layer, build up your moon sand into a mountain and try dropping your asteroid onto it and see what happens.
Try making your moon sand look like the moon by forming all kinds of craters of all shapes and sizes in your sand.
Mold your moon sand into different phases of the moon
So, now that you have created and experimented with your own moon sand, can you answer the question? What does the moon feel like to you?
Make Conclusions
Which rocks made the deepest impressions? What happened to your craters when you changed the height at which you dropped your asteroids? What did your data tell you about your experiment?
If you had fun making moon sand crater creations and snapped some photos, be sure to submit it to our Science Showcase here or tag Orlando Science Center and use #OSCatHome on social media! You might be featured on our channels.
OSC At Home Emails
Get a round up of our latest activities and ideas delivered straight to your inbox so you don't miss a thing!
Find out when we release new resources by following us on social media!
Follow us on social media for even more science fun including fun facts, games, behind-the-scenes photos, and more!
Support OSC At Home
In these ever-changing times, it is our pleasure to adapt quality Orlando Science Center experiences to engage with everyone while they are safe at home. Please consider supporting our operating fund to ensure we can continue developing resources today and well into the future. Thank you for your generosity and support!
Learn about NASA's Mars rover Perseverance while you learn how to build a time capsule.
Have you ever wanted to preserve time? Let us teach you how to build a time capsule! While you gather your materials and bulid your time capsule, check out this video about NASA's latest Mars rover, Perseverance.
On July 30, NASA is set to send its next rover to Mars. Our very own Science Interpreter Spencer served on a panel of judges that narrowed down the list of names. Then, the nation, and many of you, got to vote on its name!
The Perseverance rover will seek signs of ancient life and collect rock and soil samples for a possible return to Earth.
Materials you will need:
Scissors
Hot Glue
Paper
Pencil
Cylinder that is opened on both ends
Directions:
STEP 1:
Take your hot glue gun and glue around the base of your cylinder. Once you have completed the ring, quickly place the cylinder onto one or the cardboard squares and wait for the glue to dry.
STEP 2:
Take your scissors and cut the excess cardboard off of the cardboard square that was glued to the bottom of your cylinder.
STEP 3:
Put the objects inside the time capsule that you have decided to preserve. We choose wooden tokens that represent the different exhibits and programs we put on here at the science center. You should choose something with meaning but nothing that you won’t miss for being gone for too long.
STEP 4:
With your piece of paper and pencil, write yourself a note. It is always fun to read a note that you wrote in the past. Make it about what you think life might be like when you open the time capsule and why you choose the items that you did.
STEP 5:
Repeat steps 1 and 2 on the lid side of the cylinder to seal in the objects and the note inside the time capsule.
STEP 6:
Decorate! We choose to laser cut out some gears to glue all over our time capsule, but you can decorate your time capsule however you like. Make sure you leave some room for a warning label so nobody opens your time capsule too early.
STEP 7:
Once you finish decorating you should label your time capsule with a warning label so that way if anyone finds your time capsule they won’t open it too early.
Lastly, decide where you are going to store your time capsule. You can keep your time capsule in many places, your closet, or even under your bed. If you bury your time capsule, make sure your time capsule can endure the elements!
How did your time capsule turn out? We'd love to see it! Submit photos or videos of your projects to the OSC Science Showcase for a chance to be featured!
Get a round up of our latest activities and ideas delivered straight to your inbox so you don't miss a thing!
Find out when we release new resources by following us on social media!
Follow us on social media for even more science fun including fun facts, games, behind-the-scenes photos, and more!
Support OSC At Home
In these ever-changing times, it is our pleasure to adapt quality Orlando Science Center experiences to engage with everyone while they are safe at home. Please consider supporting our operating fund to ensure we can continue developing resources today and well into the future. Thank you for your generosity and support!


")


