A repurposed project that teaches STEM skills to kids. Homemade stamps really make a mark!
Repurposing found objects, using materials in creative ways, making a plan, and problem solving are all key engineering skills that you can practice while doing this kids homemade stamps activity! Follow along for tips, tricks, and suggestions to help you make custom DIY recycled stamps at home.
Once you've finished creating your tools with your kids, homemade stamps can be used to make your own cards, wrapping paper, or artwork so this recycled project can be used again and again!
Materials:
It’s time to raid your recycling bin! This is a great opportunity to stretch your creative muscles and use what you have available to you. The materials listed here are suggestions and you can absolutely make substitutions based on what you have on hand.
- A base for your stamps
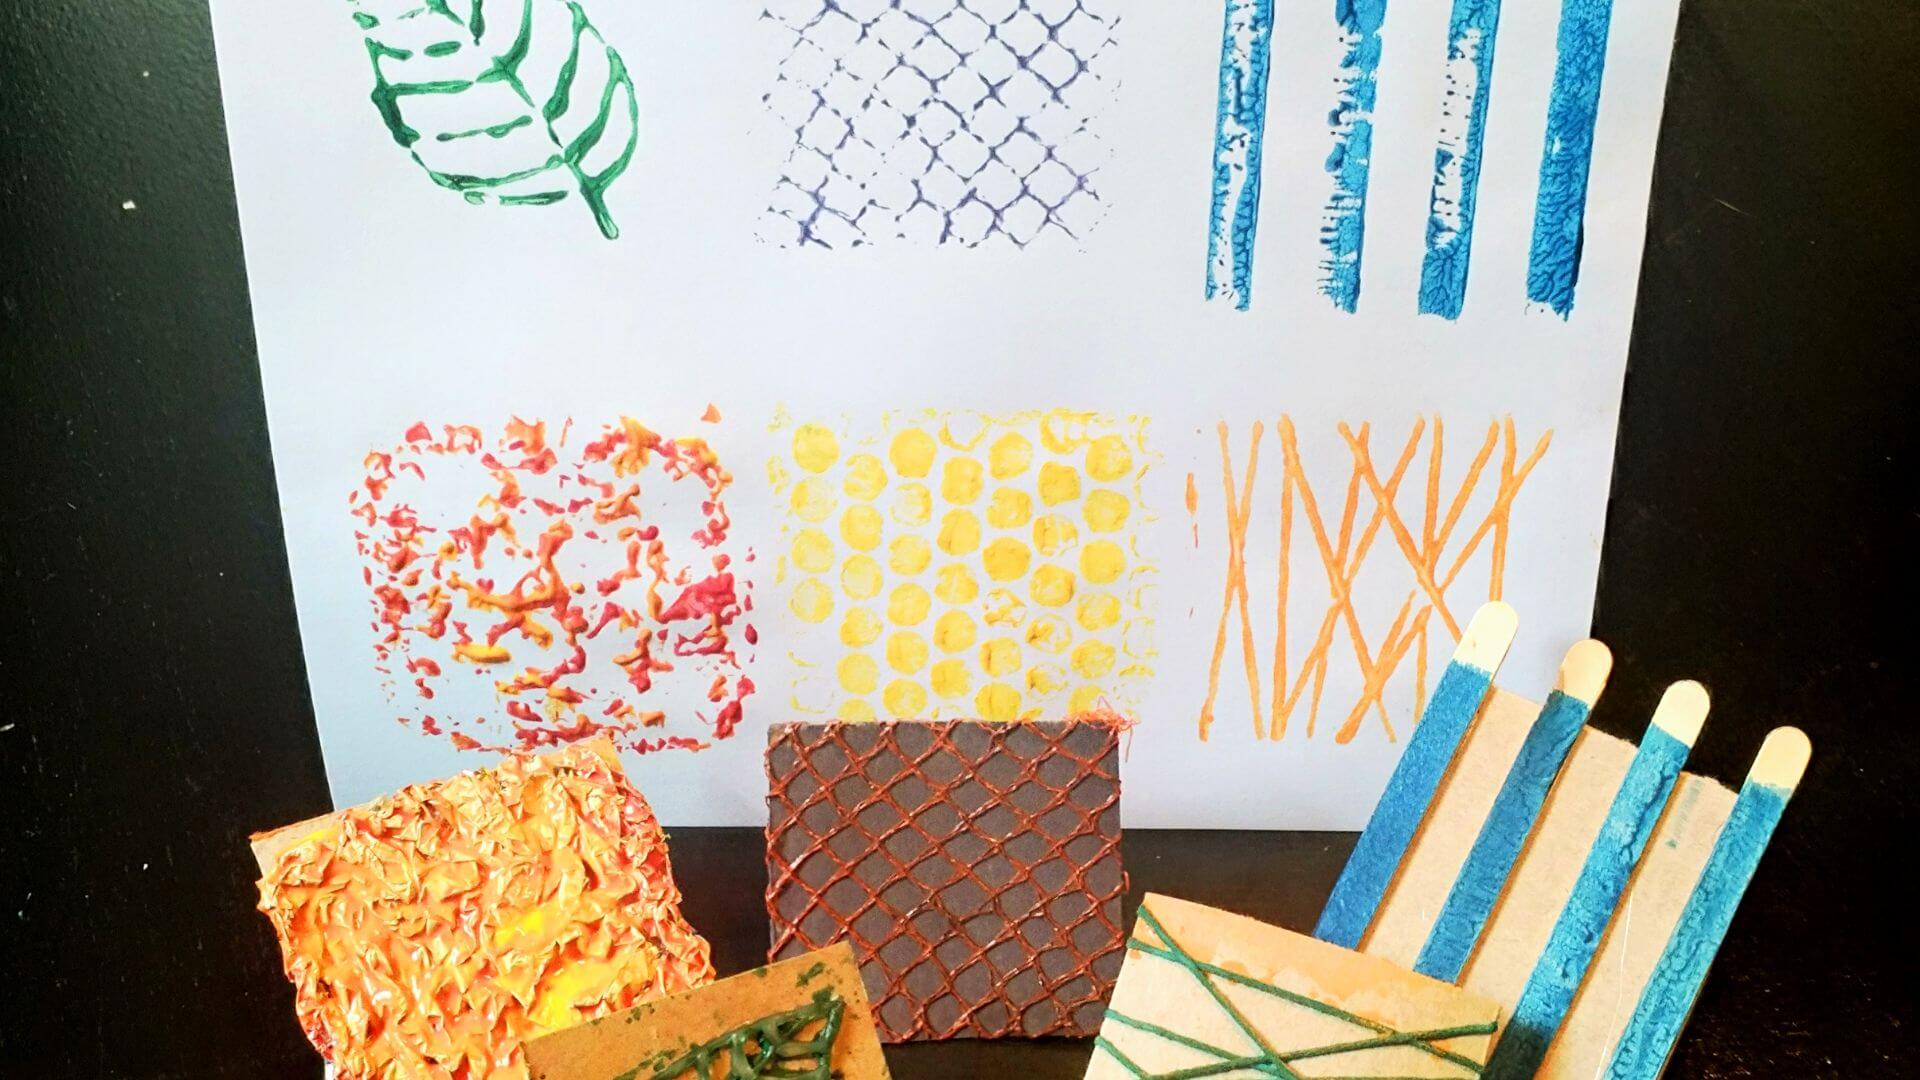
This needs to be something sturdy that you can attach materials of different shapes and textures to. We used cardboard, but you could also use something like scrap wood from another project or the lid from a pickle jar. - Textures for your stamps
These could be just about anything! Our examples feature popsicle sticks, string, bubble wrap, tin foil, pipe cleaners, a design made out of hot glue, and a mesh produce bag. As long as your materials can be glued to your base and lay relatively flat, they should work.
- A handle
We used more cardboard for this, but you could also use a pipe cleaner, bottle cap, or wine cork. - Adhesive
We used a glue gun, but if you’re willing to wait other kinds of glue can also work. Check the directions on your adhesive of choice for best results. - Paint
Several different kinds of paint will work well for this project. Make sure to pick a paint that works well for whatever you’re planning to decorate with your stamps. If you have an ink pad, that’s also a good option (just remember to check if it’s washable as many are not!). - Paintbrushes or sponges
Select whatever you think will be easiest to use to apply your paint. You can always switch it up part way through if you’d like to try something new! - Something to stamp
Stamps are often used on paper, but with fabric paint you could also decorate a canvas bag or T-shirt. We also recommend decorating paper bags, cardstock, or butcher paper so you can later turn your creation into a card or gift wrap!
Directions:
- Glue your textures of choice to whatever you’ve chosen to be the base of your stamp.
- Adjust your texture materials as needed so they lay flat on the base of your stamp.

- Glue your handle onto your stamp.
NOTE: This should go on the side opposite your texture.

When your adhesive is dry, use a sponge or a paint brush to apply your paint. Depending on how you’ve constructed your stamp, it may be easier to spread a thin layer of paint onto a paper plate and stamp directly into the paint.

Apply your stamp to whatever you’ve chosen to decorate! It’s important to put even pressure across the whole stamp as you press it down.
If you remove your stamp and find that part of your pattern or texture hasn’t transferred to your project, that’s a good sign that the missing part of your stamp didn’t get enough pressure.

- When you’re finished stamping, allow your creation to dry completely.
- Share your creation with us! We’d love to see what you made! Submit your photos to our Science Showcase or tag Orlando Science Center and use hashtag #OSCatHome on social media!
OSC At Home Emails
Get a round up of our latest activities and ideas delivered straight to your inbox so you don't miss a thing!
Find out when we release new resources by following us on social media!
Follow us on social media for even more science fun including fun facts, games, behind-the-scenes photos, and more!

![]()
![]()
![]()
Support OSC At Home
In these ever-changing times, it is our pleasure to adapt quality Orlando Science Center experiences to engage with everyone while they are safe at home. Please consider supporting our operating fund to ensure we can continue developing resources today and well into the future. Thank you for your generosity and support!