Learn about erosion with this soil science experiment!
Forces of nature like wind and rain shape and reshape Earth’s surface by gradually wearing away, or eroding rocks and soil.
When it rains, water that is not used by plants or dried up by the sun slowly flows through the topsoil downhill into nearby water basins like lakes, rivers, streams, and aquifers. Natural areas like Mangroves, Cypress Swamps, Coral Reefs, and Pinewood Flats act like buffer zones which lessens the harmful effects of natural disasters like tropical storms and hurricanes have on Florida.
In this soil science experiment, you will see how different environments can affect water runoff and soil erosion.
Materials:
- 3 plastic bottles
- 6 cups of soil
- 1 cup of mulch with some leaf litter
- 1 square of grass taken from outside. Not the grass pulled out, but a small section removed with a garden spade to be placed inside one of the bottles
- 1 watering can which will simulate rainfall
- 3 clear disposable cups
- 3 pieces of twine that are 12 inches long
- Scissors or a box cutter
- Hole puncher (optional)
Let's get started!
- Begin by cutting off one side of all 3 of the plastic bottles. (Cut the bottles vertically in half from top to bottom.)
- Place the bottles on their sides and fill each one with two cups of soil.
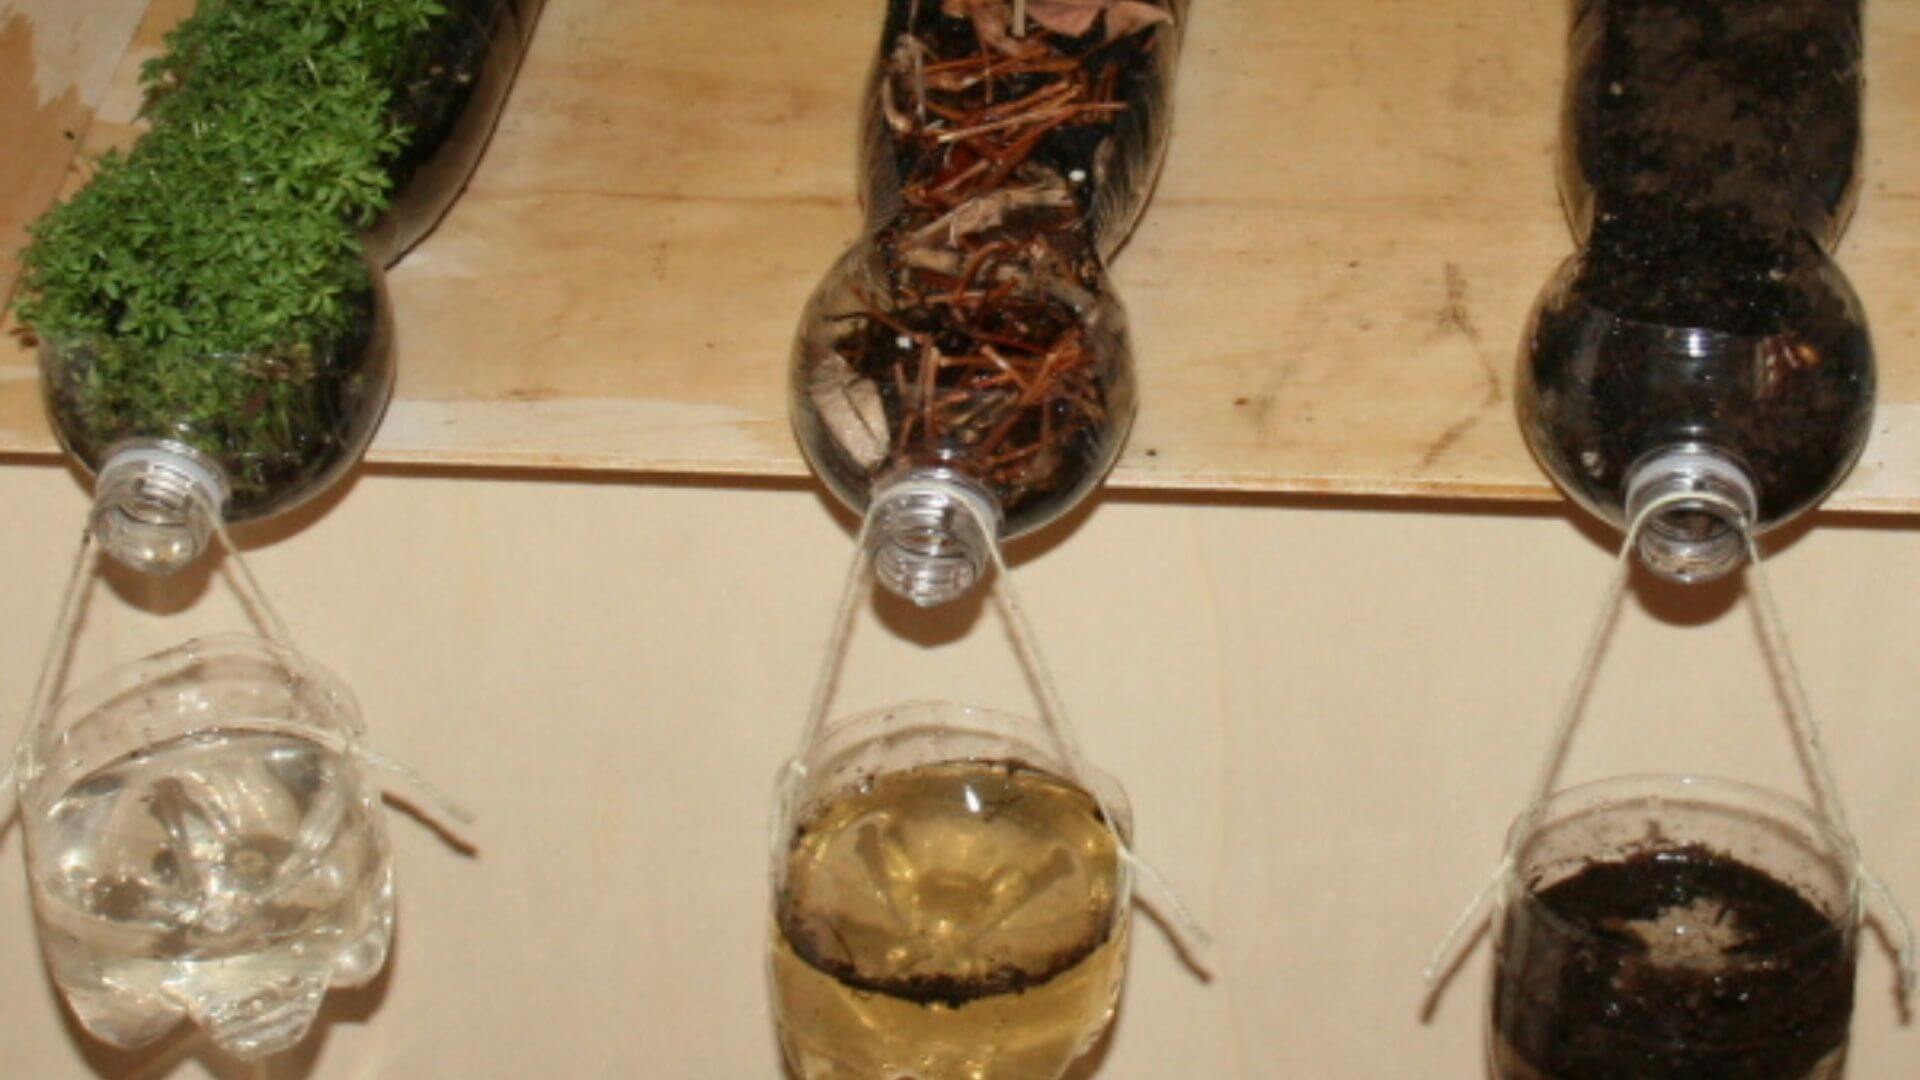
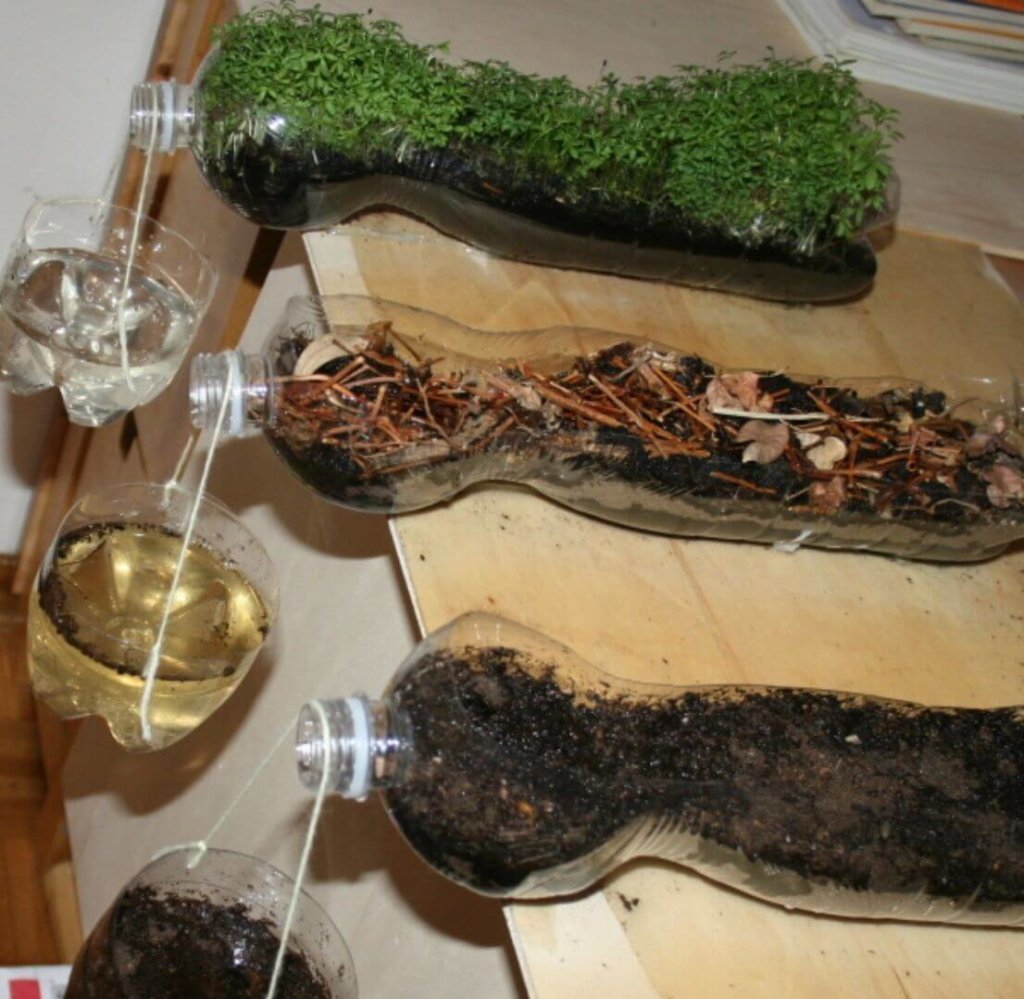
- In one bottle, add the 1 cup of mulch and leaf litter and pack it down.
- In the second bottle, add the grass that was collected and pack it down.
- Lay the bottles horizontally with the mouth of the bottle hanging over the edge of a table.
- Make 2 holes at the top on each side of the “catch-cups” using the hole puncher or you can use the scissors or box cutter.
- Pull the twine through the holes and tie them to make handles for the cups.
- Attach one cup with twine to each one of the bottles so that each one has a cup hanging from the mouth over the end of the table (see photo).
- Now the fun part! Use your watering can to simulate a rainstorm by watering each of the soil science bottles
- Make observations and record your findings about which model held the most rainwater, and what the water looks like in the catch cups.
Expand on the Activity
Post-Activity Discussion Questions:
- Which model did the best job at keeping the soil in place?
- Do you think it’s a good idea to have natural areas with a lot of plants to protect Florida when it rains?
Try Another Activity!
Outdoor Scavenger Hunt Explorer Kit and Downloadable Activities