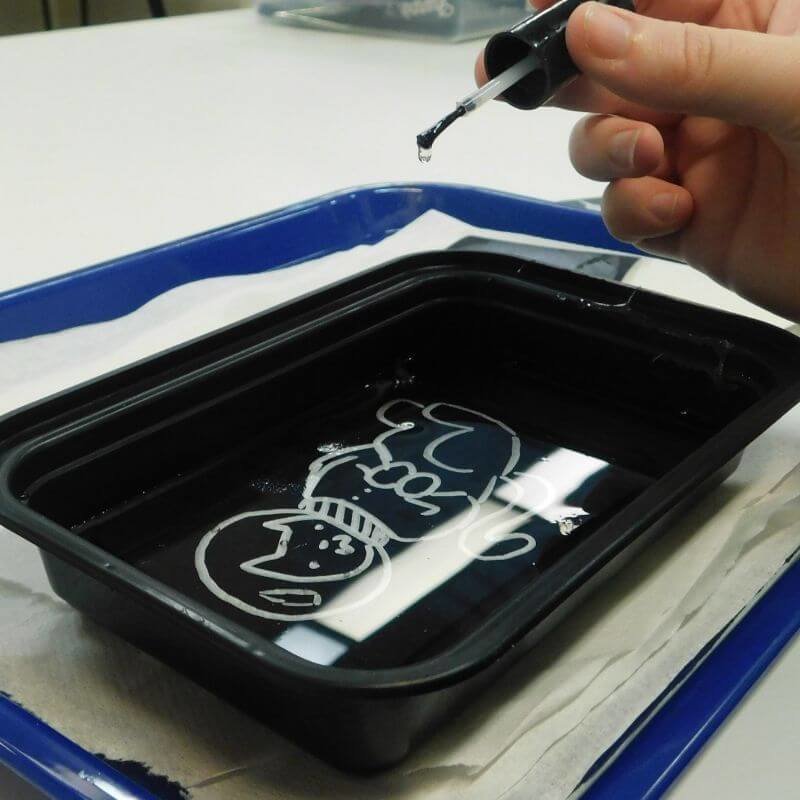
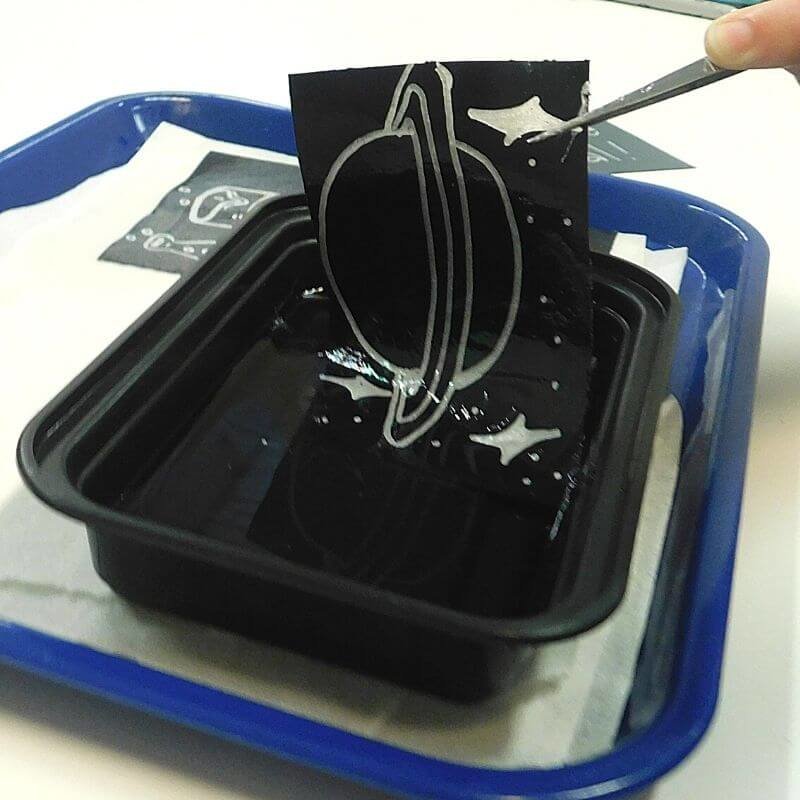
Demonstrate Laminar Flow at Home with this Water Optical Illusion

We'd like to thank our partner, Florida Prepaid, for sponsoring this colorful activity! Today’s young scientists are tomorrow’s college graduates. Saving early for college sends your child a powerful message that you believe in their future — and want them to avoid debt later. Learn more about Florida Prepaid’s College Savings Plan at myfloridaprepaid.com

Florida Prepaid College Savings Plan Logo

What if we told you that you could freeze time with just a balloon, tape, and some water? Now what if we showed you how to demonstrate laminar flow at home?

 We promise this isn’t CGI magic or a trick of the camera. What you are seeing is a particularly interesting fluid dynamic, which is a scientific way of saying the flow of a fluid (which is any liquid or gas), called laminar flow. 

Below we are going to explore the following questions: What is laminar flow? What is laminar flow used for in everyday life? And most importantly, how can you demonstrate laminar flow at home? 
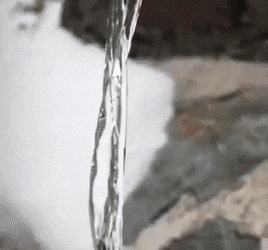
Laminar flow demonstration GIF

What is Laminar Flow? 

Laminar flow is a type of flow pattern of a fluid in which all the particles are flowing in parallel linesopposed to turbulent flow, where the particles flow in random and chaotic directions. A flow is either turbulent, laminar, or somewhere in between. This is measured by the Reynolds number which is a ratio between velocity (the speed of the flowand viscosity (how thick or thin the fluid is). The more viscous, or thick, the fluid is the faster it can flow without going turbulent 

What is Laminar Flow Used For?

Laminar flow has a wide range of real-life applications. A type of laminar flow is achieved everyday by pilots. A smooth flight occurs when the flow of the air over an aircraft’s wings is laminar. If the pilot runs into a very turbulent patch of air the wing cannot correct the air to make it laminar, causing turbulence.

 A different example of laminar flow occurs everyday inside of you. Blood flowing throughout your body is flowing laminarly. 

One last example of laminar flow is syrup, or honey, flowing out the nozzle. Because the liquid is so thick, or viscous, the Reynolds number indicates that the flow is very laminar.  

How Can I Demonstrate Laminar Flow at Home?

The following video and steps below it are detailed for you to try and recreate laminar flow at home. 

Adult supervision is required as this experiment involves the usage of sharp and potentially dangerous objects.

  • Step 1: Gather the following materials: 
    • One balloon 
    • Duct Tape or electrical tape 
    • Water 
    • A sharp object (to pierce the balloon)
  • Step 2: Fill the balloon with water and tie it off.
  • Step 3: Make a square on your balloon out of tape.
    Make sure you pat down the 
    tape, so its smoothly secured. Different sized squares result in different sized flows.
  • Step 4: With adult assistance pierce the balloon inside the square with your sharp object and watch as the water flows out laminarly 

How did it go? Try taking your own spin on the experiment, does the amount of water change the results? How about where you place the square? Do you think you can get multiple flows to happen on the same balloon?   

If you tried to demonstrate laminar flow at home, be sure you submit you photos and videos of your experiments to our Science Showcase here or tag Orlando Science Center on social media and use hashtag #OSCatHome for a chance to be featured on our channels!   

Until next time, STAY CURIOUS! 

OSC At Home Emails

Get a round up of our latest activities and ideas delivered straight to your inbox so you don't miss a thing!

Find out when we release new resources by following us on social media!


Follow us on social media for even more science fun including fun facts, games, behind-the-scenes photos, and more!


Facebook Logo Instagram Logo YouTube Logo Twitter Logo

Support OSC At Home

In these ever-changing times, it is our pleasure to adapt quality Orlando Science Center experiences to engage with everyone while they are safe at home. Please consider supporting our operating fund to ensure we can continue developing resources today and well into the future. Thank you for your generosity and support!

Books About Exploring Space for Any Planet Pioneer

From the moons of Endor to the moons of Jupiter, astronaut enthusiasts will love these books about exploring space!

Scientists from Albert Einstein to Carl Sagan have emphasized the importance of imagination. For something to be achieved, it must first be imagined. It’s little wonder then that science fiction has time and time again become reality.

Jules Vern imagined landing on the moon as far back as 1865 with From the Earth to the Moon. In 1953, Ray Bradbury described listening devices that sounds suspiciously like Bluetooth headsets in Fahrenheit 451. In 1898, the internet was described in a short story called “From the ‘London Times’ of 1904” by none other than Mark Twain. These are but a few examples.

In this spirit, here are some books about exploring space that you can find on your library’s shelves that complement the Science Center’s exhibit Our Planet. They’ll have you imagining what could be next!

Books selected by the Acquisitions Services department of Orange County Library System.


Whether you're a Trekkie or a Wookie, these books about exploring space are phenomenal for all sci-fi fans! 

Artemis
by Andy Weir

Taking place in 2080, this novel is set in Artemis, the first and thus far only city on the Moon. The main character finds herself caught up in a conspiracy to control the city.

Artemis by Andy Weir

The Martian
by Andy Weir

The story follows an American astronaut, Mark Watney, as he becomes stranded alone on Mars in 2035 and must improvise in order to survive.

The Martian by Andy Weir

Aurora
by Kim Stanley Robinson

Jumping forward in time quite a bit, this novel is set in 2545 and concerns an interstellar ark starship launched to being a human colony. The story is narrated by the ship’s artificial intelligence.

books about exploring space - Aurora by Kim Stanley Robinson

The Terranauts
by T.C. Boyle

A similar ark theme but set in a biosphere in 1994 as climate change threatens Earth. Human nature is under the microscope as eight scientists live and work in a prototype of a possible off-earth colony.

Books about exploring space - The Terranauts by T.C. Boyle

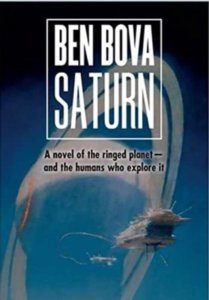
Saturn
by Ben Bova

Part of the author’s Grand Tour Series, each novel follows the colonization of the Solar System by humans in the late 21st century.

Saturn by Ben Bova

Check out the history, herstory, and future of space travel with this non-fiction selection!


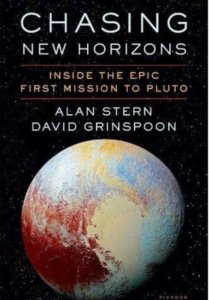
Chasing New Horizons: Inside the Epic First Mission to Pluto
by Alan Stern and David Grinspoon

The story of the men and women behind this amazing mission and their decades-long commitment and persistence. You’ll also get a look into the political fights within and outside of NASA.

non fiction books about exploring space - Chasing New Horizons_ Inside the Epic First Mission to Pluto by Alan Stern and David Grinspoon

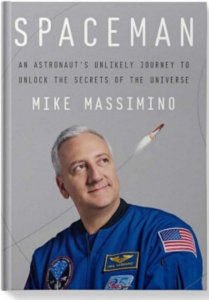
Spaceman
by Mike Massimino

Have you ever wondered what it would be like to look back on Earth from outer space and see the surprisingly precise line between day and night? This author has been there and he puts you inside the astronaut suit with his book.

Spaceman by Mike Massimino

Rise of the Rocket Girls: The Women Who Propelled Us, from Missiles to the Moon to Mars
by Nathalia Holt

Based on extensive research and interviews with all the living members of the team, this is the riveting true story of the women who launched America into space.

non fiction books about exploring space -Rise of the Rocket Girls: The Women Who Propelled Us, from Missiles to the Moon to Mars by Nathalia Holt

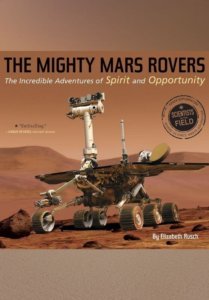
The Mighty Mars Rovers: The Incredible Adventures of Spirit and Opportunity
by Elizabeth Rusch

For younger readers, this books tells of two Mars rovers that were intended to do research for three months and wound up exploring the red planet for six years.

The Mighty Mars Rovers_ The Incredible Adventures of Spirit and Opportunity by Elizabeth Rusch

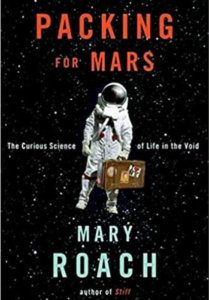
Packing for Mars
by Mary Roach

From the space shuttle training toilet to a crash test of NASA's new space capsule (cadaver filling in for astronaut), Roach takes you on a surreally entertaining trip into the science of life in space and space on Earth.

Packing for Mars by Mary Roach

The Mars challenge: The Past, Present, and Future of Human Spaceflight
by Alison Wilgus

This nonfiction graphic novel in which a teen who dreams of being the first woman on Mars is taken on a conceptual journey of what that might be like.

non fiction books about exploring space - The Mars challenge: The Past, Present, and Future of Human Spaceflight by Alison Wilgus


Try a Stellar Activity!

Have you ever looked up at night and thought "what does the moon feel like?"

Using our DIY Moon Sand recipe, you too can experiment and make your own moon craters and touch the surface of the moon!

Easy Milk Experiment • Learn About Molecules With Tie-Dye Milk

We'd like to thank our partner, Florida Prepaid, for sponsoring this colorful activity! Today’s young scientists are tomorrow’s college graduates. Saving early for college sends your child a powerful message that you believe in their future — and want them to avoid debt later. Learn more about Florida Prepaid’s College Savings Plan at myfloridaprepaid.com

Florida Prepaid College Savings Plan Logo

Learn about molecules and more with this easy tie-dye milk experiment

Make a rainbow of colors swirl around with materials you can find in your kitchen and a dash of science!

Atoms and molecules are the particles that make up everything. What element or elements they are, how they’re arranged, how they move, and how they interact with each other determines how a substance looks, acts, and reacts. However, atoms and molecules are very, very small. You could line up 70 million helium atoms in a row across a pencil eraser!

This makes them way too small to see with our own eyes or even with many microscopes. But we can observe molecules in motion with this tie-dye milk experiment.

Ready to make your own? Watch along or follow the written steps below!

Materials you will need:

  • Milk or cream
  • Food coloring
  • Cotton swabs or toothpicks
  • Dish soap
  • A dish or plate with a rim that can hold liquid.

Directions:

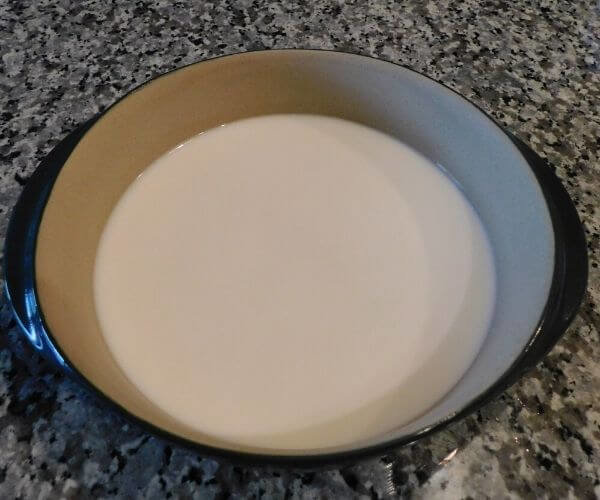
Step 1: First, add some milk or cream to your dish. You want to make sure the milk completely covers the bottom of the dish, but you don’t need to completely fill it.

A dish of milk for tie dye milk experiment

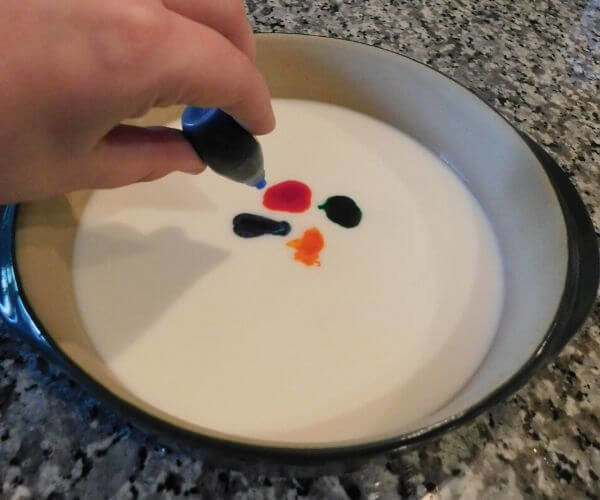
Step 2: Next, add 4 drops of food coloring to the center of the dish, being careful not to let them mix. Don’t stir the milk and food coloring! You want them to stay separate for now.

Add dye to milk

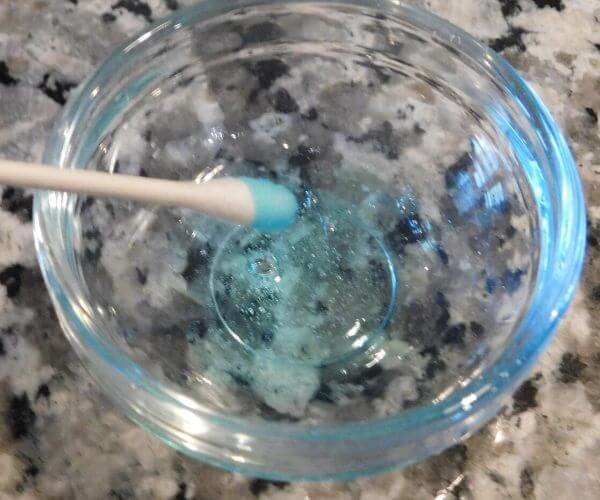
Step 3: Pick up your cotton swab or toothpick. Carefully cover one end of it with dish soap.

Add dish soap to a qtip to create tie-dye milk effect

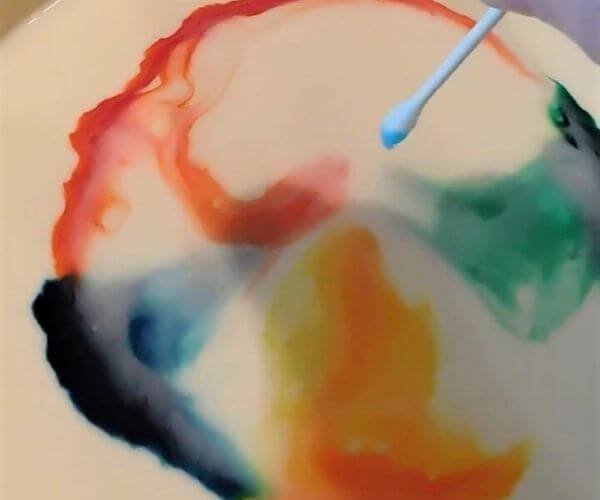
Step 4: When you’re ready, touch the center of the milk with the soapy end of your swab and watch the colors move!

The result of tie-dye milk experiment

The Science of Tie-Dye Milk

  • Milk is a mixture. It’s mostly water, but it also has proteins, fats, and other molecules mixed in.
  • Because milk is mostly made up of water, it acts a lot like water and has many of the same properties.
  • One of these properties is called surface tension. Surface tension is how resistant a liquid is to external force, or how strong the surface of the liquid is. It’s a bit like the surface of water having a sort of “skin.” This is how some insects can walk on water.
  • Soap is what we call a surfactant. It lowers the surface tension of a liquid.
  • When we dip the soap in the milk, it lowers its surface tension and causes not just the water molecules, but fat and protein molecules, to move as they quickly rearrange themselves.
  • By adding food coloring, we can see the movement caused by lowering the surface tension.

Expand on This Activity:

  • Ask Your Scientist the Following Questions:
    • What new colors do you see?
    • How are the colors moving?
    • Why do you think this happened?
  • Keep Experimenting:
    • Press down on the bottom of the dish with the soap-covered cotton swab for three seconds, then lift up. How is the movement of the colors different than when you quickly touch the cotton swab to the milk’s surface?
    • Touch the cotton swab to areas where the colors have collected to watch the colors continue to move.
    • Try the experiment with more or fewer colors of food coloring. How is the tie-dye different?

The Science of Tie-Dye Milk

  • Milk is a mixture. It’s mostly water, but it also has proteins, fats, and other molecules mixed in.
  • Because milk is mostly made up of water, it acts a lot like water and has many of the same properties.
  • One of these properties is called surface tension. Surface tension is how resistant a liquid is to external force, or how strong the surface of the liquid is. It’s a bit like the surface of water having a sort of “skin.” This is how some insects can walk on water.
  • Soap is what we call a surfactant. It lowers the surface tension of a liquid.
  • When we dip the soap in the milk, it lowers its surface tension and causes not just the water molecules, but fat and protein molecules, to move as they quickly rearrange themselves.
  • By adding food coloring, we can see the movement caused by lowering the surface tension.

Learn More: Chemistry

  • Many atoms and molecules have positive (+) or negative (-) charges. An atom or molecule with no charge is called neutral. Positive and negatively charged atoms attract, just like the north and south poles of a magnet.
  • Molecules can be polar or nonpolar. Polar molecules have one side that is much more positive or negative than the other. Nonpolar molecules don’t have a difference in charge. Polar molecule likes to mix with other polar molecules, and nonpolar molecules like mix with other nonpolar molecules. Polar and nonpolar molecules don’t mix. This is what keeps oil and water separate; oil is made of nonpolar molecules and water is made of polar molecules!
  • Water molecules have a positive side and negative side. This makes water a polar molecule. Because of this, water molecules can stick to each other. Molecules in liquid sticking to each other is known as cohesion. The cohesion between the water molecules at the surface is what creates surface tension.
  • Soap molecules have a negative side and neutral side, so it has both a polar and nonpolar end. The negative side of the soap molecule is attracted to the positive side of the water molecule, weakening the attraction between the water molecules and lowering the surface tension.
  • But that’s not all. The neutral sides of the soap molecules also interact with the nonpolar fat molecules, separating them out of the milk. This is how soap is able to clean up greasy messes!

OSC At Home Emails

Get a round up of our latest activities and ideas delivered straight to your inbox so you don't miss a thing!

Find out when we release new resources by following us on social media!


Follow us on social media for even more science fun including fun facts, games, behind-the-scenes photos, and more!


Facebook Logo Instagram Logo YouTube Logo Twitter Logo

Support OSC At Home

In these ever-changing times, it is our pleasure to adapt quality Orlando Science Center experiences to engage with everyone while they are safe at home. Please consider supporting our operating fund to ensure we can continue developing resources today and well into the future. Thank you for your generosity and support!

Are All Metals Magnetic? An Introduction to Electromagnetic Induction

We'd like to thank our partner, Florida Prepaid, for sponsoring this colorful activity! Today’s young scientists are tomorrow’s college graduates. Saving early for college sends your child a powerful message that you believe in their future — and want them to avoid debt later. Learn more about Florida Prepaid’s College Savings Plan at myfloridaprepaid.com

Florida Prepaid College Savings Plan Logo

Join us for a fun physics lesson and find out if all metals are magnetic!

Have you ever walked around your house or classroom with a magnet to see what it can pick up? If not, give it a try! We'll wait... 

You probably picked up different kinds of metal objects like paper clips or keychains. But were are all the metals you tried to pick up magnetic? What about a penny or some aluminum foil? Probably not. That's because there are only three naturally occurring metals in nature: iron, nickel, or cobalt. But that doesn't mean other metals can't become magnetic. 

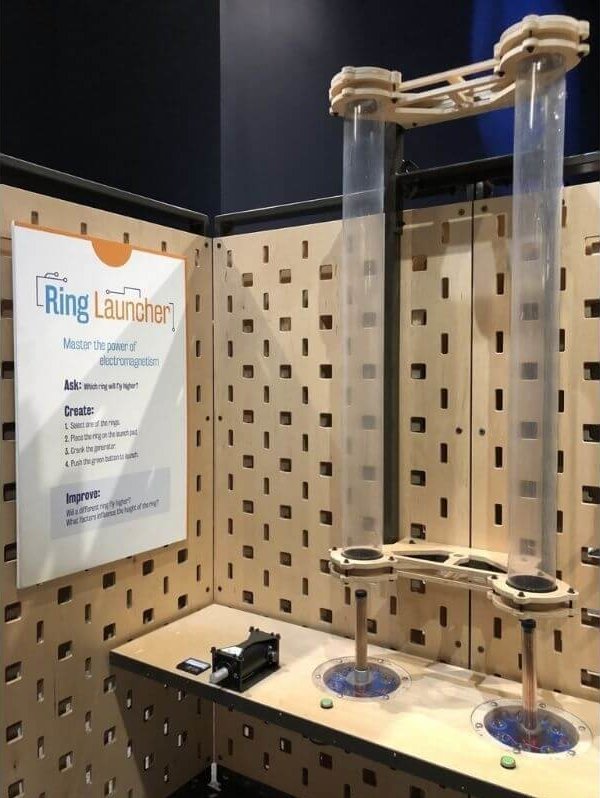
Using one of our most popular exhibits, the Ring Launcher, we'll learn about a really cool concept called electromagnetic induction and find out whether or not all metals are magnetic. 

Watch the video and read along as we find out if all metals are magnetic!

What are Electrons?

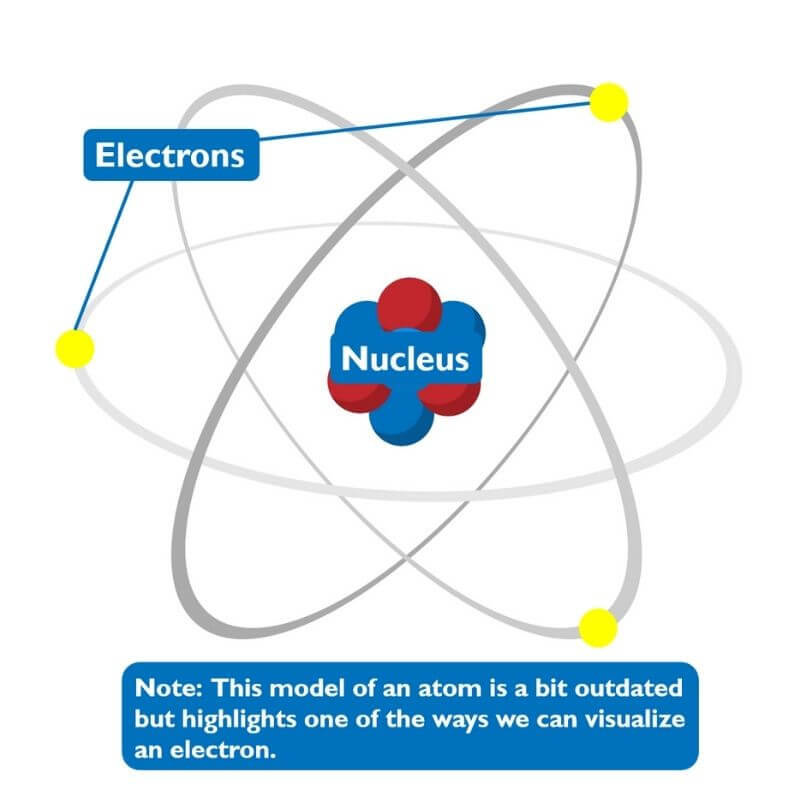
To learn about electromagnetic induction, we need to start with electrons. Electrons are subatomic particles, which means they are even smaller than an atom! They can be thought of as absurdly tiny bundles of negative charges that zip around the nucleus of atom. When electrons flow in one direction, we call it a current, which transmits energy in the form of electricity! A current also creates a magnetic field that will attract or repel nearby magnets.

What is Metal?

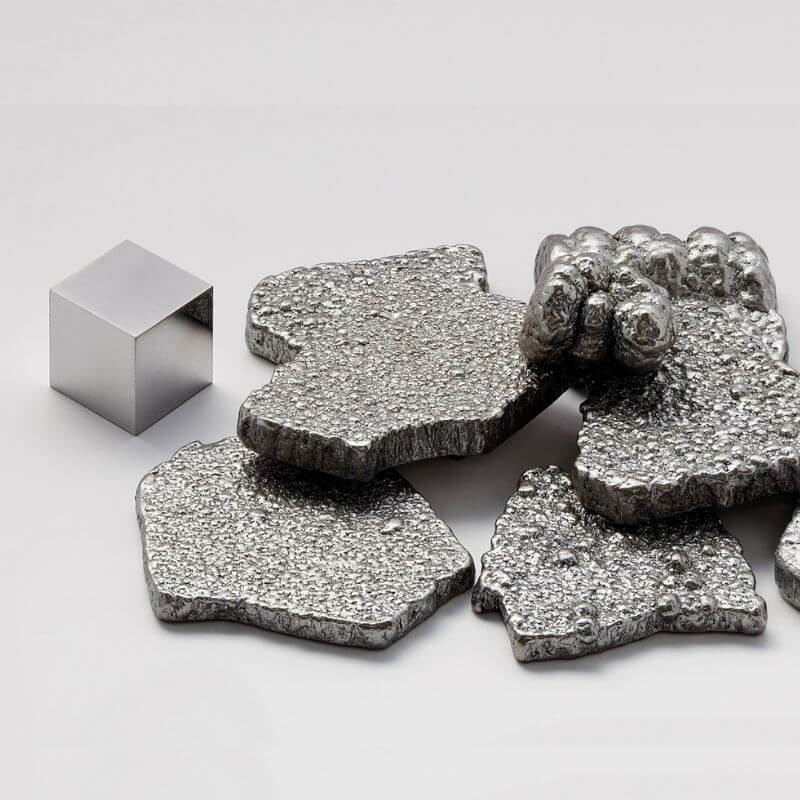
We encounter metals every day, but what IS metal? It is a special kind of material where electrons can flow freely across the surface. When there is a magnetic field nearby, it causes the free-moving electrons to zip all across the surface, which creates a current inside the metal.

different kinds of metal

What is Electromagnetic Induction?

Like specified above, magnetic fields force electrons to move (remember that moving electrons are called a current) … and that currents create a magnetic field. So, if you send electricity through a wire, the magnetic field produced by the current will cause electrons in a nearby metal to move, which also creates an entirely different magnetic field. These two magnetic fields are always opposite each other, which means they repel away from one another. We say that the original current induced a magnetic field in the metal, which is where the term “electromagnetic induction” comes from!

A photo of OSC Ring Launcher

So what is Happening in the Ring Launcher? 

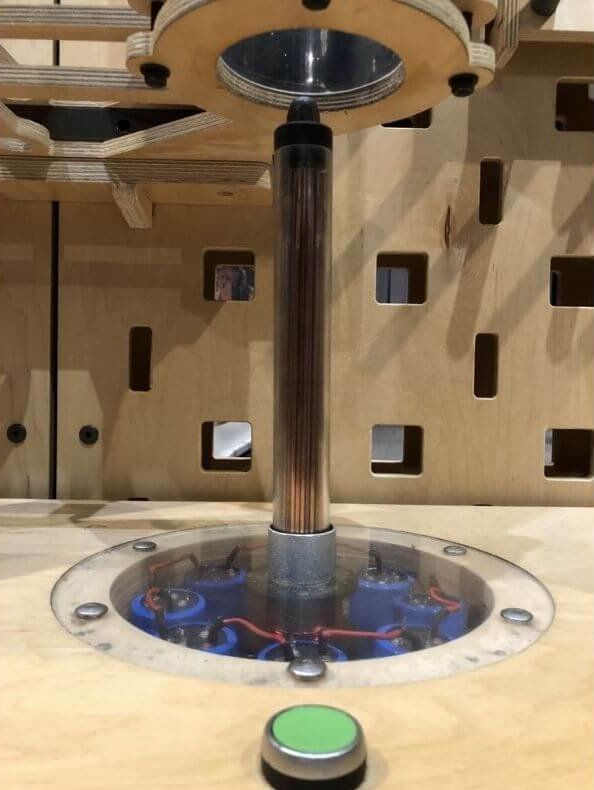
If you look carefully at the base of the ring launcher, you’ll see a bunch of wires and a copper tube sticking out. When the button is pressed, electrons flow through these wires and tube, which creates a current. That current induces a magnetic field in the aluminum rings, which creates an opposing magnetic field and forces the ring to launch in the air!

a closer looks at the Ring Launcher

Orlando Science Center is full of awesome experiments and demonstrations that rely on concepts like electromagnetic induction. Next time you’re here, try and think about what makes all the cool things happen across the building. In fact, try to think about all the amazing science behind all the amazing things that happen in your day-to-day life!

Want to try another fun experiment?

What Is The Mars Rover Doing? See and HEAR What’s Happening on Mars!

Perseverance has landed on Mars, but what is the rover doing up there?

Humans have launched and successfully landed a brand new rover on the surface of Mars! Its name is Perseverance and it brings brand new technology that scientists can use to study the possibility of ancient life on the Martian surface. Check out some of the awesome details below to see what the Mars rover is doing!

Timeline

The Perseverance Rover took years to design and build, with the initial concepts dating all the way back to 2013. It eventually launched on July 30th, 2020 aboard an Atlas V rocket right here in Central Florida.

It then took about 7 months to fly to Mars where it successfully landed in the Jezero Crater on February 18th, 2021. Check out this awesome video to see the actual footage of the landing!

Scientific Equipment

Perseverance is largely modeled after our last Martian rover, Curiosity, but brings with it a whole host of new technology.

Percy brought a drill that will create rock samples for future missions to return to Earth… not to mention the first Martian oxygen experiment, tons of new cameras, and a state-of-the-art spectrometer that can scan rocks for signs of ancient life!

Ingenuity

Perseverance also brought a helicopter, named Ingenuity, which will mark the first powered flight on another world.

Mic Check 1..2..

A microphone on the side of NASA’s Perseverance Rover recorded these sounds. The wind is audible in the filtered section. This is the first time a Mars rover has been equipped with a microphone.

Perseverance Sticks the Landing!

Perseverance is an amazing and bold step in planetary science that paves the way for further exploration, and the flawless landing only marks the beginning of Percy’s incredible journey.

Make sure to pay attention to all the spectacular new science coming out of NASA for the years to come! And check out NASA’s press conference on the successful landing!

Expand Activity! 

One of the goals of Perseverance is to seek signs of ancient life and collect rock and soil samples for a possible return to Earth. Learn how you can make your own time capsule! 

OSC At Home Emails

Get a round up of our latest activities and ideas delivered straight to your inbox so you don't miss a thing!

Find out when we release new resources by following us on social media!


Follow us on social media for even more science fun including fun facts, games, behind-the-scenes photos, and more!


Facebook Logo Instagram Logo YouTube Logo Twitter Logo

Support OSC At Home

In these ever-changing times, it is our pleasure to adapt quality Orlando Science Center experiences to engage with everyone while they are safe at home. Please consider supporting our operating fund to ensure we can continue developing resources today and well into the future. Thank you for your generosity and support!

What Does The Moon Feel Like? Try This DIY Moon Sand Recipe

We'd like to thank our partner, Florida Prepaid, for sponsoring this colorful activity! Today’s young scientists are tomorrow’s college graduates. Saving early for college sends your child a powerful message that you believe in their future — and want them to avoid debt later. Learn more about Florida Prepaid’s College Savings Plan at myfloridaprepaid.com

Florida Prepaid College Savings Plan Logo

Cheese or Sand? What does the moon feel like? Find out with this stellar activity! 

Have you ever looked up at night and thought "what does the moon feel like?" The moon’s surface is made up of craters and rocks. Craters are holes in the Moon’s surface formed by impact from an asteroid, which is a chunk of rock and metal in outer space. Using our DIY Moon Sand recipe, you too can experiment and make your own moon craters and touch the surface of the moon!

These recipes call for various food items but it is not to be consumed! Keep an eye out for this when little ones are playing with their moon sand. We do recommend doing this activity outside if possible as it does tend to get messy.

Materials for DIY Moon Sand:

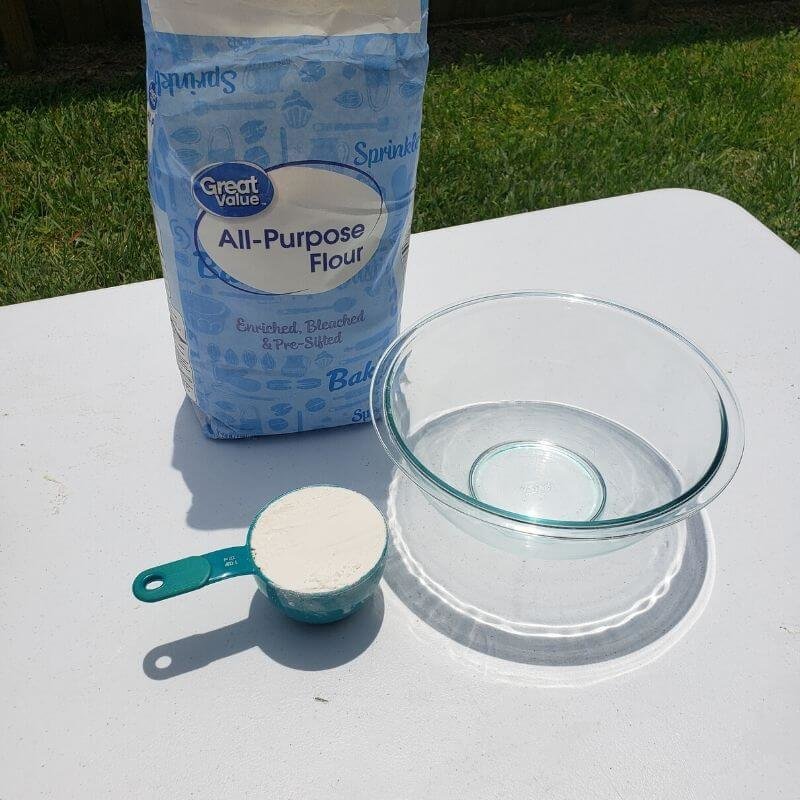
  • 4 cups of all-purpose flour
  • 1/2 cup of baby oil
  • Measuring cups
  • Mixing bowl
  • Rocks of various sizes 
  • Mixing spoon *optional
  • Play bin *optional

Materials for Gluten-Free DIY Moon Sand:

  • 2 cups of baking soda/powder
  • 2 cups of cornstarch
  • 1 cup of baby oil
  • Measuring cups
  • Mixing bowl
  • Rocks of various sizes 
  • Mixing spoon *optional
  • Play bin *optional

Directions:

STEP 1:

  • First, measure out your dry ingredients and add them to your mixing bowl, this will be your flour or baking soda/cornstarch base. When you scoop these ingredients into your measuring cups, make sure you level off the cup to make sure you get a full cup!
ingredients for DIY moon sand

STEP 2:

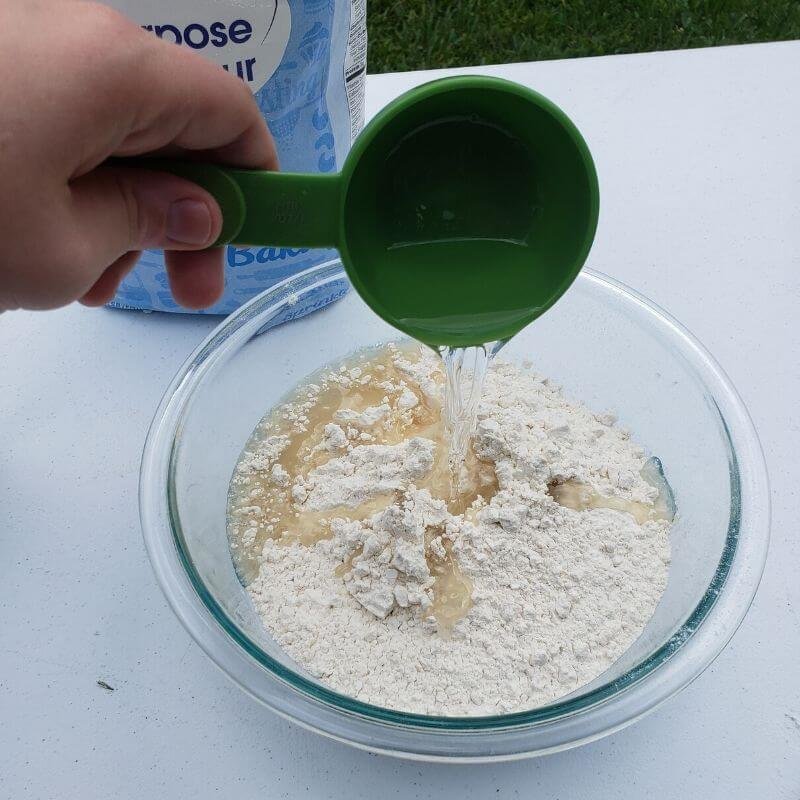
  • Next, we will add in our liquid ingredients. Measure out the designated amount of oil to add to your mixture and carefully pour it into your bowl.
Add liquid ingredients to moon sand

STEP 3:

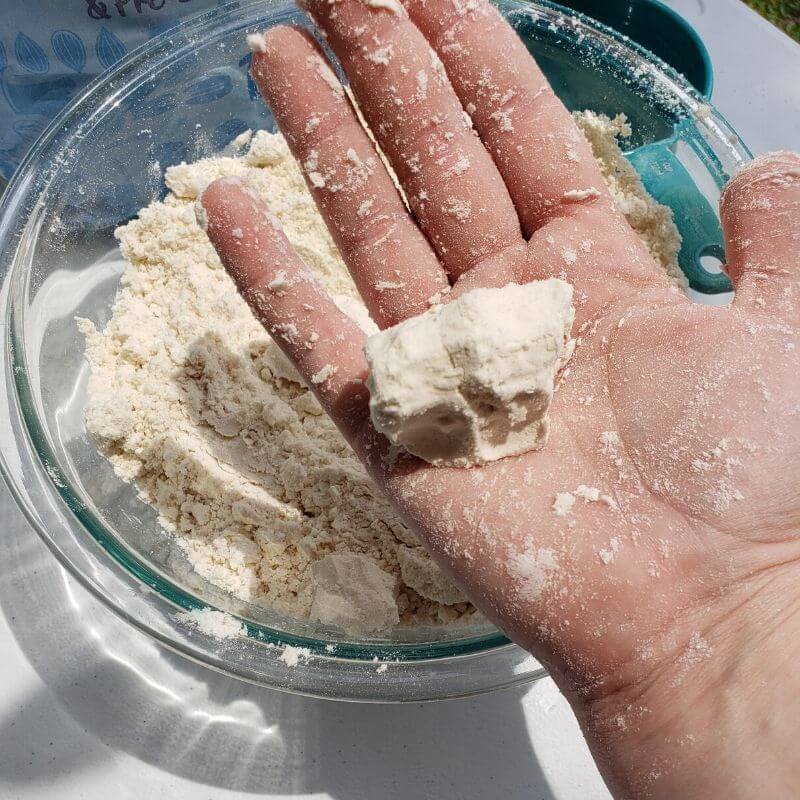
  • Here’s where it starts to get messy! Start to mix all of your ingredients together. You can mix with your hands or a large mixing spoon. Your dry ingredients will absorb the oil and start to stick together while still remaining soft. The best moon sand texture is crumbly, but still able to be molded together.
combine ingredients

Now that you have made your moon sand, you can start making your own craters!

Our moon sand is nice and soft but is perfect for making impressions. Gather a few rocks of different shapes and sizes. Through this activity, children will be able to experiment and make observations about their craters while changing variables of the activity. How will your results change?

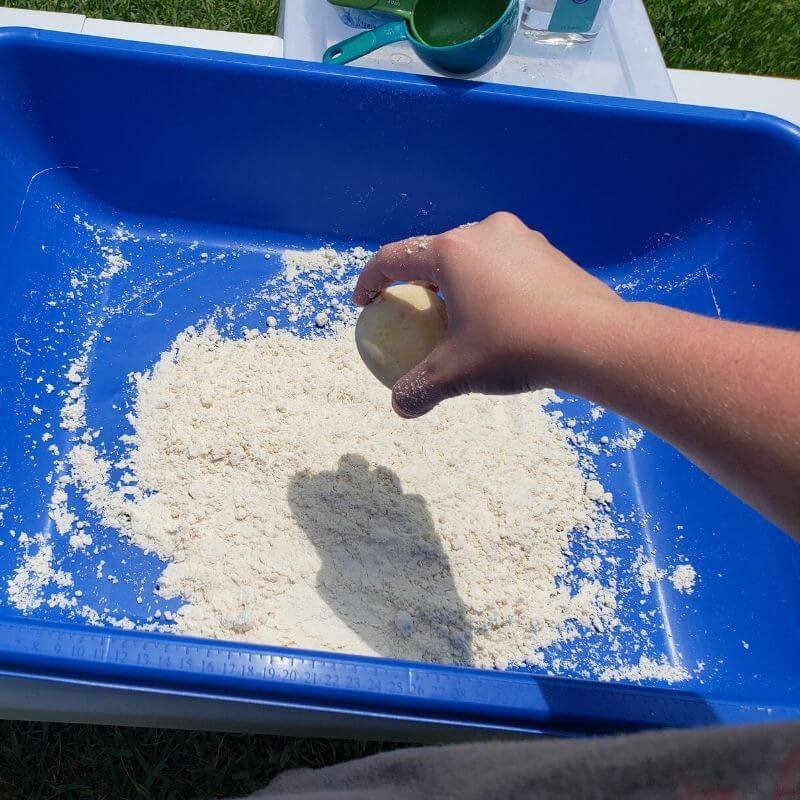
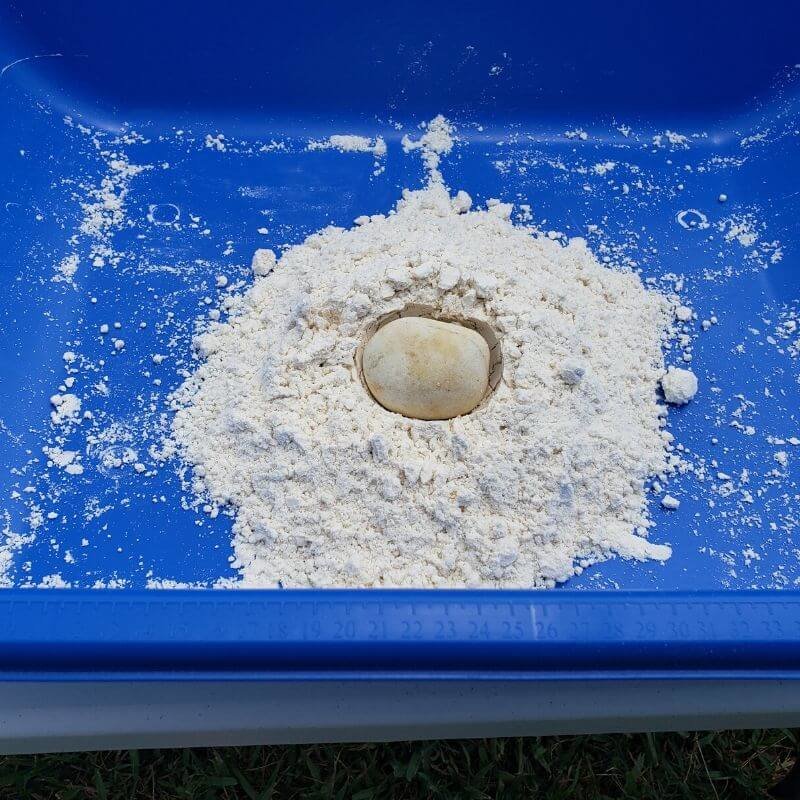
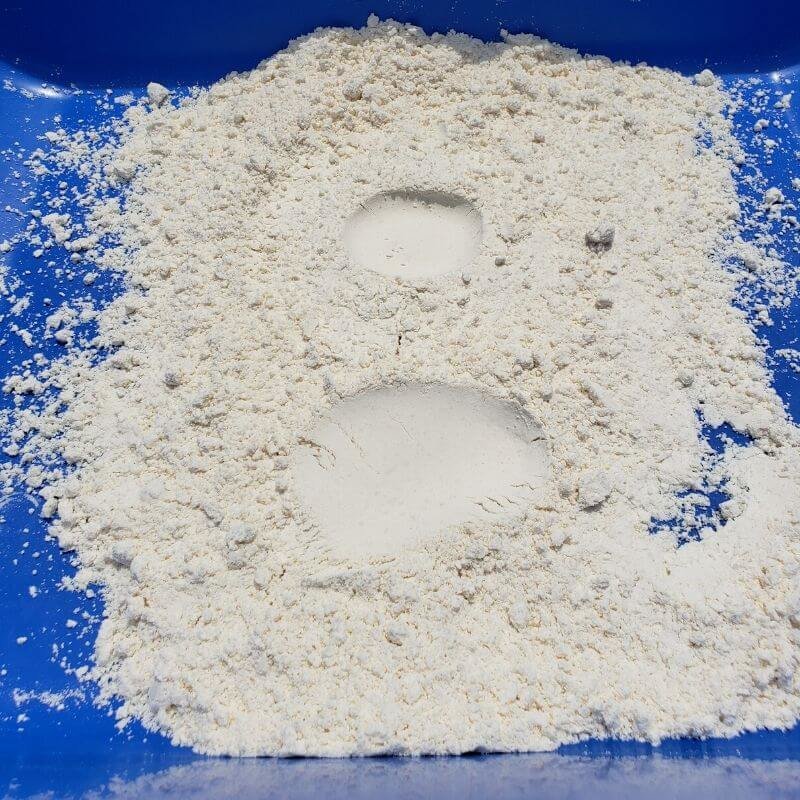
Experiment: Even out your moon sand to form a layer at the bottom of your bowl or bin. Stand over your moon sand and gently drop different rocks onto the surface. You can measure the size of your craters with a ruler by how many inches wide or deep it is. Record your results, you can write or draw the way your crater looks and take note of your measurements to compare later.

Try some of these variations and observe how your craters change:

  • Drop your asteroids from different heights
  • Instead of an even layer, build up your moon sand into a mountain and try dropping your asteroid onto it and see what happens.
  • Try making your moon sand look like the moon by forming all kinds of craters of all shapes and sizes in your sand.
  • Mold your moon sand into different phases of the moon

So, now that you have created and experimented with your own moon sand, can you answer the question? What does the moon feel like to you? 

Experiment with your DIY moon sand
make a crater
crater in moon sand

Make Conclusions

Which rocks made the deepest impressions? What happened to your craters when you changed the height at which you dropped your asteroids? What did your data tell you about your experiment?

If you had fun making moon sand crater creations and snapped some photos, be sure to submit it to our Science Showcase here or tag Orlando Science Center and use #OSCatHome on social media! You might be featured on our channels.

OSC At Home Emails

Get a round up of our latest activities and ideas delivered straight to your inbox so you don't miss a thing!

Find out when we release new resources by following us on social media!


Follow us on social media for even more science fun including fun facts, games, behind-the-scenes photos, and more!


Facebook Logo Instagram Logo YouTube Logo Twitter Logo

Support OSC At Home

In these ever-changing times, it is our pleasure to adapt quality Orlando Science Center experiences to engage with everyone while they are safe at home. Please consider supporting our operating fund to ensure we can continue developing resources today and well into the future. Thank you for your generosity and support!

Ice Cream Science Project: How to Make Ice Cream in 3 Simple Steps

I scream, you scream, we all scream "SCIENCE" with this ice cream science project!

Get that chilly sensation whenever you want as you learn the science of cold by making homemade ice cream! This vanilla or chocolate ice cream science project doesn’t require any fancy equipment, just plastic food storage bags, elbow grease, and chemistry!

Recommend age: 5+; younger scientists may need help measuring ingredients and shaking the bag.

Mess Alert: This activity can be messy since the bags can leak! You may want to shake the bags outside or over a sink.

Materials you will need:

  • ½ cup of whole milk or half-and-half
  • 1 tablespoon of sugar
  • ¼ teaspoon of vanilla
  • 1 tablespoon of cocoa powder
  • 6 tablespoons of rock salt or ice cream salt
  • 1 pint-size plastic food storage bag (e.g., Ziploc)
  • 1 gallon-size plastic food storage bag
  • Ice cubes
  • Duct tape
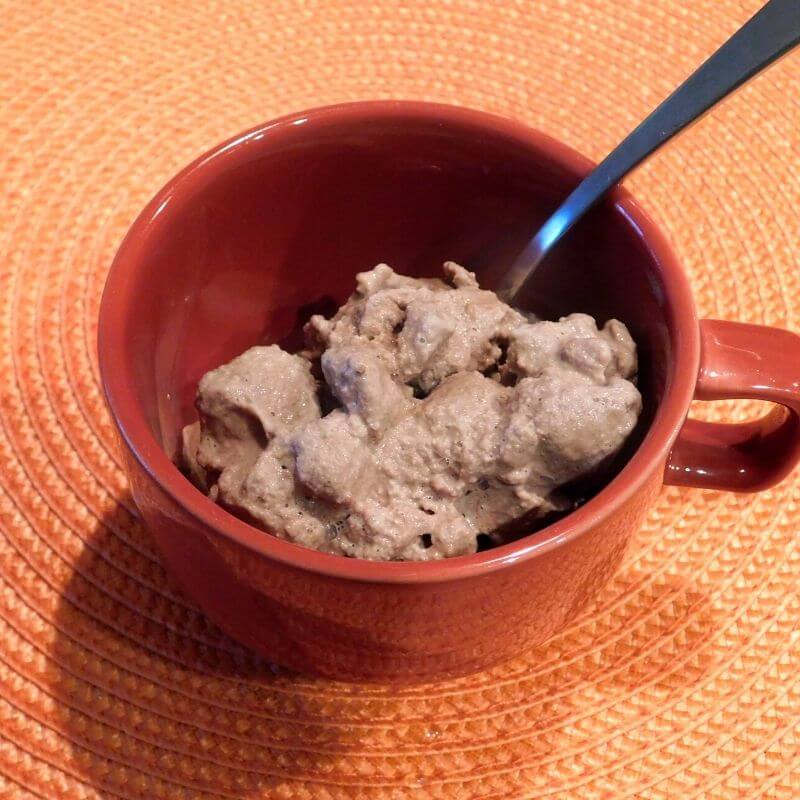
Completed chocolate ice cream science project

Directions:

Step 1:

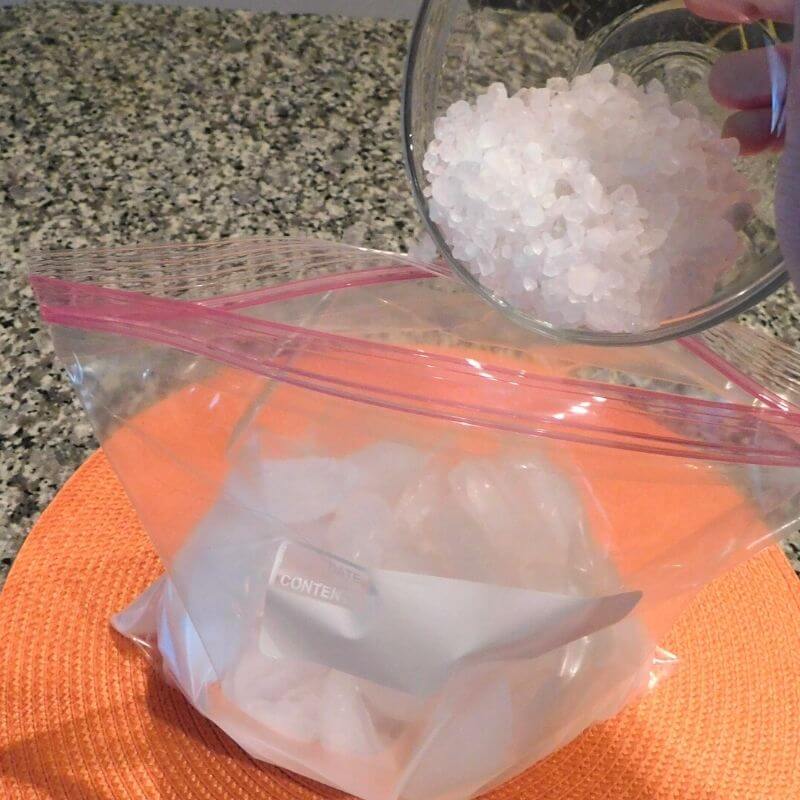
Fill the gallon-size plastic food storage bag halfway with ice, and add the rock salt to the ice. Seal the bag so it doesn’t spill while you prepare the ice cream ingredients.

Tip: You can add more than one bag of ice cream to the bag of ice and shake them at the same time. If you do make more than one bag, you can use a Sharpie to label the bags of ice cream to tell them apart.

add rock salt to ice cream science project

Step 2:

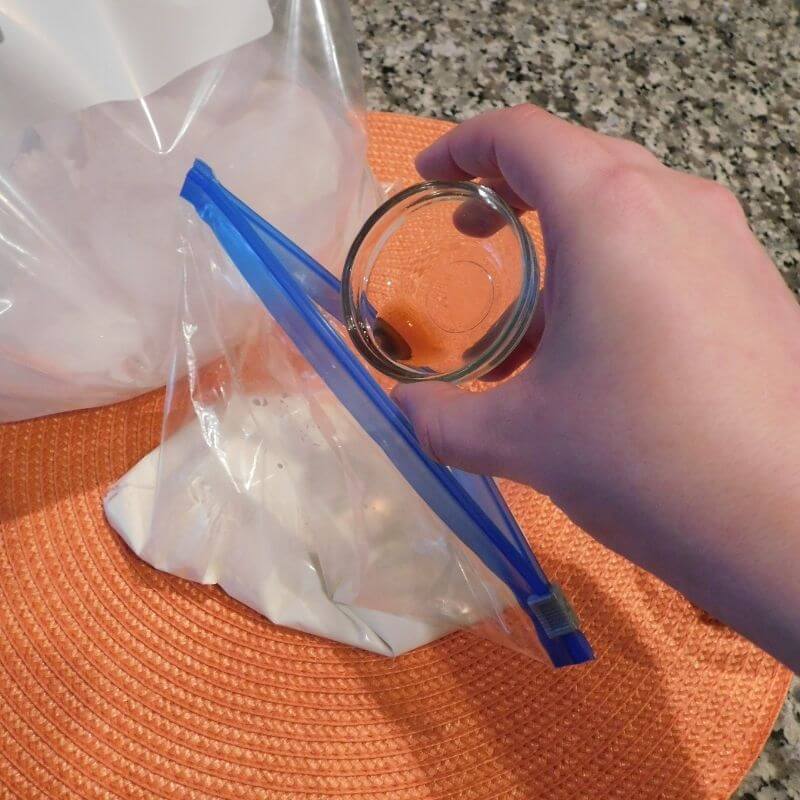
Add the milk and sugar to the pint-size plastic food storage bag. Optional: add cocoa powder to the pint-size bag to make chocolate ice cream. (Add the vanilla to the pint-size bag, even chocolate ice cream has a little vanilla in it!)

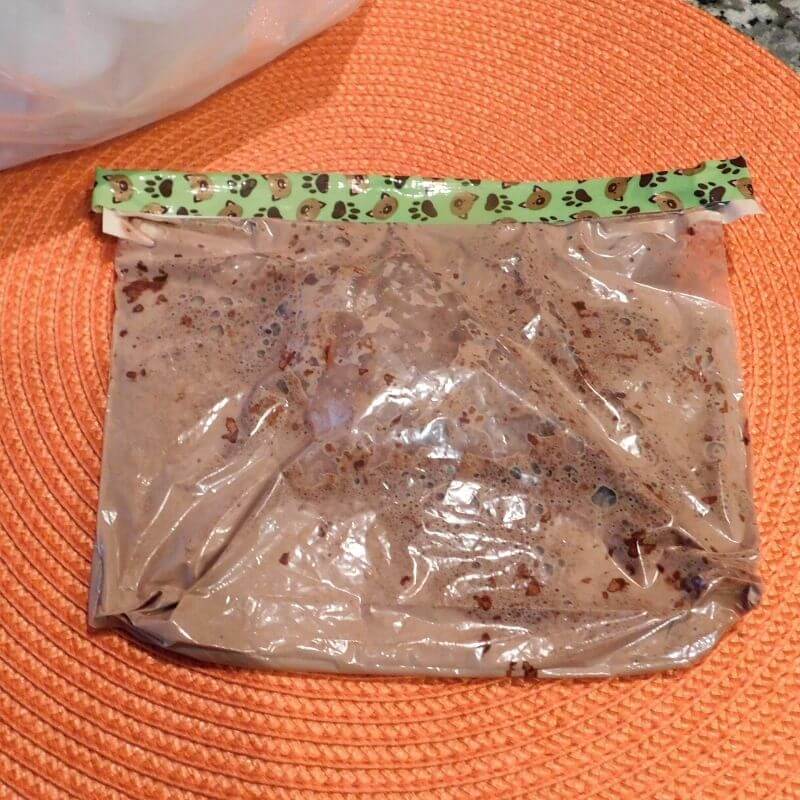
Squeeze the excess air out of the pint-size bag and seal it, and tape the seal shut with duct tape to keep it from spilling. Shake the pint-size bag for a few seconds to mix the ice cream ingredients.

Tip: ½ cup of milk will make about 1 scoop of ice cream, so double the recipe if you want more. But don't increase the proportions more than that – a large amount might be too big for kids to pick-up because the ice itself is heavy.

adding vanilla to ice cream science project

While you're making and shaking your ice cream talk about physical and chemical changes  and encourage your scientist to answer the following:

  • What does your ice cream look like?
  • Why do you think the ingredients in the pint-size bag turn to ice cream?
  • What do you think the shaking did?
  • Why do you think we added salt to the ice?
  •  What physical or chemical changes did you observe while making your ice cream?
  • What other examples of physical or chemical changes can you think of?
  • Dive deeper into a science topic with the “Learn More” section.

Step 3:

Open the gallon-size bag and put the pint-size bag inside it, and carefully seal the gallon-size bag again. Make sure it is completely shut!

Shake until the mixture in the pint-size bag is ice cream, which takes about 5 minutes.

Wipe off or rinse the top of the pint-size bag with cold water to remove any salt, then open the bag carefully, add any toppings you would like, and enjoy your ice cream!

seal liquid ingredients before shaking

Expand on the activity! 

The Science: Physical and Chemical Changes

We talk about two types of changes in chemistry: physical changes and chemical changes. We also talk a lot about matter, which is is anything that takes up space.

In a physical change, the form of matter is changed, while its chemical identity remains the same.

  • Think about cutting a piece of paper into bits. It’s still paper, just in smaller pieces. Physical changes are also reversible. You could tape the paper back together! Other examples of physical changes include boiling, melting, freezing, dissolving, and mixing.

In a chemical change, the chemical reaction occurs. The chemical reaction changes the chemical identity of the matter, and new products are formed that you can’t easily reverse.

  • Think of a campfire. The fire takes a log and creates ash and smoke, two chemically-distinct products.

There are 5 signs that a chemical reaction has occurred. They’re easy to remember… just think about F.A.R.T.S.

Fizzes: Did the reaction produce bubbles or gas?

Aroma: Did the reaction produce a smell?

Re-color: Did the reaction produce a new color?

Temperature: Did the reaction produce a temperature change or release light?

New Substance: Did the reaction produce a new substance?

When making ice cream, you’re using physical changes. You mix and dissolve the sugar into the milk, but this doesn’t change the chemical structure of the milk and you could remove the sugar is you tried.

When you shake your bag, you’re freezing the milk, which means the water in it is turning from a liquid (water) into a solid (ice). This is also a physical change! We still see lots of physical and chemical changes in the kitchen. Which ones can you think of?

Learn More: Chemistry

Why do we shake our ice cream science project instead of just popping the ice cream in the freezer?

Ice cream is an emulsion. In an emulsion, small droplets of one liquid are dispersed (or spread out) throughout another. When you shake the ice cream, you disperse the ice crystals, fat molecules, and air in the other ingredients.

The more you shake, the smaller the ice crystals get and the more air you add. This makes the ice cream creamier! We add salt to the ice so we can shake the ice cream long enough to emulsify it.

Every substance has a melting point, which is the temperature it melts or freezes at. For freshwater, the melting temperature is 32ºF/0ºC. Adding rock salt lowers the melting point of water. A 10% salt solution freezes at about 20ºF/-6ºC.

With a lower melting point, we can shake the ice cream longer to better diffuse the different parts. If it froze faster, this would be much harder to do.

OSC At Home Emails

Get a round up of our latest activities and ideas delivered straight to your inbox so you don't miss a thing!

Find out when we release new resources by following us on social media!


Follow us on social media for even more science fun including fun facts, games, behind-the-scenes photos, and more!


Facebook Logo Instagram Logo YouTube Logo Twitter Logo

Support OSC At Home

In these ever-changing times, it is our pleasure to adapt quality Orlando Science Center experiences to engage with everyone while they are safe at home. Please consider supporting our operating fund to ensure we can continue developing resources today and well into the future. Thank you for your generosity and support!
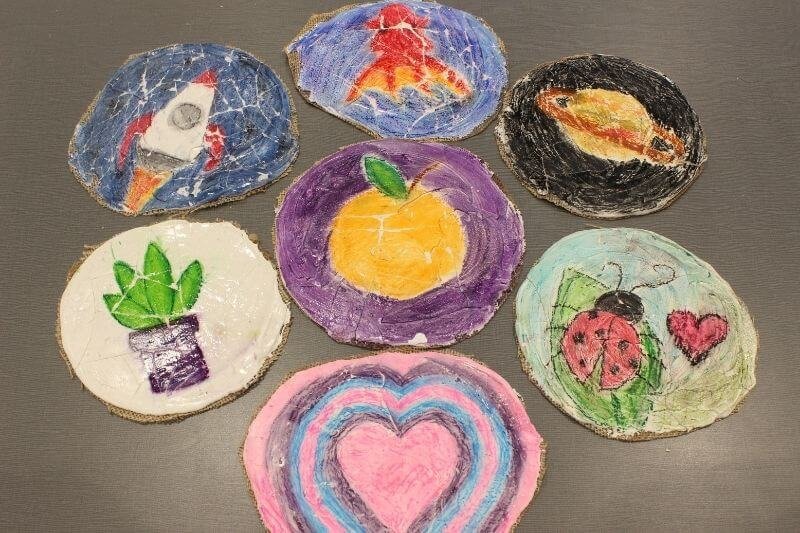
DIY Fresco Art For Kids • An Activity in Ancient Art

You don't need to be Michelangelo to create this DIY Fresco art for kids! 

Fresco paintings are a huge part of the artifacts recovered from the fallen city of Pompeii, Italy in 79 AD. Fresco art is defined by combining wet plaster with pigments such as paint or pastels. In this DIY Fresco art activity, we will be doing a modified version that kids of all ages can do at home!


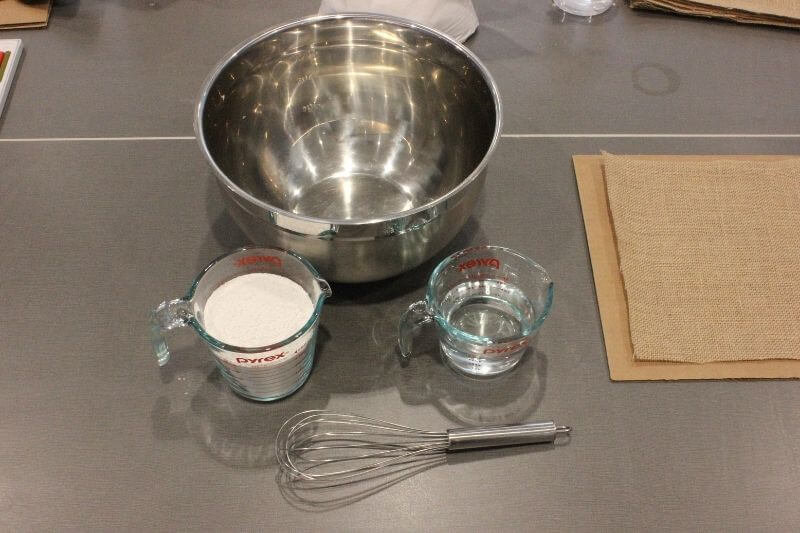
Materials you will need:

  • Plaster of Paris (BLICK Art materials)
  • Natural Burlap
  • Cardboard
  • Soft Pastels (any that are not oil based)
  • Mixing bowl
  • Measuring cups
  • Spray bottle
  • Clear washable glue
  • Wisk or mixing tool
  • Spatula
  • Box cutter (for adult use only)
materials for DIY Fresco Art For Kids

Directions:

Step 1:

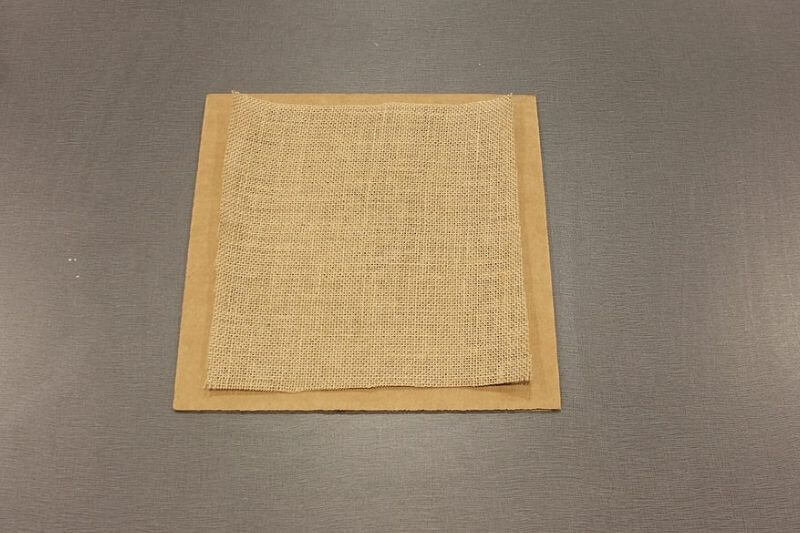
Prepare your supplies! Cut your cardboard down to approximately a 1ft by 1ft square. Next, you should cut the burlap down to about a 10” by 10” square so that there is at least an inch of cardboard sticking out on all sides when you lay the burlap on top of the cardboard. 


square of burlap on cardboard

Step 2:

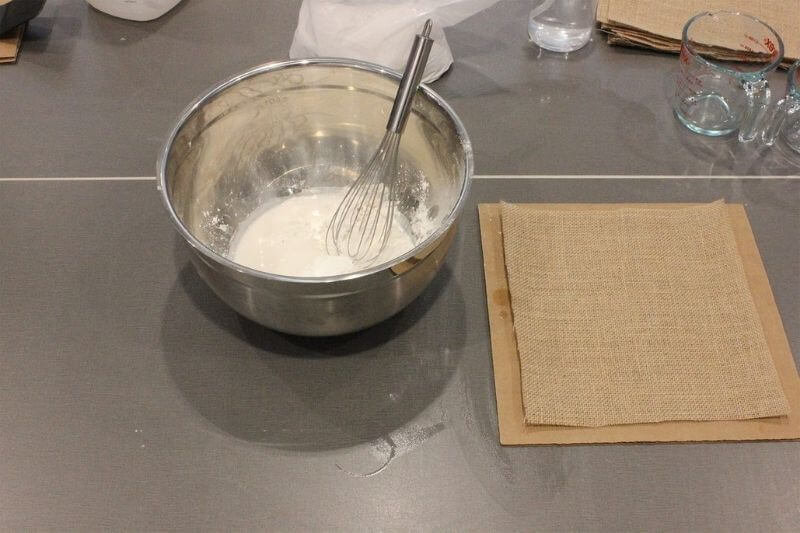
Fresco-plaster mixture: Use the ratio of 2-parts plaster: 1-part water. For this activity, we used 2 cups of plaster with 1 cup of water. Pour the ingredients into a bowl and begin to stir with your mixing tool. You will notice that the plaster will instantly combine with the water and become a thicker mixture.


make plaster for diy fresco art

Step 3:

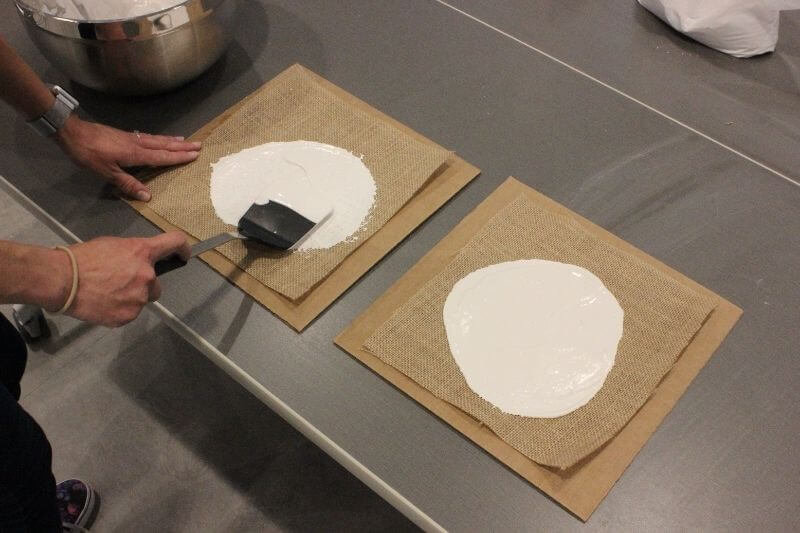
Preparing your base: Pour some of your mixture onto your burlap-cardboard base and begin to smear into a circle like the image shown. Feel free to keep the plaster base relatively thick, this will give you a better effect in a later step. Let plaster dry for 2 hours.


prepare the base for DIY Fresco Art by spreading plaster on burlap

Step 4:

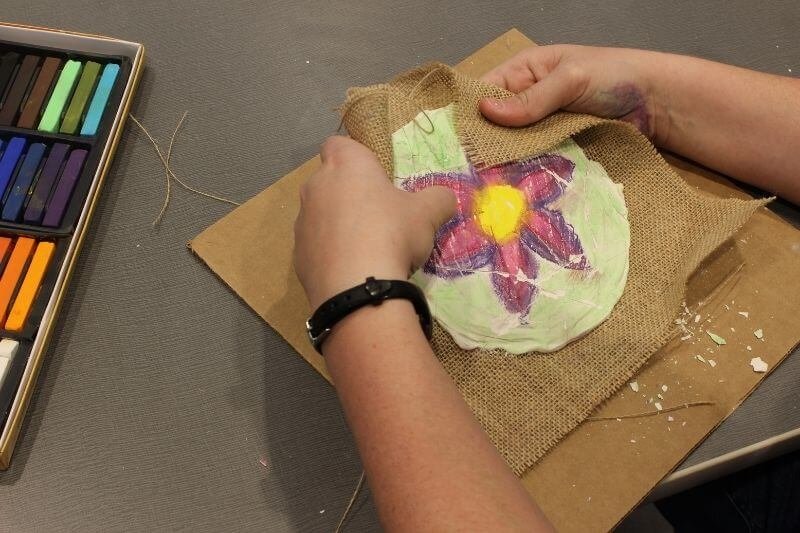
Time to make your DIY Fresco Art! Mist your plaster base with a spray bottle so that it is slightly damp. Use the soft pastels as desired to blend colors and create your own Fresco art masterpiece! Have fun with the plaster base, use your fingers to smudge the colors and see how they blend.


two hands decorating Fresco Art with a flower

Step 5:

Now for the fun part! Use your hands or a tool to gently break apart your plaster base. This will create “stress fractures” and make your Fresco art look like it has just been found from long ago or just like the artifacts recovered from Pompeii.


two hands creating stress fractures to fresco

Step 6:

Preserve your creation: Using clear washable glue, pour a generous amount onto the middle of your plaster base. Using a scrap piece of cardboard, gently spread the glue around to create an even layer over your base. This will seal in the pigment and the fractures you have added to your fresco.


Step 7:

Finish your Fresco! Once the glue is fully dried, gently remove the burlap-plaster base from the cardboard. Now you will be able to trim the excess burlap away from your plaster base. You have now completed your ownDIY Fresco Art!


completed fresco art projects


Funding for this project was provided by the Cornelia T. Bailey Foundation.

Thanks to the support from Orange County Government through the Arts & Cultural Affairs, Orlando Science Center is excited to host the blockbuster exhibit, Pompeii: The Immortal City in the Fall of 2020.
 

Orlando Science Center is excited to support partnership programs and collaborations leading up to and coinciding with the run of the exhibition.

Cornelia T. Bailey Foundation

If you enjoyed this project, you're going to lava these other Pompeii-inspired activities! 

OSC At Home Emails

Get a round up of our latest activities and ideas delivered straight to your inbox so you don't miss a thing!

Find out when we release new resources by following us on social media!


Follow us on social media for even more science fun including fun facts, games, behind-the-scenes photos, and more!


Facebook Logo Instagram Logo YouTube Logo Twitter Logo

Support OSC At Home

In these ever-changing times, it is our pleasure to adapt quality Orlando Science Center experiences to engage with everyone while they are safe at home. Please consider supporting our operating fund to ensure we can continue developing resources today and well into the future. Thank you for your generosity and support!
How to Make Homemade Butter in 5 Simple Steps

I can't believe it IS butter! Learn how to make homemade butter with a little science and a lot of energy!  

Shake off the excess energy as you make butter and learn about the chemistry of the food we eat every day! Join us as we learn how to make homemade butter in 5 simple steps, using only 3 ingredients, for 1 delicious experiment! 

Materials you will need:

  • ½ cup heavy cream

  • A small jar or container with a tight fitting lid

  • Salt (optional)

Directions:

Step 1:

Let your half cup of cream sit a while until it has warmed up to almost room temperature.


Step 2:

Pour the cream into the jar and seal the lid tightly. Make sure the lid is completely sealed; otherwise, cream may leak out of the container!

seal your homemade butter (1)

Step 3:

Start shaking! It should take between 5-7 minutes (or the length of this dance party) of shaking to make your homemade butter.


Step 4:

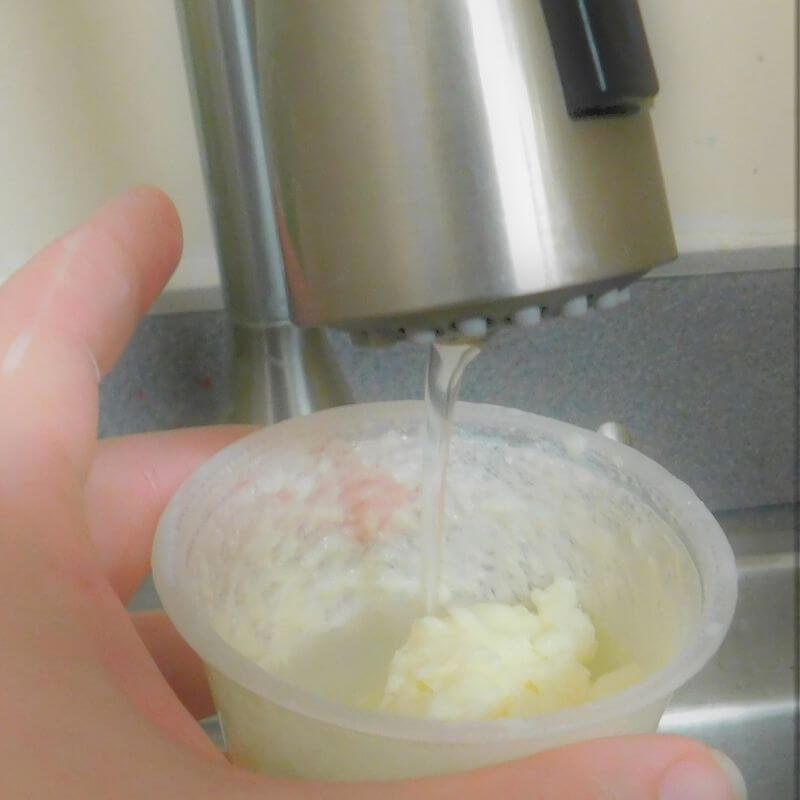
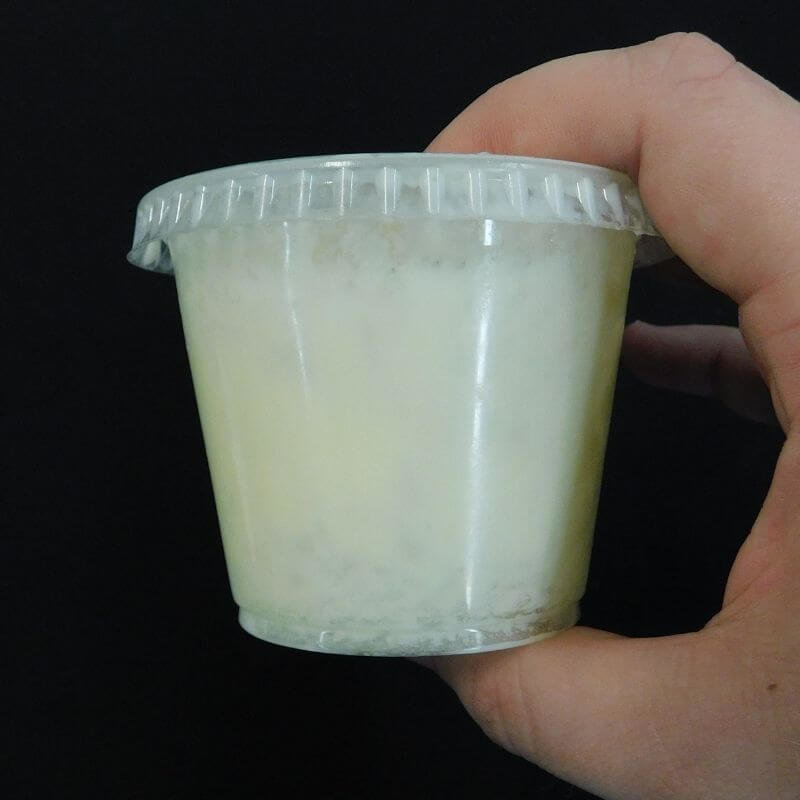
Once you have both a solid and a liquid in your jar, open the lid and rinse the homemade butter under cold water to get rid of all the liquid.

rinse your homemade butter

Step 5:

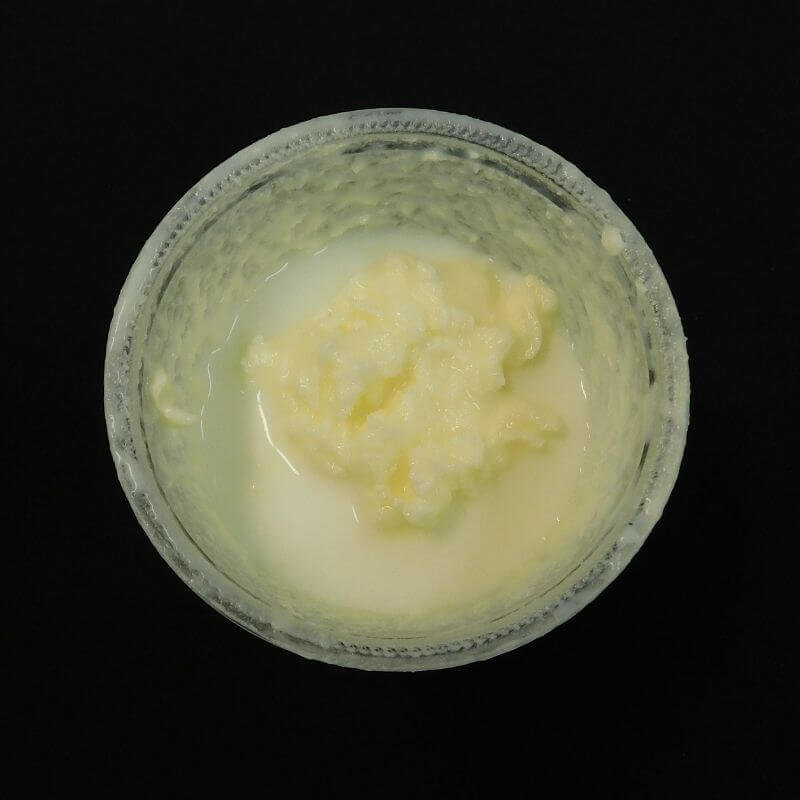
Refrigerate your butter for up to 10 days (or eat it). If you would like, you can add a pinch of salt to your butter before storing it.

the last step_ you have homemade butter

Expand on the activity!

The Science: 

  • When whole milk sits out, tiny fat molecules float to the top, forming a layer of cream that can be skimmed and collected. To make butter, the cream is agitated (stirred up) so that the fat molecules get shaken out of position and clump together.
  • As you shake your cream, you are breaking the fat out of its little bundles and mixing it with air, just like whipped cream. Your jar will feel very light.

  • Then, the fat globules will begin sticking to each other. You will start to see a liquid and a solid. The solid is butter, the liquid is buttermilk.

Did you know?

  • The color of butter comes from what the animal has been eating. Yellow is from carotene, which cows get from the plants they eat.
  • Butter has about the same density as ice.
  • Butter is an ancient prepared food, having been made by people at least 4,000 years ago. Some of the earliest known recipes for making butter call for the use of a container made from animal skin. The skin would be sewed together tightly, leaving a small opening through which to add fatty milk or cream. The vessel would then be suspended, such as from wooden poles, and swung until butter formed.

Try some more kitchen chemistry!

DIY Rock Candy

OSC At Home Emails

Get a round up of our latest activities and ideas delivered straight to your inbox so you don't miss a thing!

Find out when we release new resources by following us on social media!


Follow us on social media for even more science fun including fun facts, games, behind-the-scenes photos, and more!


Facebook Logo Instagram Logo YouTube Logo Twitter Logo

Support OSC At Home

In these ever-changing times, it is our pleasure to adapt quality Orlando Science Center experiences to engage with everyone while they are safe at home. Please consider supporting our operating fund to ensure we can continue developing resources today and well into the future. Thank you for your generosity and support!
How to Create Iridescent Art: A Colorful STEAM Bookmark Activity

Scientists use nanotechnology to create this effect, but you just need clear nail polish to learn how to create iridescent art! 
Iridescence is the phenomenon of certain surfaces that appear to gradually change color as the angle of view or the angle of illumination changes. It can be found naturally in animals like fish for camouflage in the water and for attracting mates, or in the wings of butterflies and bird feathers. It is also seen in bubbles and you won't believe how simple it is to find out how to create iridescent art yourself!

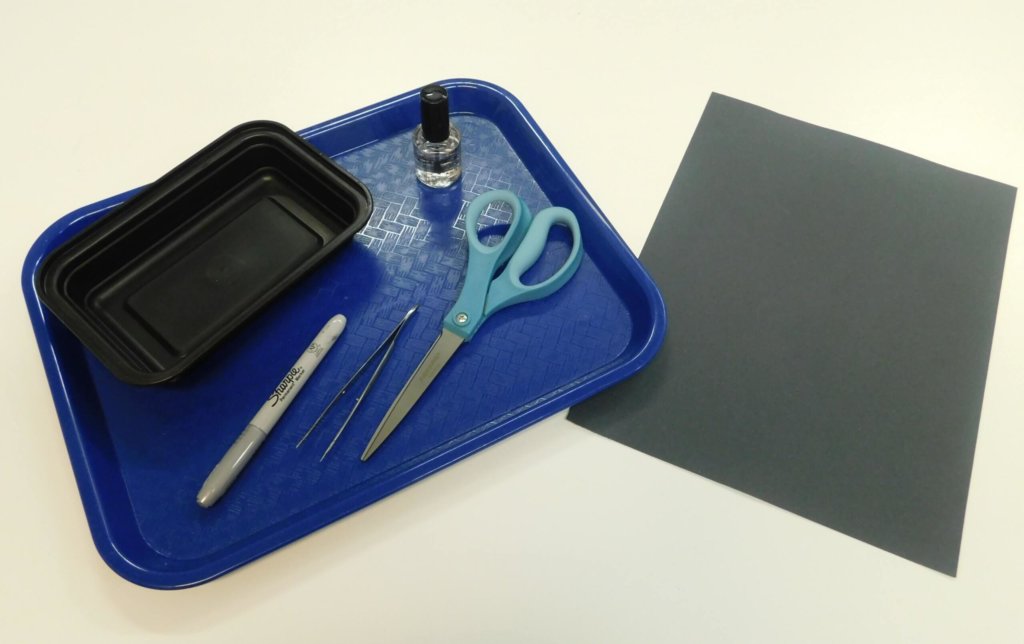
Materials you will need:

  • Black paper
  • Clear nail polish
  • Permanent marker(s) that can write on black paper
  • Shallow container (like Tupperware or a frozen dinner tray)
  • Scissors
  • Tweezers (Optional)
materials for how to create iridescent bookmarks

Directions:

Step 1:

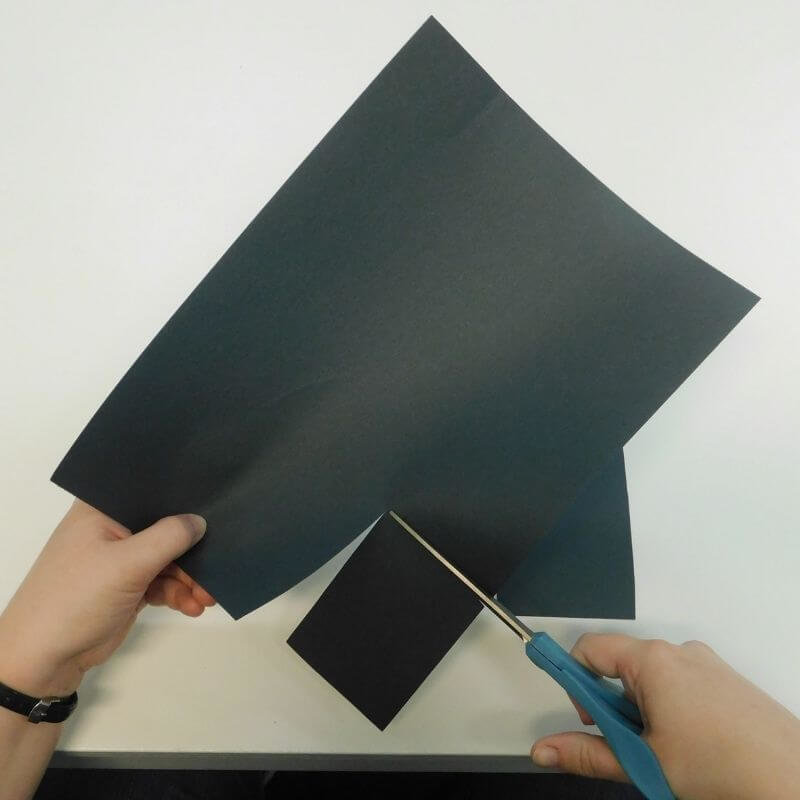
Cut out whatever size and shape bookmark you want to make. Smaller is easier to work with. Make sure it fits in your shallow container!

cut out shape of iridescent artwork

Step 2:

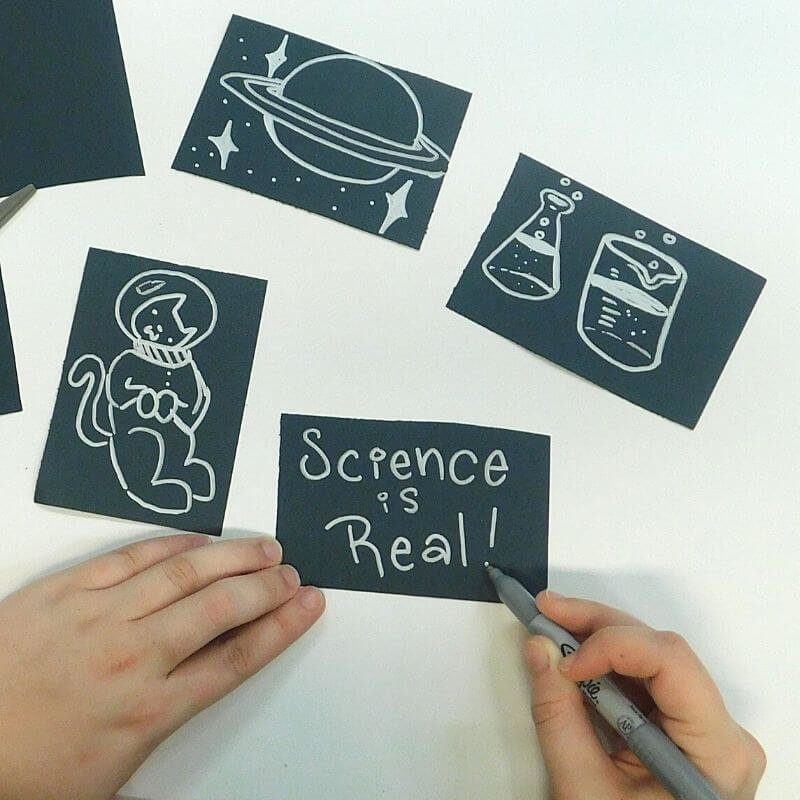
Write something or draw a picture on the paper with your markers.

draw art that will be under iridescent

Step 3:

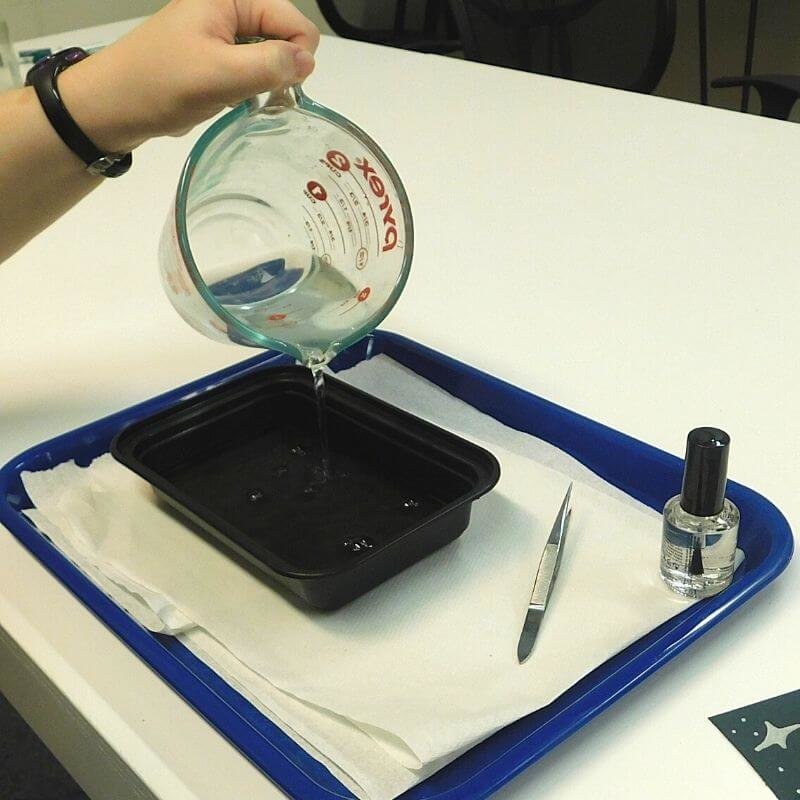
Add enough water to the container so that it is about a half-inch deep.

pouring water over iridescent art

Step 4:

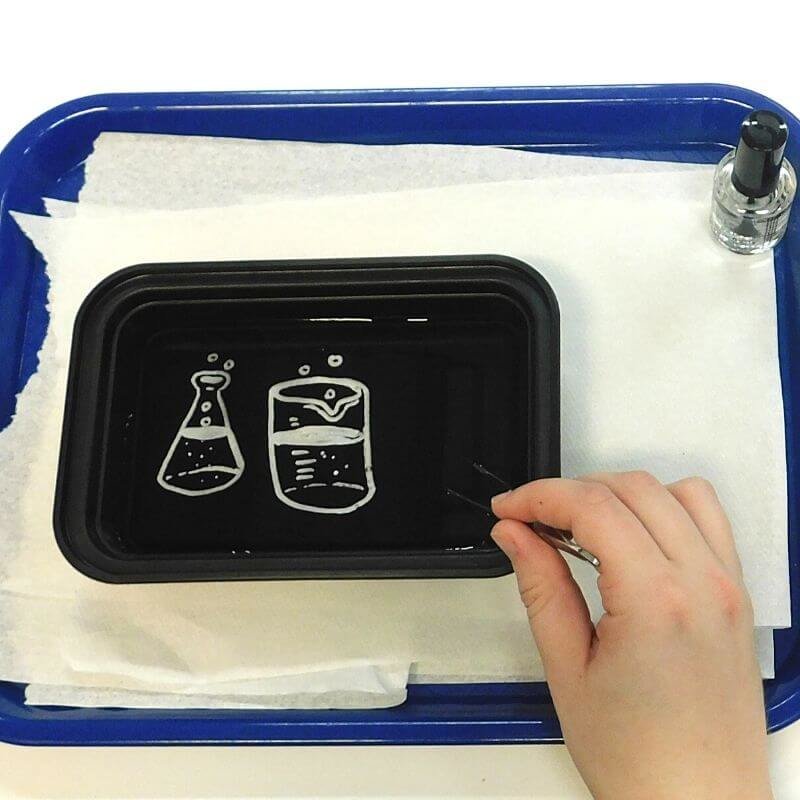
Hold one end of the black paper and slide it into the container until the paper is fully underwater.

slip paper under water

Step 5:

Add a single drop of nail polish onto the surface of the water above the paper. Make sure to just use one drop! Too much will ruin the effect!

*Tips:
The nail polish will dry quickly on top of the water. If it does, it will create a film that won’t stick to the paper. If the nail polish does create a dry film on top, simply scoop it off and try again more quickly!
It can take patience and practice to get this activity right!

add nail polish to water to create iridescent effect on your art

Step 6:

Now lift the paper out of the water, carefully dragging the face of the bookmark along the nail polish.

remove iridescent art from water

Step 7:

Leave your bookmark out to dry for about 10 minutes. Then check it out in different lights from different angles!

And that's it! You've mastered how to create iridescent art! Share your creations with us on social media by using #OrlandoScienceCenter or uploading it to our Science Showcase

finished Iridescent Bookmark art

Expand on the Activity!

Learn the science:

The nail polish spreads out into a super-thin film across the water, and then you transfer that film to the bookmark.

The film is only a few hundred nanometers thick, about as thick (or thin!) as a soap bubble. However, small differences in the thickness of the film change the color it reflects, so it creates the iridescent effect!

Can you think of any examples of iridescence in nature? Many bird feathers, butterfly wings, shells, and beetle shells have nano-sized, semi-transparent layers that create an iridescent effect when they reflect light. Scientists are also using nanotechnology to create iridescence for various materials and devices!

OSC At Home Emails

Get a round up of our latest activities and ideas delivered straight to your inbox so you don't miss a thing!

Find out when we release new resources by following us on social media!


Follow us on social media for even more science fun including fun facts, games, behind-the-scenes photos, and more!


Facebook Logo Instagram Logo YouTube Logo Twitter Logo

Support OSC At Home

In these ever-changing times, it is our pleasure to adapt quality Orlando Science Center experiences to engage with everyone while they are safe at home. Please consider supporting our operating fund to ensure we can continue developing resources today and well into the future. Thank you for your generosity and support!