Inspirational Queer Makers Who Made an Impact on Orlando Science Center’s Makerspace

Do you love The Hive: A Makerspace? Meet some of the inspirational queer makers who inspired your favorite activities!

Pride month is celebrated in June to commemorate the Stonewall Riots in 1969, which is considered to be the igniting spark that began the gay liberation movement. Pride month is a time for the LGBTQIA+ community to celebrate – to be openly proud to be queer. Queer people have made countless visible and invisible contributions to culture and society. Here at Orlando Science Center, we want to celebrate some inspirational queer makers who have inspired or influenced The Hive: A Makerspace.

This is by no means an exhaustive list of LGBTQIA+ makers, but ones we have felt inspired by here in The Hive.

Keith Haring was a gay artist who painted public murals and graffiti in the 1980s.

He got his start painting subway murals with chalk and was arrested a number of times for his illegal street art.

Keith Haring contracted HIV which later developed into AIDS and became very involved in AIDS activism. His diagnosis propelled him to make as much art as possible as quickly as possible in the time he had left, as he felt his art was the most important thing he could leave. He died in 1990 at age 31.
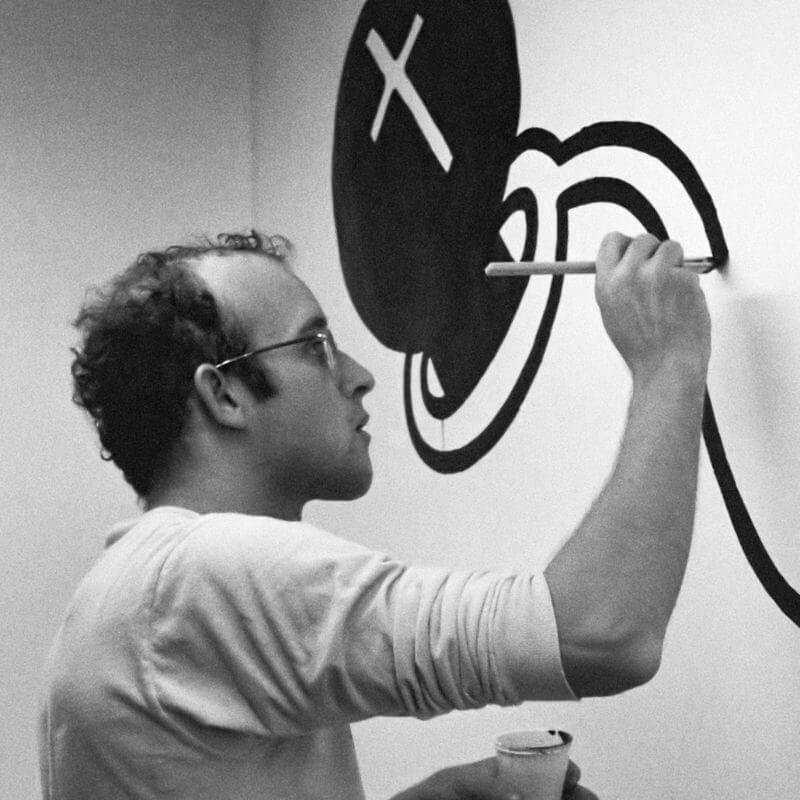
inspirational queer maker keith haring painting

Jasika Nicole is an actress most well known for her role as Astrid Farnsworth on Fringe, however, she is an accomplished sewist and artist.

Nicole makes almost all her own clothes, many of her shoes, and works in other media like ceramics, illustration, and fiber arts. She documents many of these pursuits on her blog Try Curious.

She is a strong advocate for the rights of people of color and the LGBTQIA+ community.

inspirational queer maker Jasika Nicole

Cressa Maeve Beer is a stop-motion animator and video producer who has worked in commercials, music videos, makeup tutorials and independent short films.

She recently gained visibility with her short film Coming Out, where Little Godzilla comes out as trans and is welcomed with love and acceptance.

Anna Villanyi is a museum professional, artist, crafter, musician, and animal enthusiast. Their passion for making and fascination with the natural world converge in their design of intricate animal snowflakes, which they cut by hand and translate to laser cut designs for their shop called Annamalflakes.

Their creative force helped shape The Hive's design, ethos, and early programming.
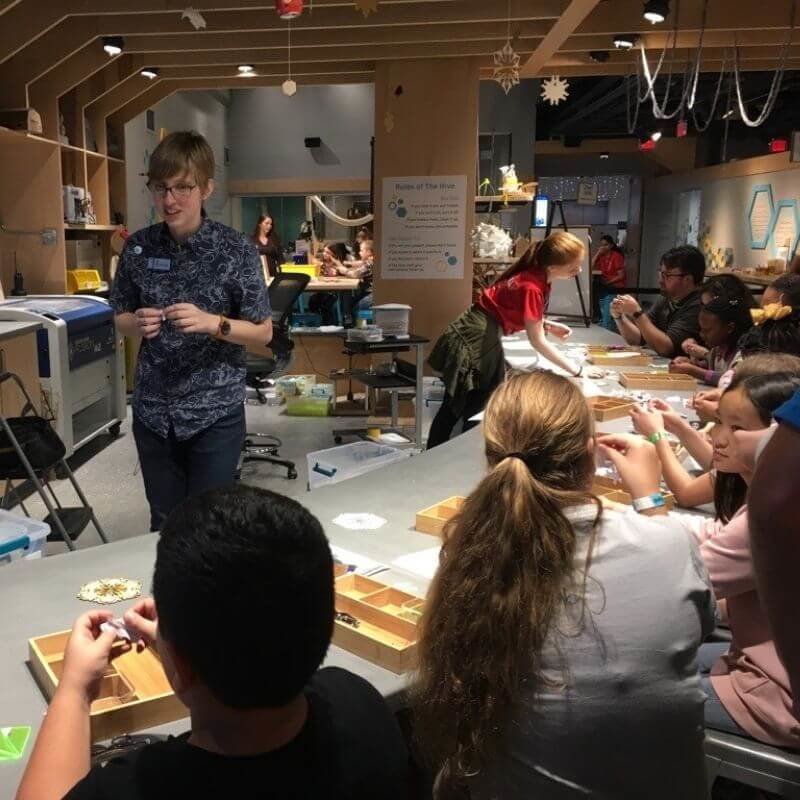
Anna Villanyi

Grace Bonney is an author, blogger, and entrepreneur. Bonney wrote a New York Times book, In The Company of Women, featuring over 100 stories about women entrepreneurs overcoming adversity. She also wrote the DIY interior design book Design*Sponge at Home. Her blog, Design*Sponge, ran for 15 years and connected and taught countless makers.

Grace Bonney

Nick Cave is best known for his soundsuits, which are wearable fabric and mixed media sculptures intended to move and make sound when the wearer moves or dances.

His first soundsuit was created as a reaction to the beating of Rodney King in 1992. Cave has created over 500 soundsuits since then, including one currently on display at the Orlando Museum of Art.

He currently lives and works in Chicago.

Wendy Carlos is an American electronic music composer credited with pioneering synth-pop music. She worked with Robert Moog on his invention of the Moog synthesizer, and released an album called Switched-On Bach, composed of Bach music played on a synthesizer, popularizing synth music sound.

She went on to compose the film scores of A Clockwork Orange, The Shining, and Tron.

In 1979, she disclosed that she had been living as a woman for over ten years and was transgender.

Wendy Carlos by a piano

Learn more!

Ice Cream Science Project: How to Make Ice Cream in 3 Simple Steps

I scream, you scream, we all scream "SCIENCE" with this ice cream science project!

Get that chilly sensation whenever you want as you learn the science of cold by making homemade ice cream! This vanilla or chocolate ice cream science project doesn’t require any fancy equipment, just plastic food storage bags, elbow grease, and chemistry!

Recommend age: 5+; younger scientists may need help measuring ingredients and shaking the bag.

Mess Alert: This activity can be messy since the bags can leak! You may want to shake the bags outside or over a sink.

Materials you will need:

  • ½ cup of whole milk or half-and-half
  • 1 tablespoon of sugar
  • ¼ teaspoon of vanilla
  • 1 tablespoon of cocoa powder
  • 6 tablespoons of rock salt or ice cream salt
  • 1 pint-size plastic food storage bag (e.g., Ziploc)
  • 1 gallon-size plastic food storage bag
  • Ice cubes
  • Duct tape
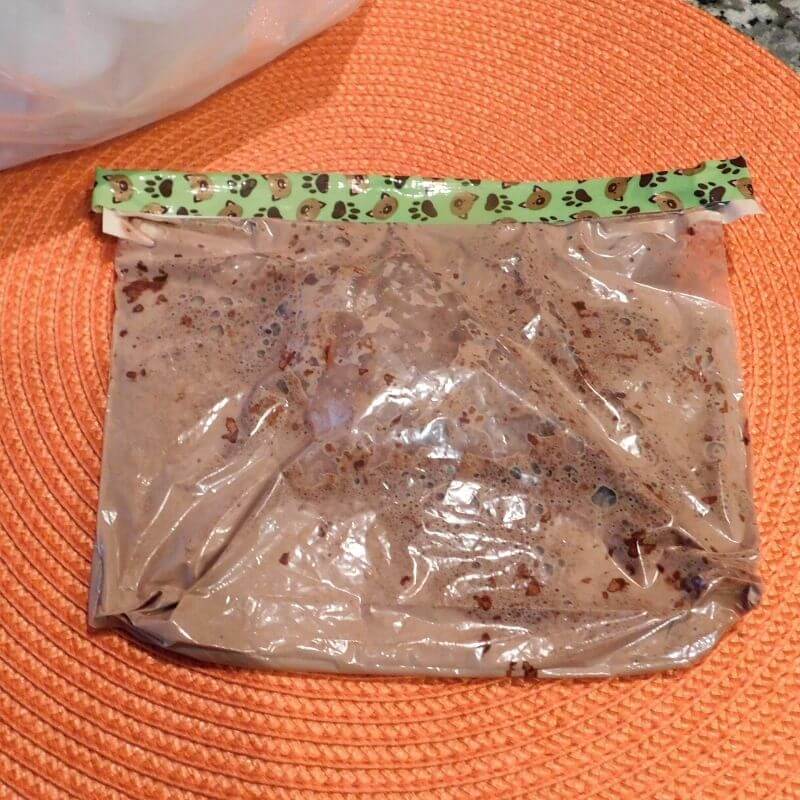
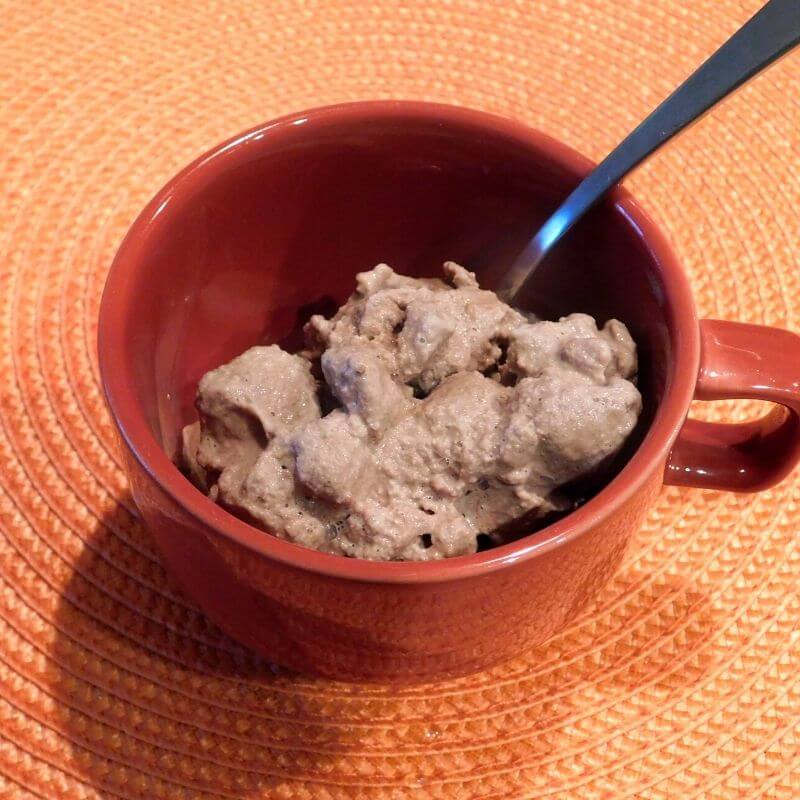
Completed chocolate ice cream science project

Directions:

Step 1:

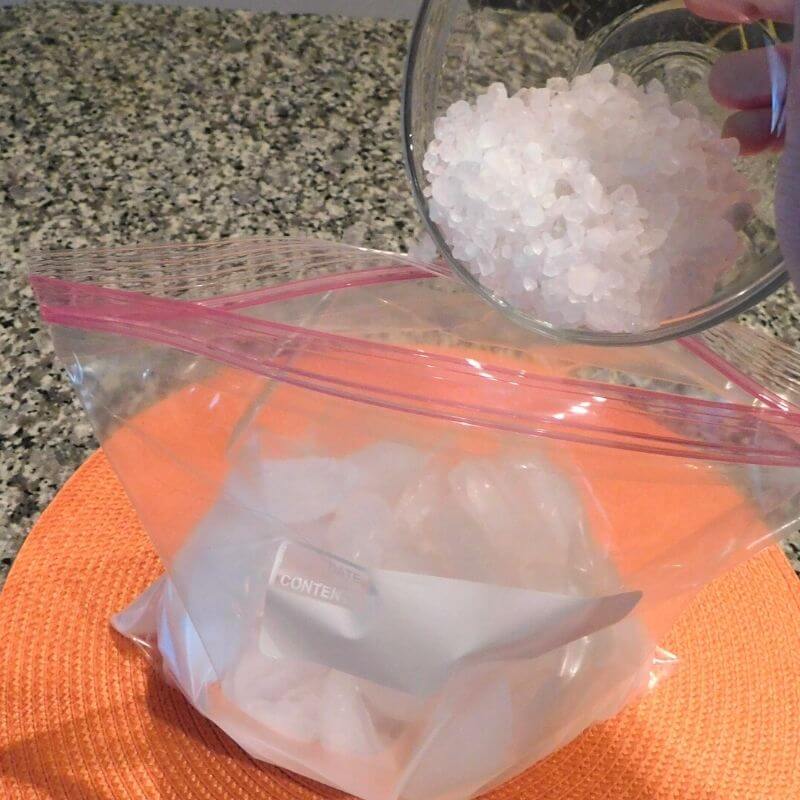
Fill the gallon-size plastic food storage bag halfway with ice, and add the rock salt to the ice. Seal the bag so it doesn’t spill while you prepare the ice cream ingredients.

Tip: You can add more than one bag of ice cream to the bag of ice and shake them at the same time. If you do make more than one bag, you can use a Sharpie to label the bags of ice cream to tell them apart.

add rock salt to ice cream science project

Step 2:

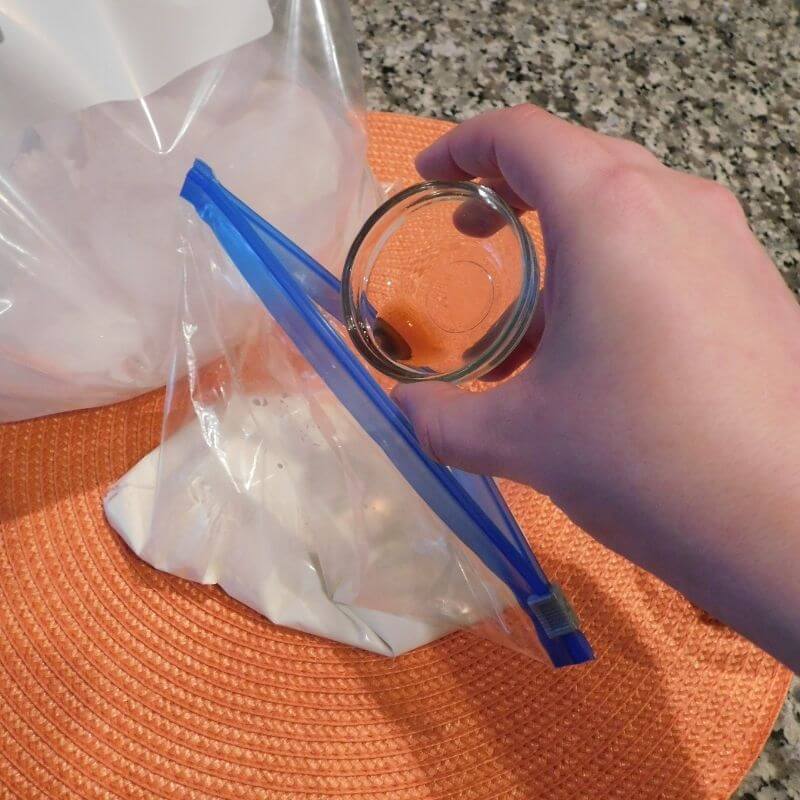
Add the milk and sugar to the pint-size plastic food storage bag. Optional: add cocoa powder to the pint-size bag to make chocolate ice cream. (Add the vanilla to the pint-size bag, even chocolate ice cream has a little vanilla in it!)

Squeeze the excess air out of the pint-size bag and seal it, and tape the seal shut with duct tape to keep it from spilling. Shake the pint-size bag for a few seconds to mix the ice cream ingredients.

Tip: ½ cup of milk will make about 1 scoop of ice cream, so double the recipe if you want more. But don't increase the proportions more than that – a large amount might be too big for kids to pick-up because the ice itself is heavy.

adding vanilla to ice cream science project

While you're making and shaking your ice cream talk about physical and chemical changes  and encourage your scientist to answer the following:

  • What does your ice cream look like?
  • Why do you think the ingredients in the pint-size bag turn to ice cream?
  • What do you think the shaking did?
  • Why do you think we added salt to the ice?
  •  What physical or chemical changes did you observe while making your ice cream?
  • What other examples of physical or chemical changes can you think of?
  • Dive deeper into a science topic with the “Learn More” section.

Step 3:

Open the gallon-size bag and put the pint-size bag inside it, and carefully seal the gallon-size bag again. Make sure it is completely shut!

Shake until the mixture in the pint-size bag is ice cream, which takes about 5 minutes.

Wipe off or rinse the top of the pint-size bag with cold water to remove any salt, then open the bag carefully, add any toppings you would like, and enjoy your ice cream!

seal liquid ingredients before shaking

Expand on the activity! 

The Science: Physical and Chemical Changes

We talk about two types of changes in chemistry: physical changes and chemical changes. We also talk a lot about matter, which is is anything that takes up space.

In a physical change, the form of matter is changed, while its chemical identity remains the same.

  • Think about cutting a piece of paper into bits. It’s still paper, just in smaller pieces. Physical changes are also reversible. You could tape the paper back together! Other examples of physical changes include boiling, melting, freezing, dissolving, and mixing.

In a chemical change, the chemical reaction occurs. The chemical reaction changes the chemical identity of the matter, and new products are formed that you can’t easily reverse.

  • Think of a campfire. The fire takes a log and creates ash and smoke, two chemically-distinct products.

There are 5 signs that a chemical reaction has occurred. They’re easy to remember… just think about F.A.R.T.S.

Fizzes: Did the reaction produce bubbles or gas?

Aroma: Did the reaction produce a smell?

Re-color: Did the reaction produce a new color?

Temperature: Did the reaction produce a temperature change or release light?

New Substance: Did the reaction produce a new substance?

When making ice cream, you’re using physical changes. You mix and dissolve the sugar into the milk, but this doesn’t change the chemical structure of the milk and you could remove the sugar is you tried.

When you shake your bag, you’re freezing the milk, which means the water in it is turning from a liquid (water) into a solid (ice). This is also a physical change! We still see lots of physical and chemical changes in the kitchen. Which ones can you think of?

Learn More: Chemistry

Why do we shake our ice cream science project instead of just popping the ice cream in the freezer?

Ice cream is an emulsion. In an emulsion, small droplets of one liquid are dispersed (or spread out) throughout another. When you shake the ice cream, you disperse the ice crystals, fat molecules, and air in the other ingredients.
The more you shake, the smaller the ice crystals get and the more air you add. This makes the ice cream creamier! We add salt to the ice so we can shake the ice cream long enough to emulsify it.

Every substance has a melting point, which is the temperature it melts or freezes at. For freshwater, the melting temperature is 32ºF/0ºC. Adding rock salt lowers the melting point of water. A 10% salt solution freezes at about 20ºF/-6ºC.
With a lower melting point, we can shake the ice cream longer to better diffuse the different parts. If it froze faster, this would be much harder to do.

OSC At Home Emails

Get a round up of our latest activities and ideas delivered straight to your inbox so you don't miss a thing!

Find out when we release new resources by following us on social media!


Follow us on social media for even more science fun including fun facts, games, behind-the-scenes photos, and more!


Facebook Logo Instagram Logo YouTube Logo Twitter Logo

Support OSC At Home

In these ever-changing times, it is our pleasure to adapt quality Orlando Science Center experiences to engage with everyone while they are safe at home. Please consider supporting our operating fund to ensure we can continue developing resources today and well into the future. Thank you for your generosity and support!

DIY Fresco Art For Kids • An Activity in Ancient Art

You don't need to be Michelangelo to create this DIY Fresco art for kids! 

Fresco paintings are a huge part of the artifacts recovered from the fallen city of Pompeii, Italy in 79 AD. Fresco art is defined by combining wet plaster with pigments such as paint or pastels. In this DIY Fresco art activity, we will be doing a modified version that kids of all ages can do at home!


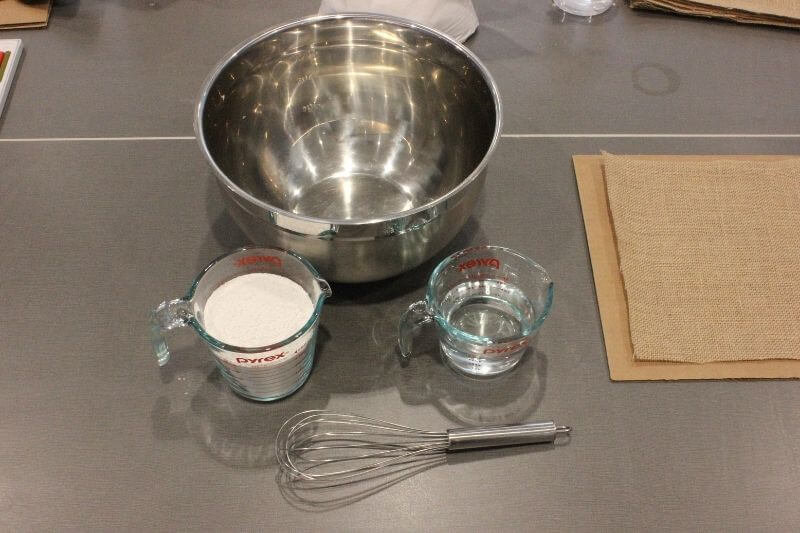
Materials you will need:

  • Plaster of Paris (BLICK Art materials)
  • Natural Burlap
  • Cardboard
  • Soft Pastels (any that are not oil based)
  • Mixing bowl
  • Measuring cups
  • Spray bottle
  • Clear washable glue
  • Wisk or mixing tool
  • Spatula
  • Box cutter (for adult use only)
materials for DIY Fresco Art For Kids

Directions:

Step 1:

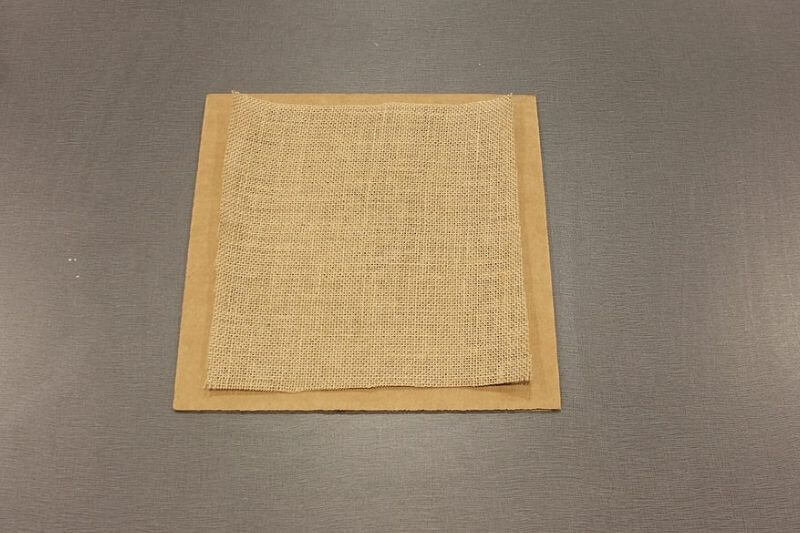
Prepare your supplies! Cut your cardboard down to approximately a 1ft by 1ft square. Next, you should cut the burlap down to about a 10” by 10” square so that there is at least an inch of cardboard sticking out on all sides when you lay the burlap on top of the cardboard. 


square of burlap on cardboard

Step 2:

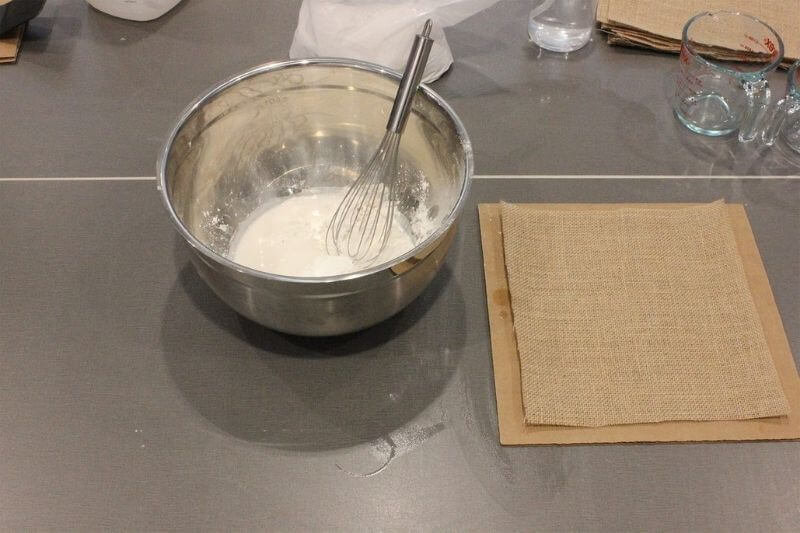
Fresco-plaster mixture: Use the ratio of 2-parts plaster: 1-part water. For this activity, we used 2 cups of plaster with 1 cup of water. Pour the ingredients into a bowl and begin to stir with your mixing tool. You will notice that the plaster will instantly combine with the water and become a thicker mixture.


make plaster for diy fresco art

Step 3:

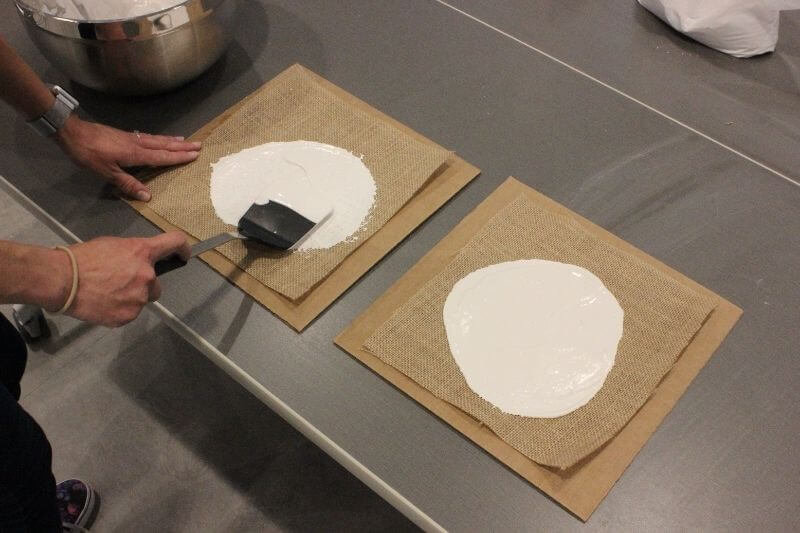
Preparing your base: Pour some of your mixture onto your burlap-cardboard base and begin to smear into a circle like the image shown. Feel free to keep the plaster base relatively thick, this will give you a better effect in a later step. Let plaster dry for 2 hours.


prepare the base for DIY Fresco Art by spreading plaster on burlap

Step 4:

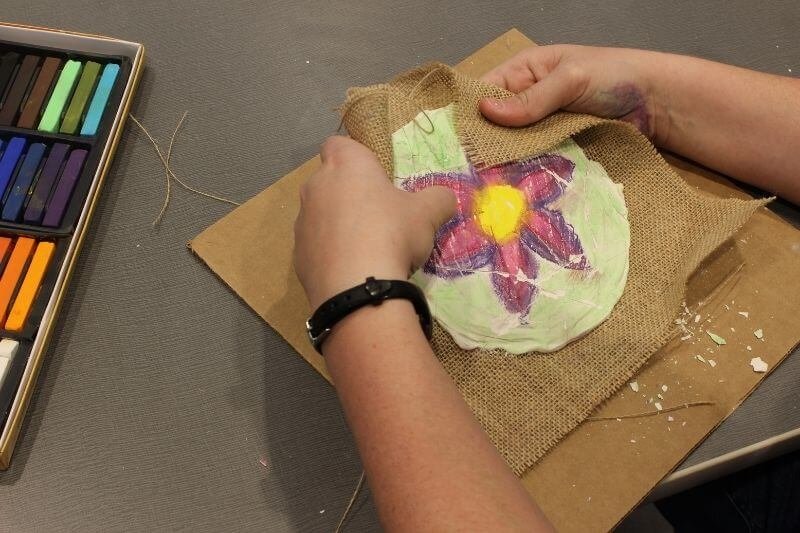
Time to make your DIY Fresco Art! Mist your plaster base with a spray bottle so that it is slightly damp. Use the soft pastels as desired to blend colors and create your own Fresco art masterpiece! Have fun with the plaster base, use your fingers to smudge the colors and see how they blend.


two hands decorating Fresco Art with a flower

Step 5:

Now for the fun part! Use your hands or a tool to gently break apart your plaster base. This will create “stress fractures” and make your Fresco art look like it has just been found from long ago or just like the artifacts recovered from Pompeii.


two hands creating stress fractures to fresco

Step 6:

Preserve your creation: Using clear washable glue, pour a generous amount onto the middle of your plaster base. Using a scrap piece of cardboard, gently spread the glue around to create an even layer over your base. This will seal in the pigment and the fractures you have added to your fresco.


Step 7:

Finish your Fresco! Once the glue is fully dried, gently remove the burlap-plaster base from the cardboard. Now you will be able to trim the excess burlap away from your plaster base. You have now completed your ownDIY Fresco Art!


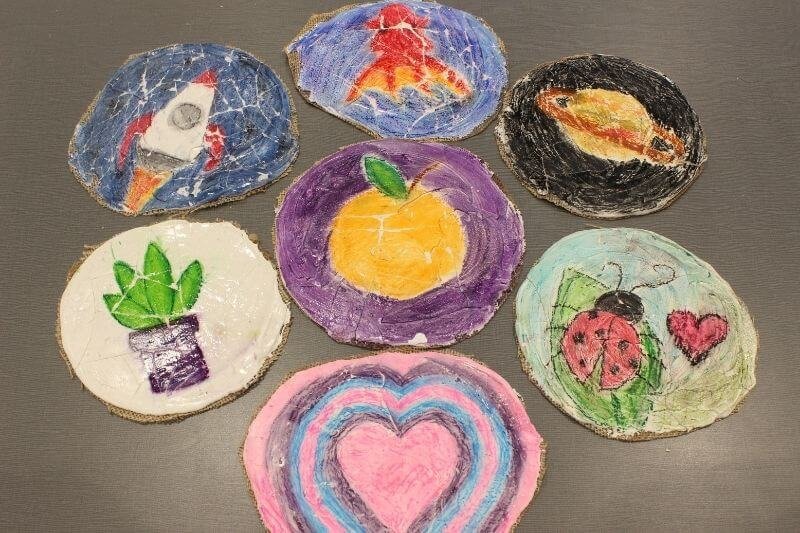
completed fresco art projects


Funding for this project was provided by the Cornelia T. Bailey Foundation.

Thanks to the support from Orange County Government through the Arts & Cultural Affairs, Orlando Science Center is excited to host the blockbuster exhibit, Pompeii: The Immortal City in the Fall of 2020.
 

Orlando Science Center is excited to support partnership programs and collaborations leading up to and coinciding with the run of the exhibition.

Cornelia T. Bailey Foundation

If you enjoyed this project, you're going to lava these other Pompeii-inspired activities! 

OSC At Home Emails

Get a round up of our latest activities and ideas delivered straight to your inbox so you don't miss a thing!

Find out when we release new resources by following us on social media!


Follow us on social media for even more science fun including fun facts, games, behind-the-scenes photos, and more!


Facebook Logo Instagram Logo YouTube Logo Twitter Logo

Support OSC At Home

In these ever-changing times, it is our pleasure to adapt quality Orlando Science Center experiences to engage with everyone while they are safe at home. Please consider supporting our operating fund to ensure we can continue developing resources today and well into the future. Thank you for your generosity and support!

How to Make Homemade Butter in 5 Simple Steps

I can't believe it IS butter! Learn how to make homemade butter with a little science and a lot of energy!  

Shake off the excess energy as you make butter and learn about the chemistry of the food we eat every day! Join us as we learn how to make homemade butter in 5 simple steps, using only 3 ingredients, for 1 delicious experiment! 

Materials you will need:

  • ½ cup heavy cream

  • A small jar or container with a tight fitting lid

  • Salt (optional)

Directions:

Step 1:

Let your half cup of cream sit a while until it has warmed up to almost room temperature.


Step 2:

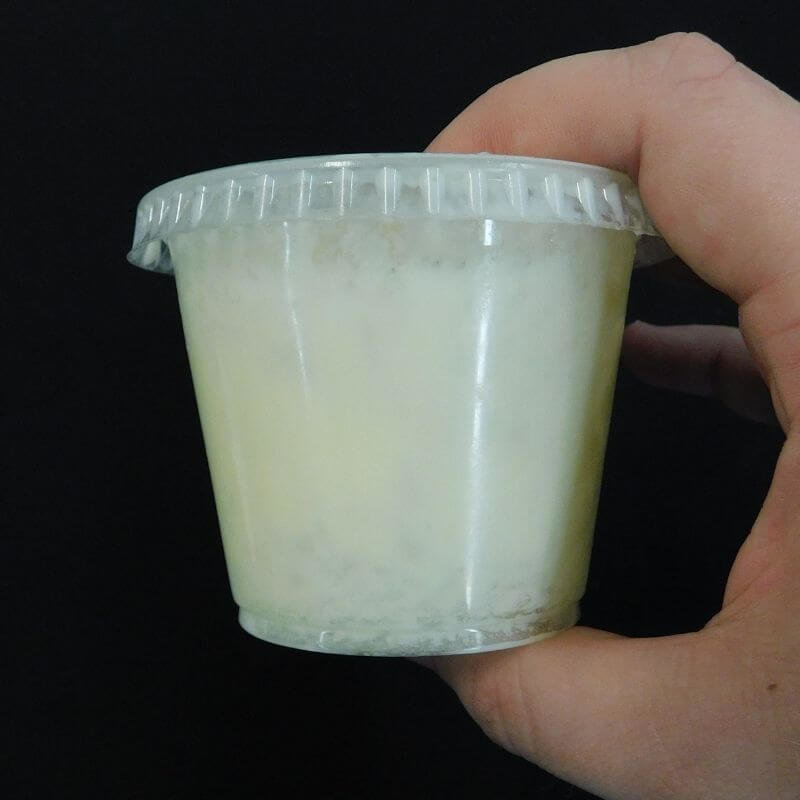
Pour the cream into the jar and seal the lid tightly. Make sure the lid is completely sealed; otherwise, cream may leak out of the container!

seal your homemade butter (1)

Step 3:

Start shaking! It should take between 5-7 minutes (or the length of this dance party) of shaking to make your homemade butter.


Step 4:

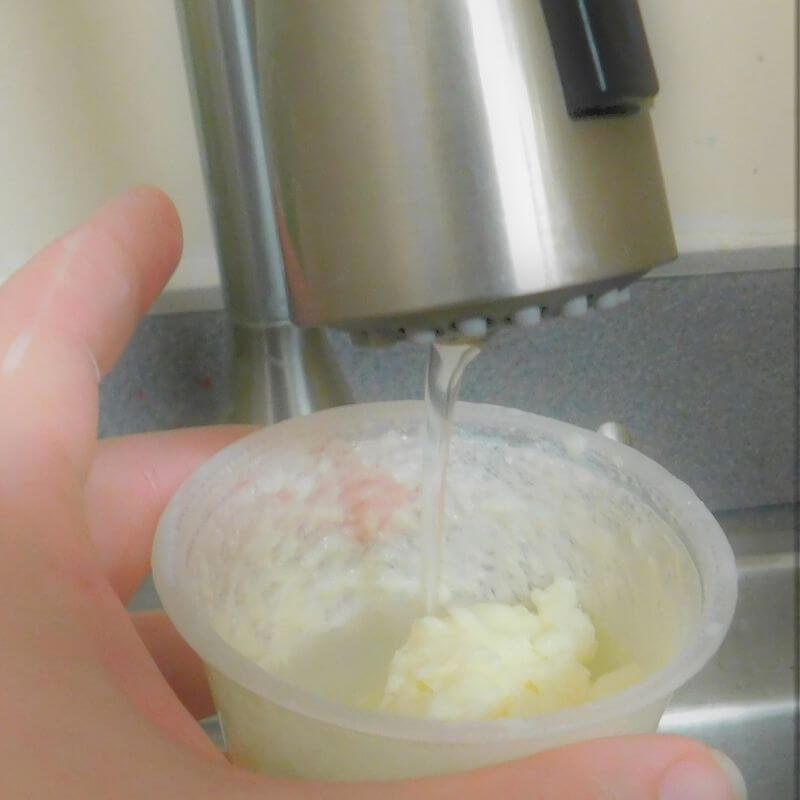
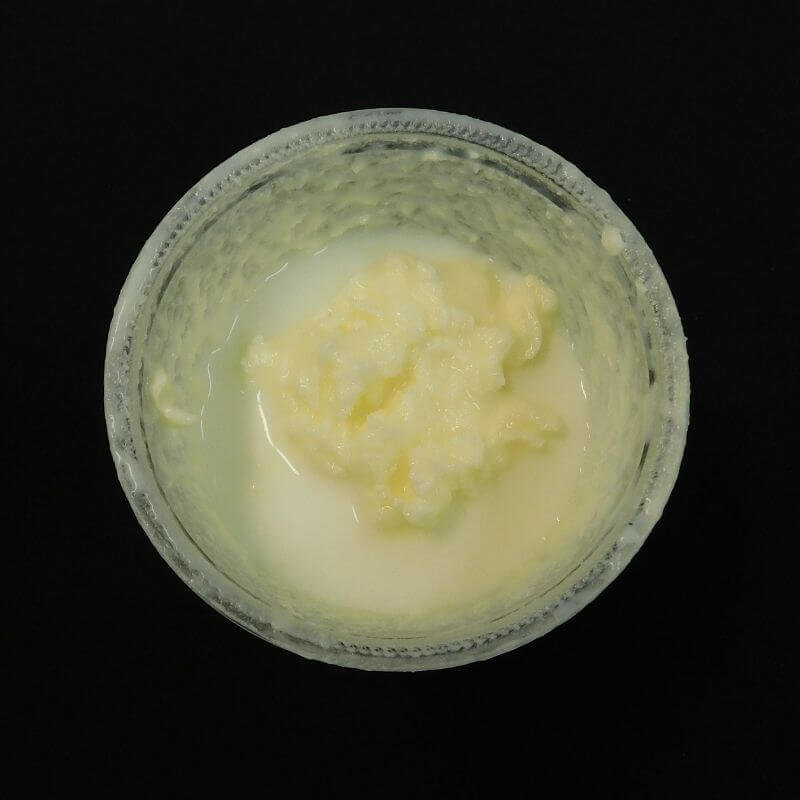
Once you have both a solid and a liquid in your jar, open the lid and rinse the homemade butter under cold water to get rid of all the liquid.

rinse your homemade butter

Step 5:

Refrigerate your butter for up to 10 days (or eat it). If you would like, you can add a pinch of salt to your butter before storing it.

the last step_ you have homemade butter

Expand on the activity!

The Science: 

  • When whole milk sits out, tiny fat molecules float to the top, forming a layer of cream that can be skimmed and collected. To make butter, the cream is agitated (stirred up) so that the fat molecules get shaken out of position and clump together.
  • As you shake your cream, you are breaking the fat out of its little bundles and mixing it with air, just like whipped cream. Your jar will feel very light.

  • Then, the fat globules will begin sticking to each other. You will start to see a liquid and a solid. The solid is butter, the liquid is buttermilk.

Did you know?

  • The color of butter comes from what the animal has been eating. Yellow is from carotene, which cows get from the plants they eat.
  • Butter has about the same density as ice.
  • Butter is an ancient prepared food, having been made by people at least 4,000 years ago. Some of the earliest known recipes for making butter call for the use of a container made from animal skin. The skin would be sewed together tightly, leaving a small opening through which to add fatty milk or cream. The vessel would then be suspended, such as from wooden poles, and swung until butter formed.

Try some more kitchen chemistry!

DIY Rock Candy

OSC At Home Emails

Get a round up of our latest activities and ideas delivered straight to your inbox so you don't miss a thing!

Find out when we release new resources by following us on social media!


Follow us on social media for even more science fun including fun facts, games, behind-the-scenes photos, and more!


Facebook Logo Instagram Logo YouTube Logo Twitter Logo

Support OSC At Home

In these ever-changing times, it is our pleasure to adapt quality Orlando Science Center experiences to engage with everyone while they are safe at home. Please consider supporting our operating fund to ensure we can continue developing resources today and well into the future. Thank you for your generosity and support!

How to Create Iridescent Art: A Colorful STEAM Bookmark Activity

Scientists use nanotechnology to create this effect, but you just need clear nail polish to learn how to create iridescent art! 

Iridescence is the phenomenon of certain surfaces that appear to gradually change color as the angle of view or the angle of illumination changes. It can be found naturally in animals like fish for camouflage in the water and for attracting mates, or in the wings of butterflies and bird feathers. It is also seen in bubbles and you won't believe how simple it is to find out how to create iridescent art yourself!

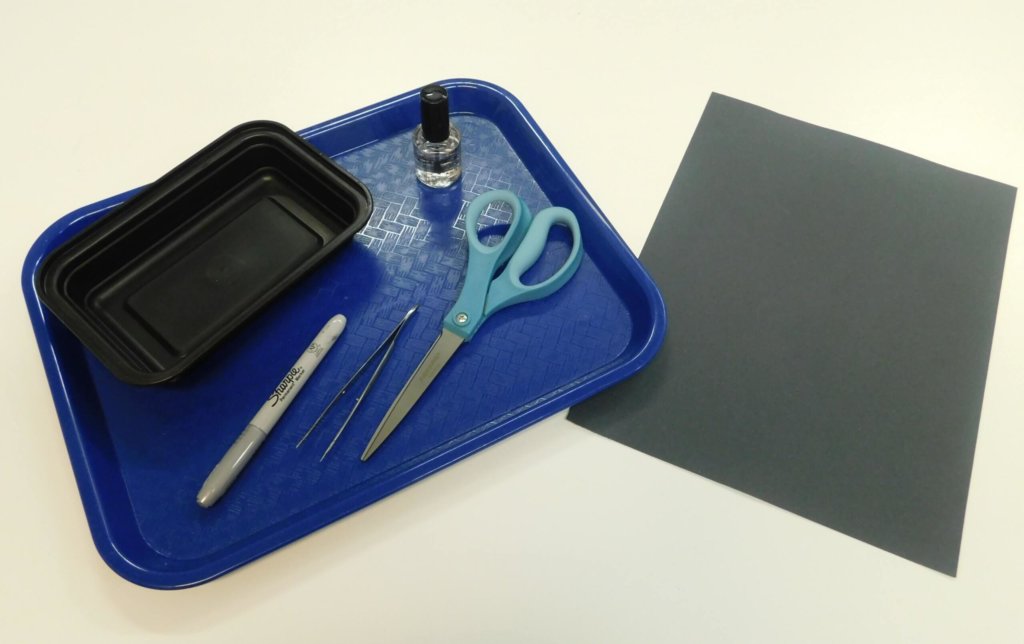
Materials you will need:

  • Black paper
  • Clear nail polish
  • Permanent marker(s) that can write on black paper
  • Shallow container (like Tupperware or a frozen dinner tray)
  • Scissors
  • Tweezers (Optional)
materials for how to create iridescent bookmarks

Directions:

Step 1:

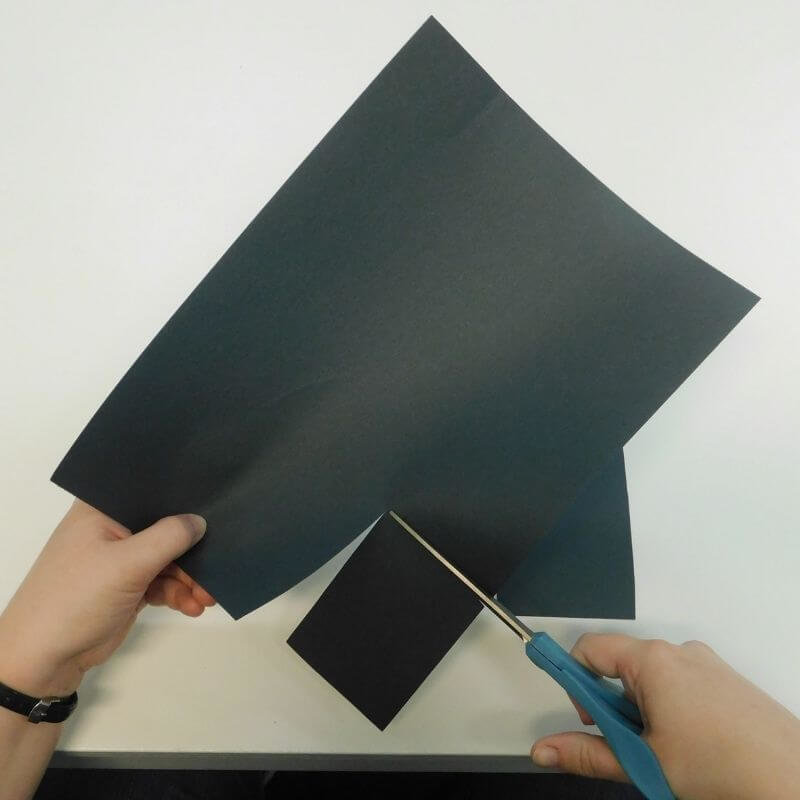
Cut out whatever size and shape bookmark you want to make. Smaller is easier to work with. Make sure it fits in your shallow container!

cut out shape of iridescent artwork

Step 2:

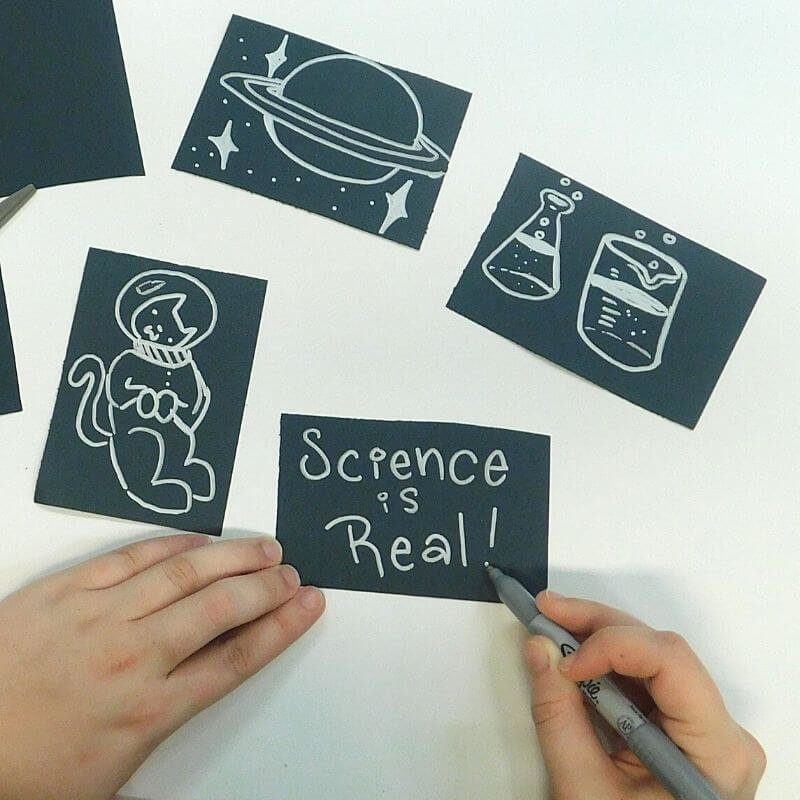
Write something or draw a picture on the paper with your markers.

draw art that will be under iridescent

Step 3:

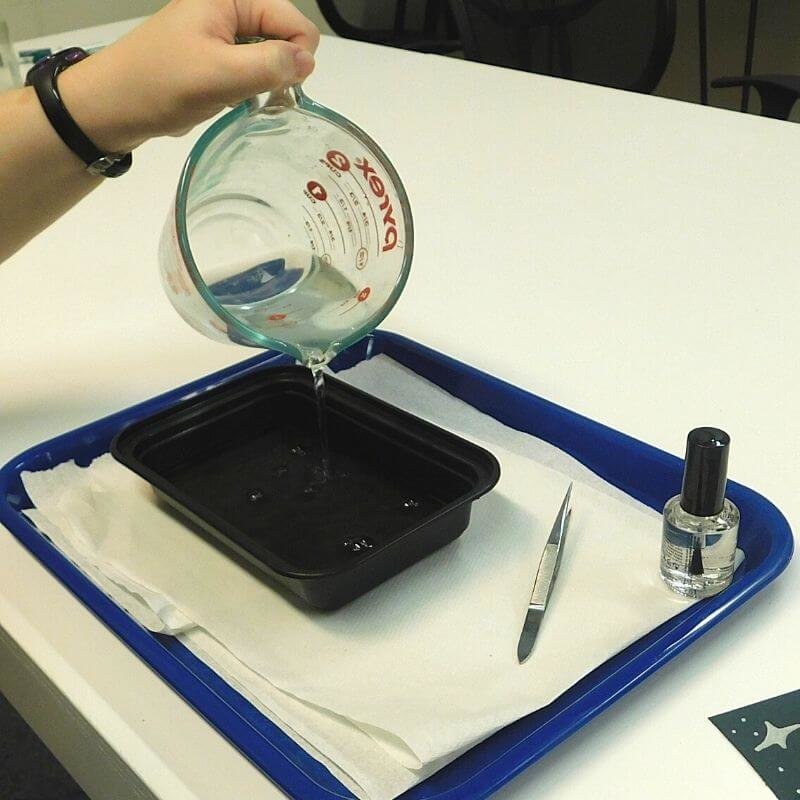
Add enough water to the container so that it is about a half-inch deep.

pouring water over iridescent art

Step 4:

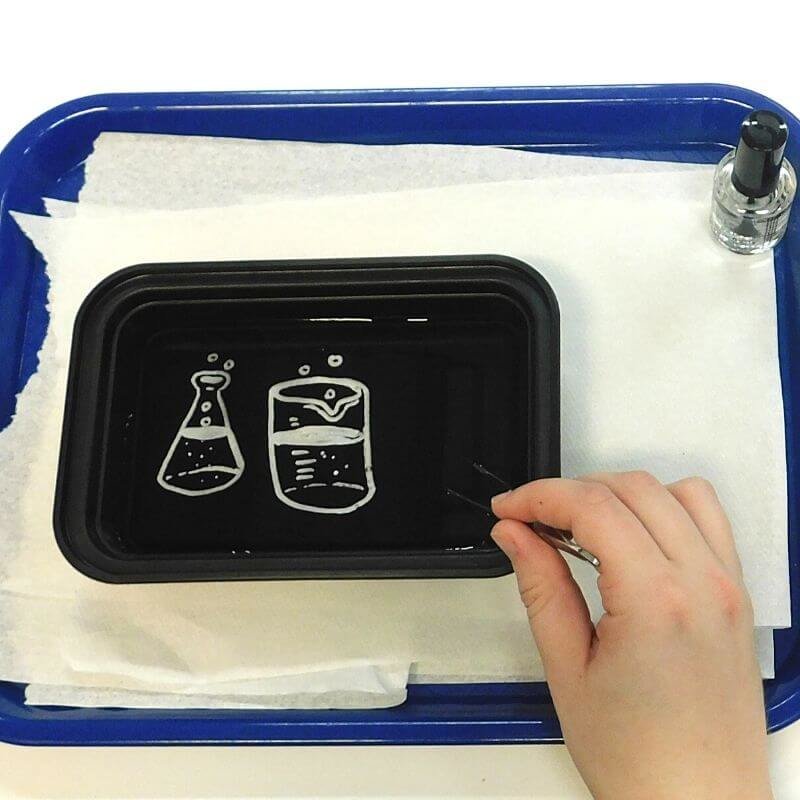
Hold one end of the black paper and slide it into the container until the paper is fully underwater.

slip paper under water

Step 5:

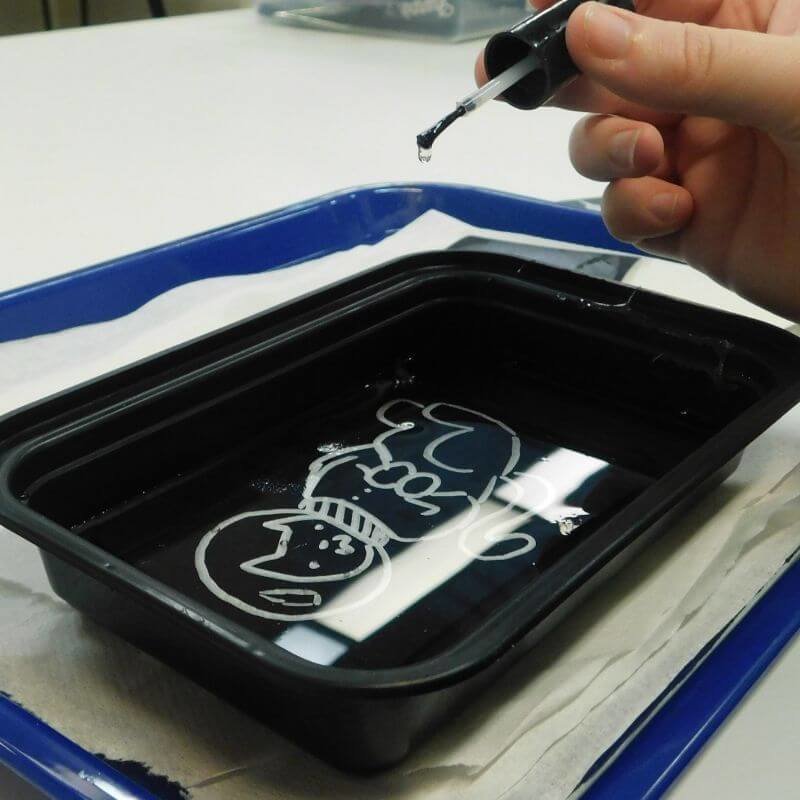
Add a single drop of nail polish onto the surface of the water above the paper. Make sure to just use one drop! Too much will ruin the effect!

*Tips:
The nail polish will dry quickly on top of the water. If it does, it will create a film that won’t stick to the paper. If the nail polish does create a dry film on top, simply scoop it off and try again more quickly!
It can take patience and practice to get this activity right!

add nail polish to water to create iridescent effect on your art

Step 6:

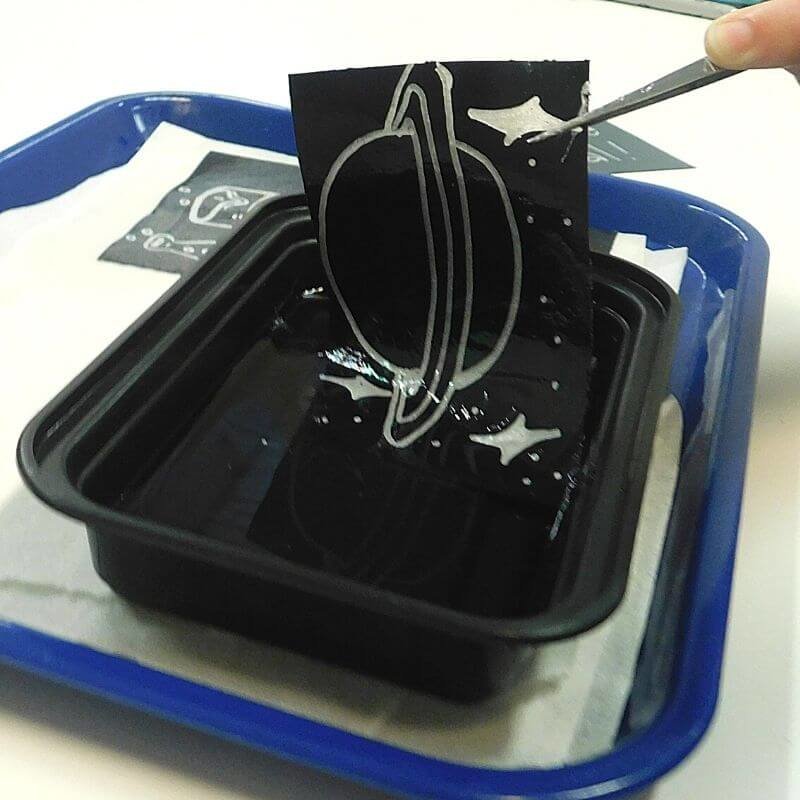
Now lift the paper out of the water, carefully dragging the face of the bookmark along the nail polish.

remove iridescent art from water

Step 7:

Leave your bookmark out to dry for about 10 minutes. Then check it out in different lights from different angles!

And that's it! You've mastered how to create iridescent art! Share your creations with us on social media by using #OrlandoScienceCenter or uploading it to our Science Showcase

finished Iridescent Bookmark art

Expand on the Activity!

Learn the science:

The nail polish spreads out into a super-thin film across the water, and then you transfer that film to the bookmark.

The film is only a few hundred nanometers thick, about as thick (or thin!) as a soap bubble. However, small differences in the thickness of the film change the color it reflects, so it creates the iridescent effect!

Can you think of any examples of iridescence in nature? Many bird feathers, butterfly wings, shells, and beetle shells have nano-sized, semi-transparent layers that create an iridescent effect when they reflect light. Scientists are also using nanotechnology to create iridescence for various materials and devices!

OSC At Home Emails

Get a round up of our latest activities and ideas delivered straight to your inbox so you don't miss a thing!

Find out when we release new resources by following us on social media!


Follow us on social media for even more science fun including fun facts, games, behind-the-scenes photos, and more!


Facebook Logo Instagram Logo YouTube Logo Twitter Logo

Support OSC At Home

In these ever-changing times, it is our pleasure to adapt quality Orlando Science Center experiences to engage with everyone while they are safe at home. Please consider supporting our operating fund to ensure we can continue developing resources today and well into the future. Thank you for your generosity and support!

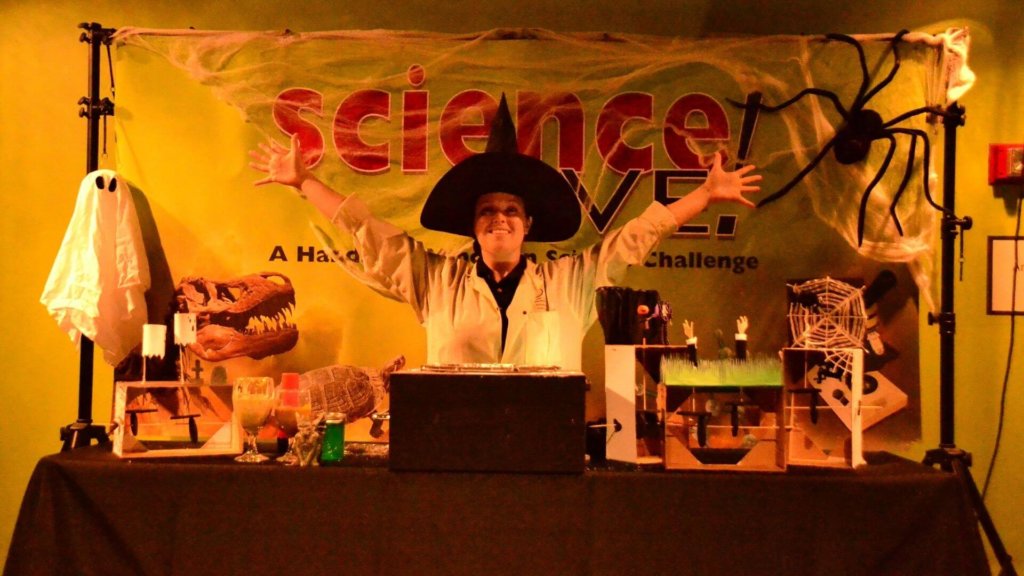
Simple Sensory STEAM Activities to Engineer for Halloween

From creepy chemistry to haunted machines, add some spook to your science with these simple sensory STEAM activites

It’s Spooky Season! Looking for something ghoul to do with your young scientists? Create concoctions that are creepy, slimy, and scary! Take these simple sensory STEAM activities to the next level with a Halloween touch by adding scents, food coloring, and decorations. 

Scary Simple Slime

Check out our simple slime recipe and see what creative ways you can adapt it to become a spooky sensory activity!

Pumpkin spice-it-up with orange food coloring and pumpkin extract for ultimate Halloween slime! Not a pumpkin person? 

If you've got a black light, you can get bright blue slime that glows under UV light by substituting tonic water for water in any recipe. The tonic water contains quinine, which emits bright blue fluorescence under black light.

Another option is to add fluorescent highlighter ink to the slime recipe. You can get the ink by soaking a highlighter in water.

Turn oobleck into Oogie Boogie

Create dancing ghosts with Oobleck! All you need is to put a speaker or subwoofer close to the Oobleck and play your favorite spooky tunes. 

What is Oobleck? It’s a non-Newtonian fluid, meaning it can act like a solid or a liquid depending on what you do to it. If you try to pick it up, run through your hands like water. Try making a fist tap the mixture in the bowl; You’ll feel it become hard as a rock! You can use this to learn how molecules called polymers work. Click thebutton below to learn how to make this easy mixture!

Haunted Machines 

Automata’s are simple machines, like levers, pulleys, or wheels, that change the direction or magnitude of a force. 

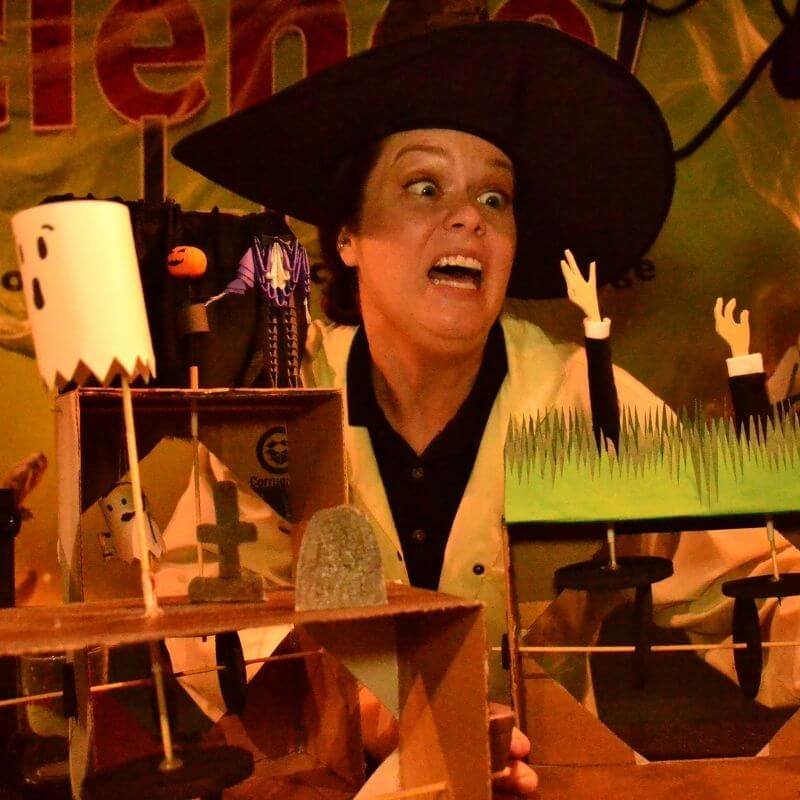
In this project, you’ll be able to create your own simple machine, using small machines! Transform this cardboard structure with chilling decorations. From a haunted house to dancing skeletons, there’s so much you can do! 

Mixing Halloween and these simple sensory STEAM activities will get you into the spooky spirit and teach you a thing or two about how cool science is. These projects are for all levels of scientists and can be repeated for extra fun! 

Simple sensory STEAM activities

OSC At Home Emails

Get a round up of our latest activities and ideas delivered straight to your inbox so you don't miss a thing!

Find out when we release new resources by following us on social media!


Follow us on social media for even more science fun including fun facts, games, behind-the-scenes photos, and more!


Facebook Logo Instagram Logo YouTube Logo Twitter Logo

Support OSC At Home

In these ever-changing times, it is our pleasure to adapt quality Orlando Science Center experiences to engage with everyone while they are safe at home. Please consider supporting our operating fund to ensure we can continue developing resources today and well into the future. Thank you for your generosity and support!

What is an automata? Marvel at this DIY machine in motion!

What is an automata? Check out this simple way to make a simple machine! 

Automata-who? An automata is a playful way to explore simple machine elements such as cams, levers, and linkages, while creating mechanical sculpture. They’ve been around for hundreds of years, with stories about automatons all the way back in Greek mythology! You might have one in your own home if you have a moving bird inside a cuckoo clock. 

What is a simple machine? A simple machine is a non-motorized device that changes the direction or magnitude of a force, for example, an inclined plane, wedge, lever, pulley, or automata.

Today you will be working with Cams and Cam Followers which is a form of the wheel and axel. Rather than making a bicycle wheel turn, we will be creating more of a gear-driven movement.

This is a really fun Maker activity that you can try at home to help understand what is an automata. Use this project to explore simple machines, like wheels and axles, and your critical thinking skills and creativity to make your project move. Let’s get making!

Materials you will need:

  • Cardboard frame 
  • Cardboard scraps 
  • Drinking straw
  • Scissors 
  • Skewer sticks
  • Foam sheet 
  • Washer
  • Masking tape
  • Hot Glue Gun 
  • Materials for decoration

Directions:

Step 1:

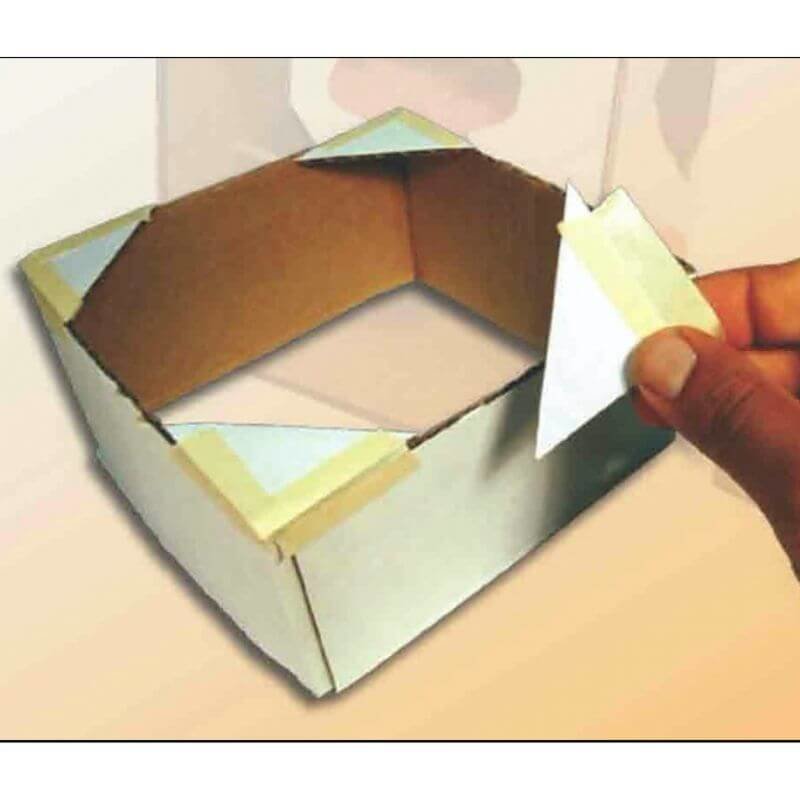
Add support to your frame.

  • Cut triangles out of the cardboard scraps and tape them into each corner of the frame for support.
add support to your automata frame

Step 2:

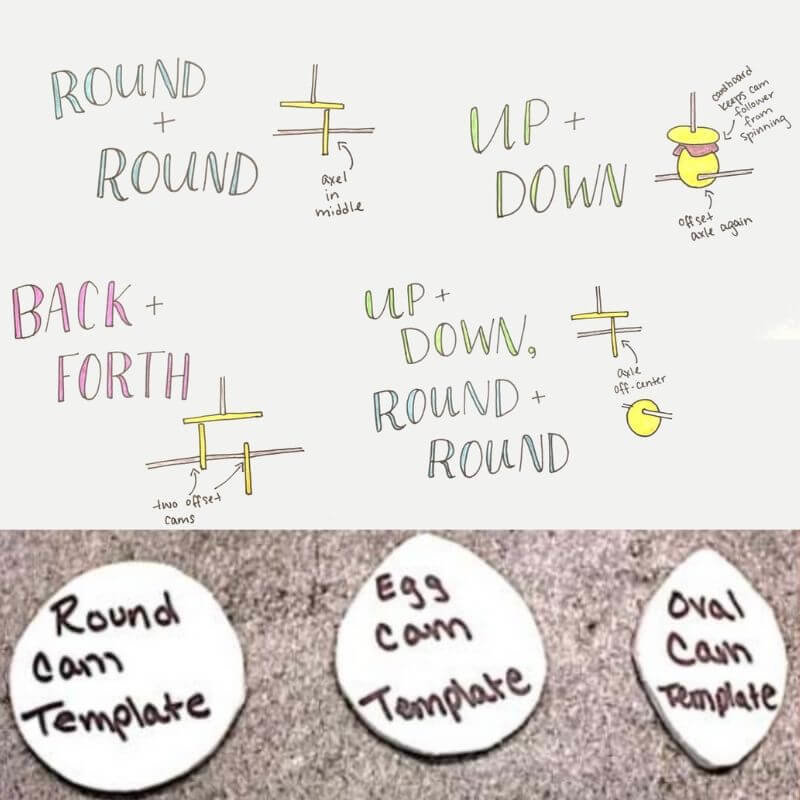
Plan out your automata. Think about what you want your automata to depict. Some start by choosing their motion first and going from there. 

  • Round and Round
  • Up/Down and Round and Round 
  • Back and Forth and Up and Down
    • Pay close attention to the placements of the cam and cam follower

Step 3:

Create the cams 

  • Draw your cam and cam follower in the upper left-hand corner of the foam sheet. 
  • Make sure to draw it as close to the edge as possible
  • It’s important to cut the cams smoothly and make sure your cam follower is a little bigger than your cam.
choose a motion your automata (1)

Step 4:

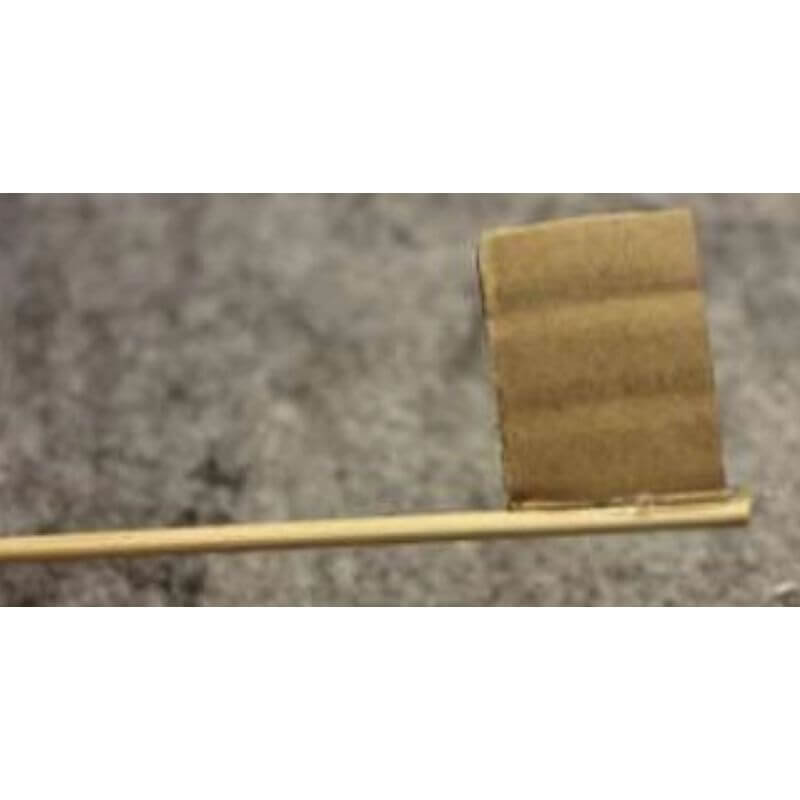
Get a handle on your automata

  • Cut a rectangular piece of cardboard and hot glue the cardboard to the skewer
add a handle

Step 5:

Add the axle to the frame 

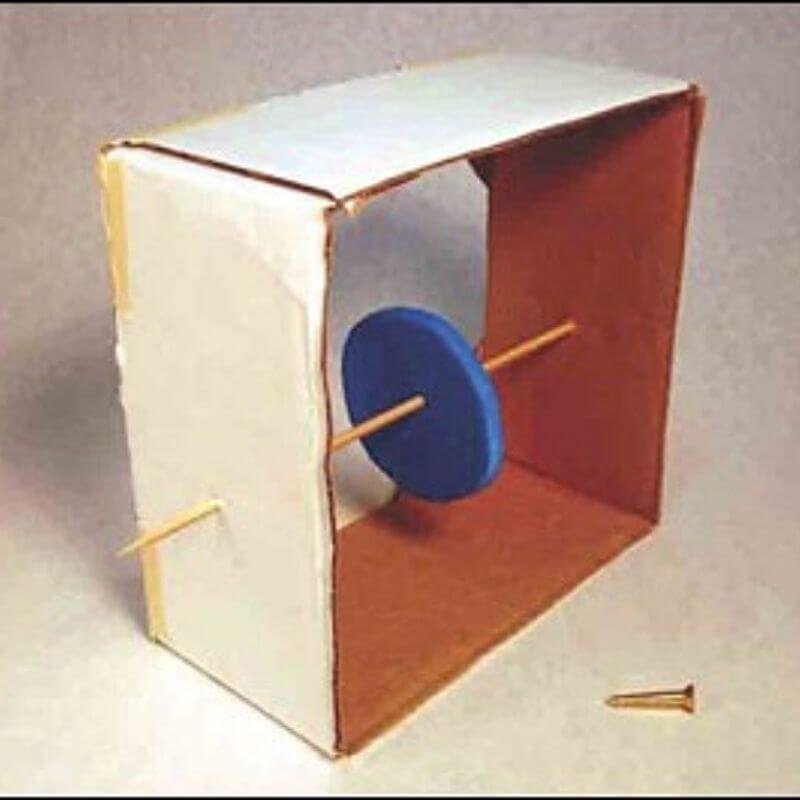
  • Put your cam on the axle inside the frame. 
  • Start the holes in the frame using the nail, and make sure the cam clears the top and bottom of the frame.
add an axel

Step 6:

Add the cam follower

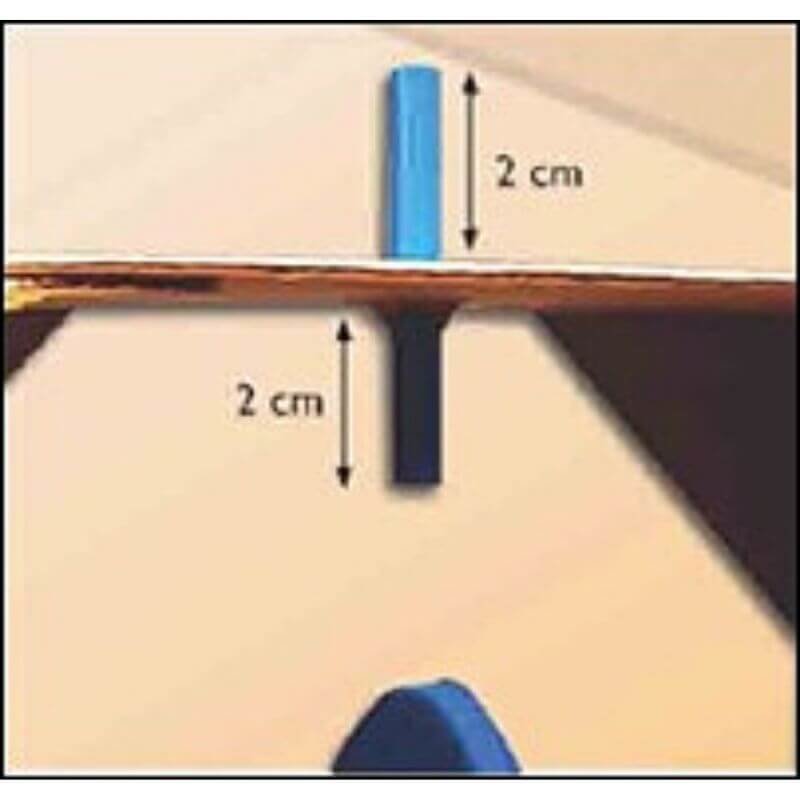
  • Poke a hole in the top of the frame where you want your cam follower to be located. 
  • Cut the straw so it’s about 4 cm long, and then insert it into the hole you just made. 
  • Hot glue the straw in place.
  • Put a skewer stick through the straw and attach your cam follower to the bottom end of the stick. 
  • Glue the cam follower in place.
add an axel

Step 7:

Test it! 

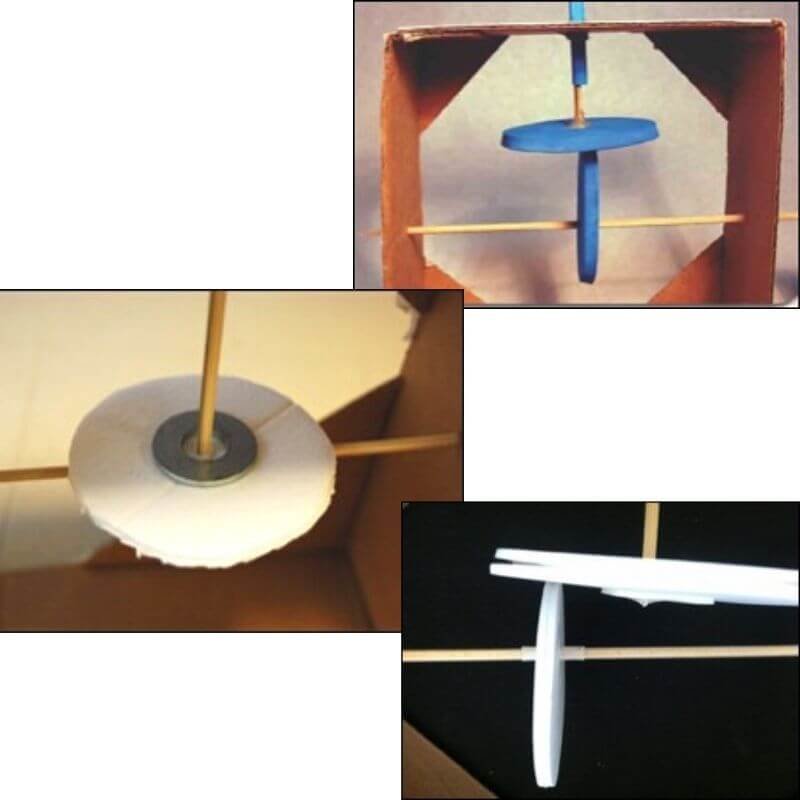
  • Adjust your cam under the cam follower until you get the motion you like. 
  • If the cam follower does not fall on the cam, attach a washer to add a little weight. 
  • If the cam does not stay in place on the axle, add a small dab of hot glue to hold the cam in place.
test your automata

Step 8:

Last, but not least, it's time to decorate your automata! 

Design your automata

OSC At Home Emails

Get a round up of our latest activities and ideas delivered straight to your inbox so you don't miss a thing!

Find out when we release new resources by following us on social media!


Follow us on social media for even more science fun including fun facts, games, behind-the-scenes photos, and more!


Facebook Logo Instagram Logo YouTube Logo Twitter Logo

Support OSC At Home

In these ever-changing times, it is our pleasure to adapt quality Orlando Science Center experiences to engage with everyone while they are safe at home. Please consider supporting our operating fund to ensure we can continue developing resources today and well into the future. Thank you for your generosity and support!

Painting Techniques for Kids to Try • From Baking Soda Paint to Buon Fresco

Using science and creativity, these painting techniques for kids to try will elicit a reaction from your friends and your art! 

1,941 years ago, a catastrophic event occurred in Pompeii, a city on the Italian peninsula. A volcano called Mount Vesuvius erupted and covered the whole city in ash! 

The site was lost for centuries and remained almost entirely untouched until 1748. Today, scientific research brings to light the extraordinary history and culture of Pompeii and the Roman world. Learn how to create a fizzing work of art or a Buon Fresco with these Roman- inspired painting techniques for kids to try.

Using the DIY baking soda paint you just created, you can now make an erupting volcano painting!

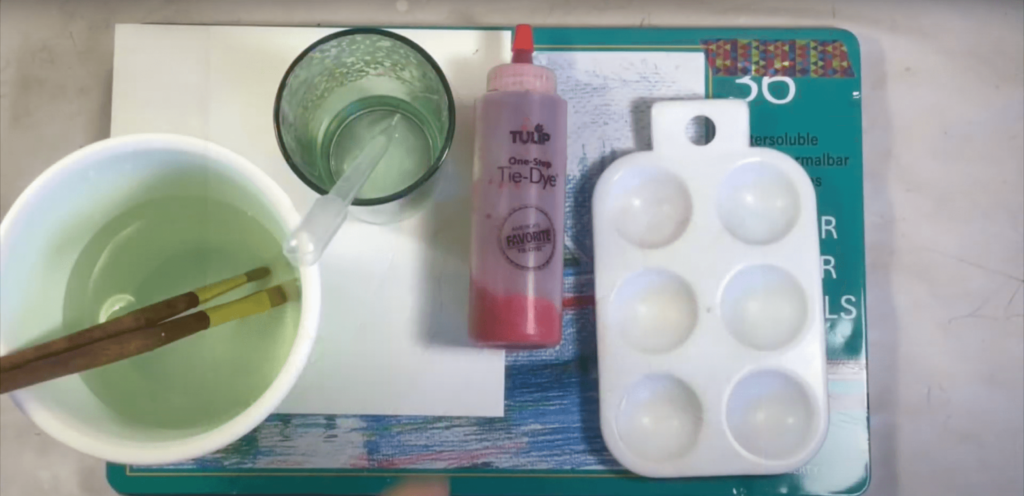
Materials you will need:

  • Red or orange baking soda paint
    *Learn how to make your own here!
  • A tray or a small container to put the baking soda paint in
  • A small cup
  • A dropper (if you do not have on you can use drips from your paintbrush)
  • White vinegar (you can add pigment to the vinegar, but it is not necessary)
  • A cup of water
  • A paintbrush or two
  • Watercolor or mixed media paper -Watercolor pencils or paint (colored pencils or markers will work too, but not crayon)
materials for painting technique for kids to try

Follow along with the video or the steps below to try this painting technique!

Directions:

  • Step One: Draw your volcano. A volcano is a mountain that lets magma or molten rock escape from under the Earth’s crust to the surface where it comes out as lava. The molten rock makes its way up the main vent of the volcano. Some volcanoes have side vents where lava will flow out the side instead of the top. At the top of the volcano is the crater, this is where most of the lava will come out, sometimes it flows and sometimes there’s a big eruption. Not all volcanoes erupt with lava, some, like Mount Vesuvius erupt with ash, but our painting today will have lava. Right not we are just drawing the mountain that will be our volcano.
  • Step Two: Fill in the background. I added plants and the sun and made the sky blue. When you are done with this step the whole scene should be complete, except the lava. In Pompeii there were marketplaces, houses, courtyards, and bathhouses- you can add some of them to your scene too!
  • Step Three: For watercolor pencils, this step turns the pencil marks into paint. Dip your paintbrush in clean water and paint on the pencil marks with the water, you will see the marks turn into paint. Make sure to rinse your brush between colors.
  • Step Four: This step adds your lava! Use a clean brush and your baking soda paint. The paint will be a little chunky because the baking soda doesn’t dissolve. Paint your lava on your volcano.
  • Step Five: Watch your volcano erupt! Using the dropper, drip the vinegar one drop at a time onto your lava. What happens? A little goes a long way, take your time and watch it bubble and flow. When the vinegar touches the baking soda, it starts a chemical reaction. The chemical reaction releases a gas and creates the bubbles you see. Once you’ve watched your eruption, leave your painting in the same spot to dry- moving it will make the lava drip off the page.

Learn more! 

  • Were you inspired by your baking soda painting technique? Try creating a Buon Fresco, a popular art technique common in Ancient Rome!
  • If you want to learn more about volcanoes and Pompeii follow the links below:
    • https://www.natgeokids.com/uk/discover/geography/physical-geography/volcano-facts/ 
    • https://kids.nationalgeographic.com/explore/history/pompeii/
Thanks to the support from Orange County Government through the Arts & Cultural Affairs, Orlando Science Center is excited to host the blockbuster exhibit, Pompeii: The Immortal City in the Fall of 2020.
 
Orlando Science Center is excited to support partnership programs and collaborations leading up to and coinciding with the run of the exhibition.
 

Students from UCF CREATE Lake Eola Charter School will participate in the Pompeii program where they will learn the science of how frescos are created and work collaboratively to create fresco paintings.

If you would like more STEAM Lessons like these, learn how to enroll in the free public STEAM Art Making with Miss A online Canvas course.

Science of Sound Activity ♪ Make Some Noise for Foley Art

Have you ever heard of Foley art? Make your own sound effects with this science of sound activity!

Foley artistry, named for the sound effect professional that pioneered it, originated during radio shows in the 1920s. They had to create sound effects from objects in the studio – anything from horse hoof beats to snow crunching to animal sounds!  

Learn to make your own Foley art sound effects using objects from around your house with this science of sound activity! 

Action!

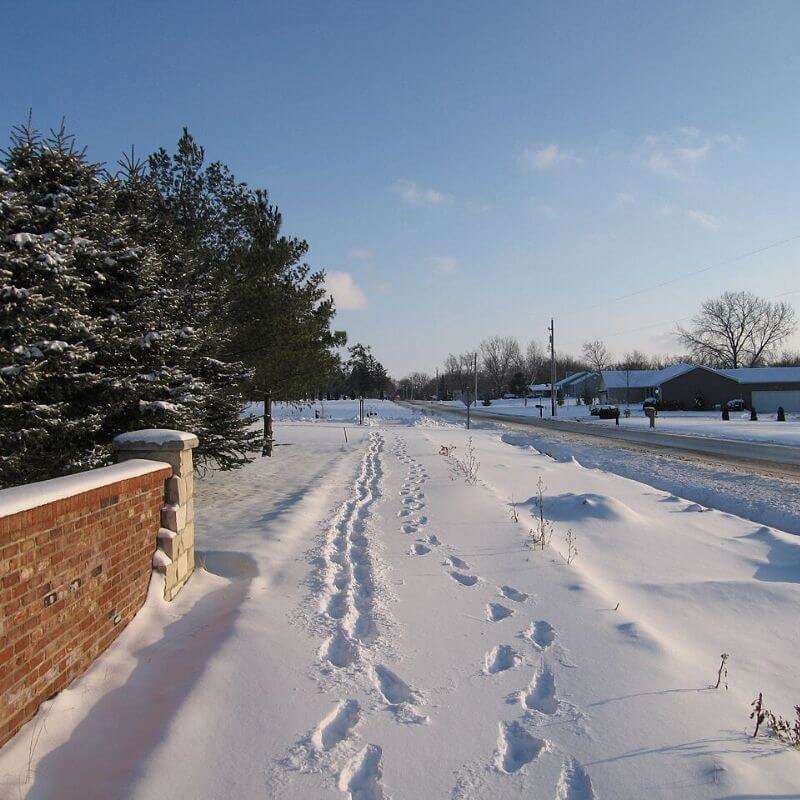
Snow crunching  

  • You will need:
    • Cornstarch
    • A balloon or zip plastic bag 
  • What to do: 
    • Fill your balloon or bag about halfway full of cornstarch.  
    • Squeeze out all the air you can and seal it up tight!  
    • Squeeze it with your hands. What does it sound like?  
science of sound activity foot steps in the snow

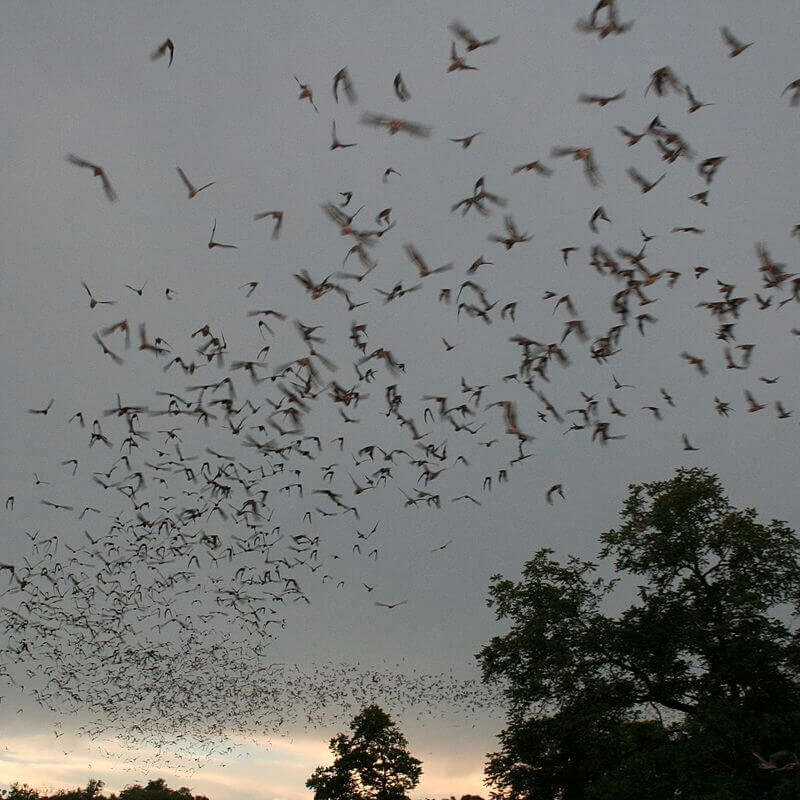
Bats flying 

  • You will need:
    • An umbrella 
  • What to do: 
    • Open your umbrella quickly, then open and close it just a tiny bit a few times.  
    • Experiment with the speed and movement. See if you can make it sound like a group of bats!  
    • Try it in a different room or outside to play with echo!
science of sound activity bats flying

Dog shaking dry

  • You will need: 
    • A mop or a rag 
  •  What to do: 
    • Wet your mop or rag.  
    • Wring out the excess water.  
    • Do the next part over your bath or shower: 
    • If you have a mop – twirl it around as fast as you can!  
    • If you have a rag – grab two corners and flap it back and forth quickly, letting as much fabric hang as you can! 
science of sound activity wet dog

Breaking a glass 

  • You will need:  
    • A set of keys 
  • What to do: 
    • Drop your keys onto the floor from 6 inches above it.  
    • Play with height to get a different sound. Try dropping onto a different surface and see what sound it makes!  
science of sound activity breaking glass

Rain 

  • You will need: 
    • Uncooked rice 
    • A cookie sheet 
  • What to do:  
    • Pour some uncooked rice onto your cookie sheet. You don’t need much – less than a handful.  
    • Tilt your cookie sheet to let the rice roll or slide down to the other side. You created a gentle rainstorm!  
science of sound activity rain

Birds flying 

  • You will need:
    • Leather or rubber gloves 
  • What to do: 
    • Hold the open end of both gloves in one hand.  
    • Shake them!  
    • Experiment with how fast you shake the gloves to make it sound like birds are further or nearer.  
science of sound activity birds flying

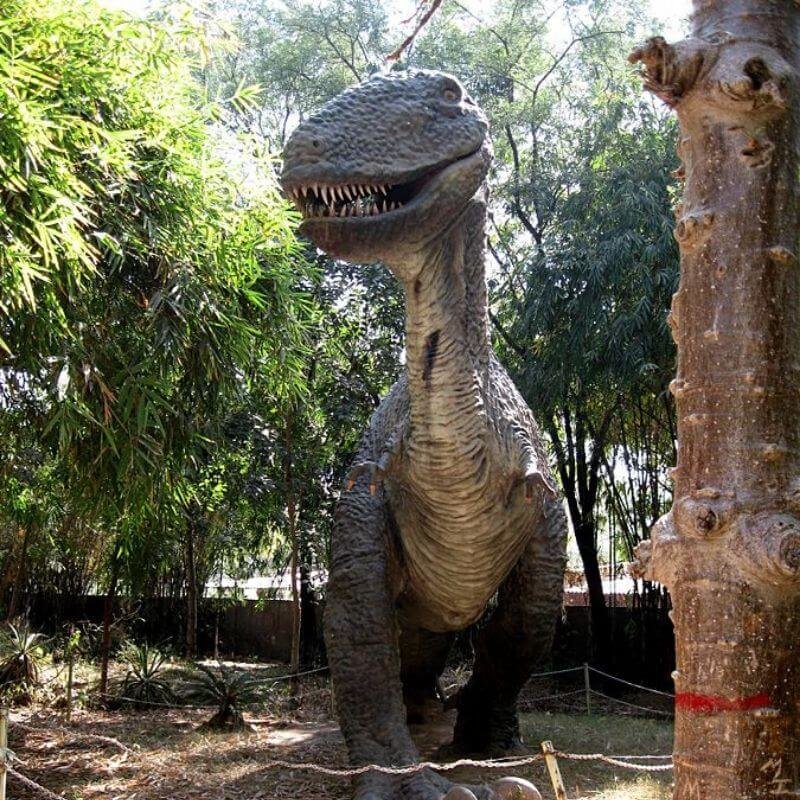
Dinosaur sounds  

  • You will need:
    • A plastic cup 
    • A piece of string 
    • Something to poke a hole in your cup (with grownup’s help) 
    • Water 
  • What to do: 
  • Poke a hole in the bottom of the cup right in the center using an embroidery needle or a thumbtack.  
  • Thread the string through the bottom of the cup and tie a knot on the end inside the cup.  
  • Pull the string taught.  
  • Wet your thumb and forefinger with some water.  
  • Run your thumb and forefinger along the string. You may need to do this a few times before you get a sound. 
science of sound activity dinosaur

What next? 

  • Mute your TV when next time you watch a movie – see if you can replicate any for your next science of sound activity! 
  • Try another special effect!
    What if we told you that you could freeze time with just a balloon, tape, and some water? Try demonstrating laminar flow at home!

OSC At Home Emails

Get a round up of our latest activities and ideas delivered straight to your inbox so you don't miss a thing!

Find out when we release new resources by following us on social media!


Follow us on social media for even more science fun including fun facts, games, behind-the-scenes photos, and more!


Facebook Logo Instagram Logo YouTube Logo Twitter Logo

Support OSC At Home

In these ever-changing times, it is our pleasure to adapt quality Orlando Science Center experiences to engage with everyone while they are safe at home. Please consider supporting our operating fund to ensure we can continue developing resources today and well into the future. Thank you for your generosity and support!

Articulated Cardboard Crafts: Create a Turtle-y Awesome Race

Don't be shell-fish! Give boxes a second life with these articulated cardboard crafts!

We all presumably have an empty box hanging around the house - why not use it for something fun before recycling the cardboard and make some cardboard racing turtles?

Online shopping and articulated cardboard crafts go hand in hand! While we definitely want you to dispose of them properly, we encourage you to hone your maker skills by repurposing this common packaging before you recycle them! If you look at it with the right eye, you might find a wealth of possibility in this humble packing material. 

Materials you will need:

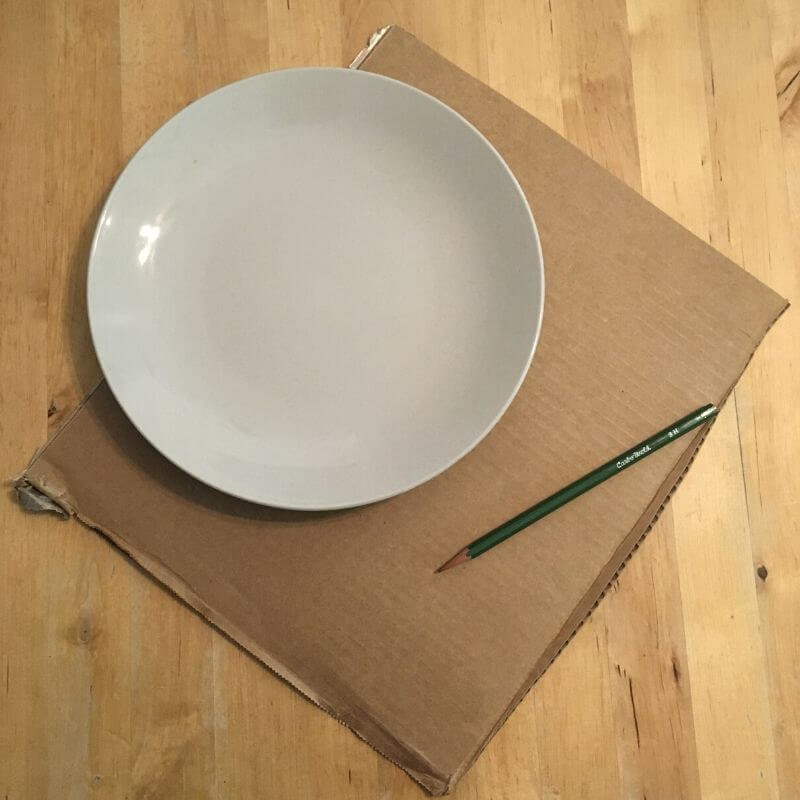
  • Cardboard
  • Pencil
  • Scissors  
  • Circular object such as a bowl
  • Optional: markers or paint to decorate your turtle
Materials for articulated cardboard crafts

Directions:

STEP 1: 

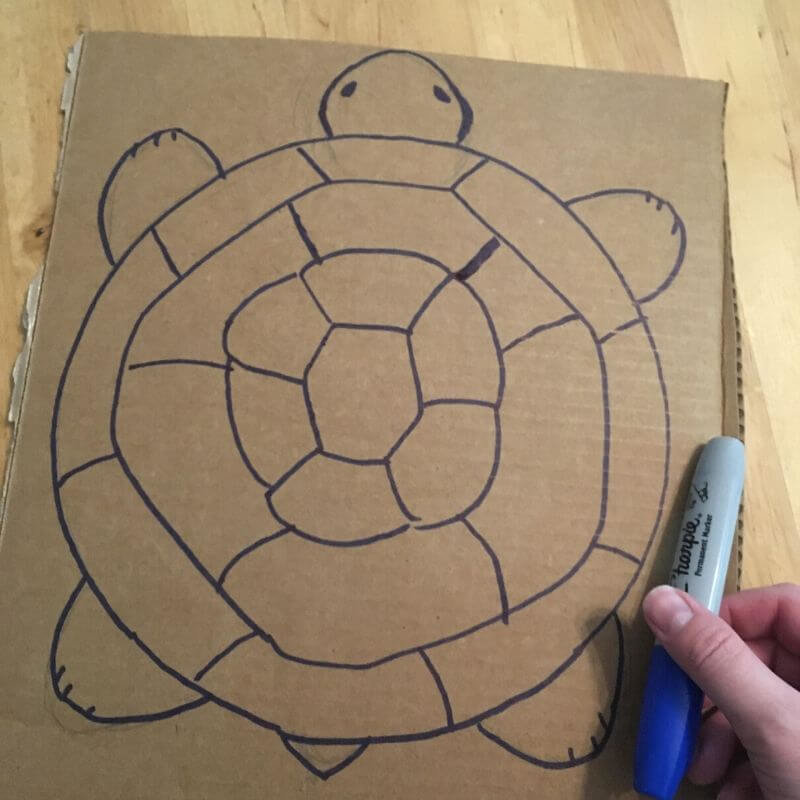
Trace a circle onto a piece of cardboard. Add a head, legs, and a tail, but make sure the left and right back feet are even so the turtle will balance - my turtle lost his tail because it wasn't balanced enough!

*Optional: Decorate your turtle!

Draw turtle for articulated cardboard crafts

STEP 2: 

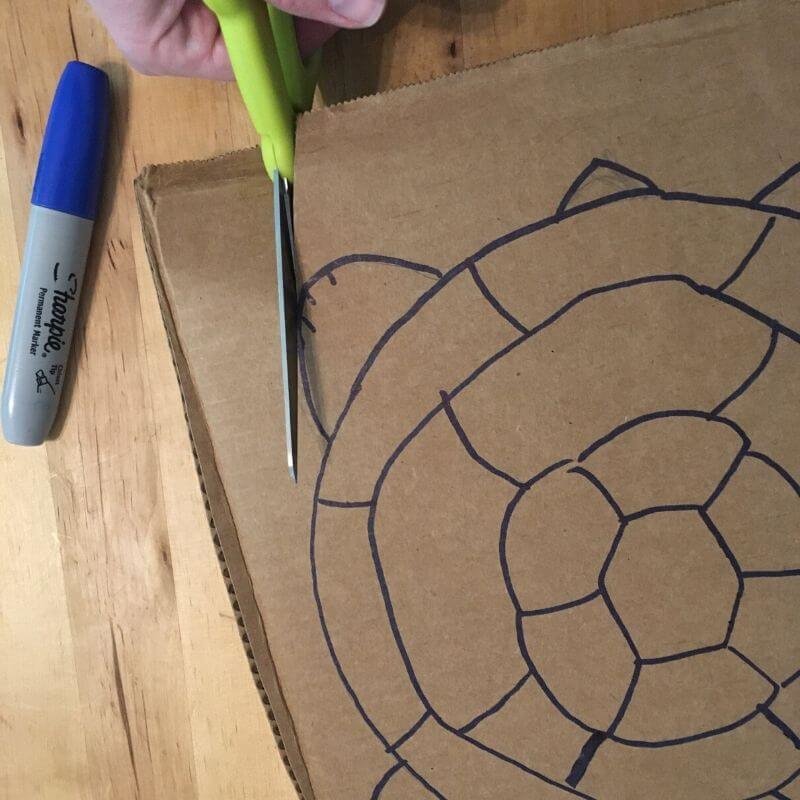
Cut out your cardboard turtle.

cut out Materials for articulated cardboard crafts

STEP 3: 

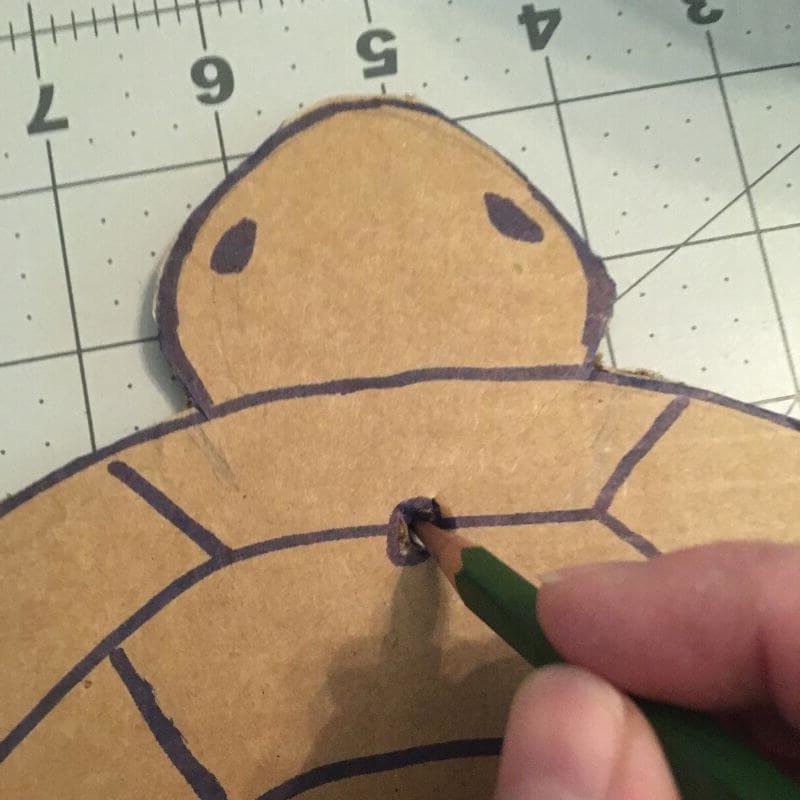
Poke a hole for your string in the middle of the turtle just below the head.

add string Materials for articulated cardboard crafts

STEP 4: 

Thread a six-foot length of yarn through the hole and tie one end to a table or chair leg about eight inches off the floor.

Pull the string taut so the turtle stands, and then release it so the turtle flops forward. Pull it taut again and the turtle will have moved forward! Keep going until your turtle reaches the table!

Now you can grab a friend, a few more, and have a race!

cut out Materials for articulated cardboard crafts

Expand on the activity!

  • Experiment with different types of thread, like yearn, string, fishing line, etc.. to see if it affects speed.
  • What happens if you put your thread through a different part of the turtle. Does this affect speed or balance?
  • Try another cardboard animal craft like this incredible cardboard pangolin!

OSC At Home Emails

Get a round up of our latest activities and ideas delivered straight to your inbox so you don't miss a thing!

Find out when we release new resources by following us on social media!


Follow us on social media for even more science fun including fun facts, games, behind-the-scenes photos, and more!


Facebook Logo Instagram Logo YouTube Logo Twitter Logo

Support OSC At Home

In these ever-changing times, it is our pleasure to adapt quality Orlando Science Center experiences to engage with everyone while they are safe at home. Please consider supporting our operating fund to ensure we can continue developing resources today and well into the future. Thank you for your generosity and support!